Previous Page Table of Contents Section Contents
Back
Index Next Page
LIFEPAK 20/20e Defibrillator/Monitor Replacement Procedures
Bottom Case (continued)
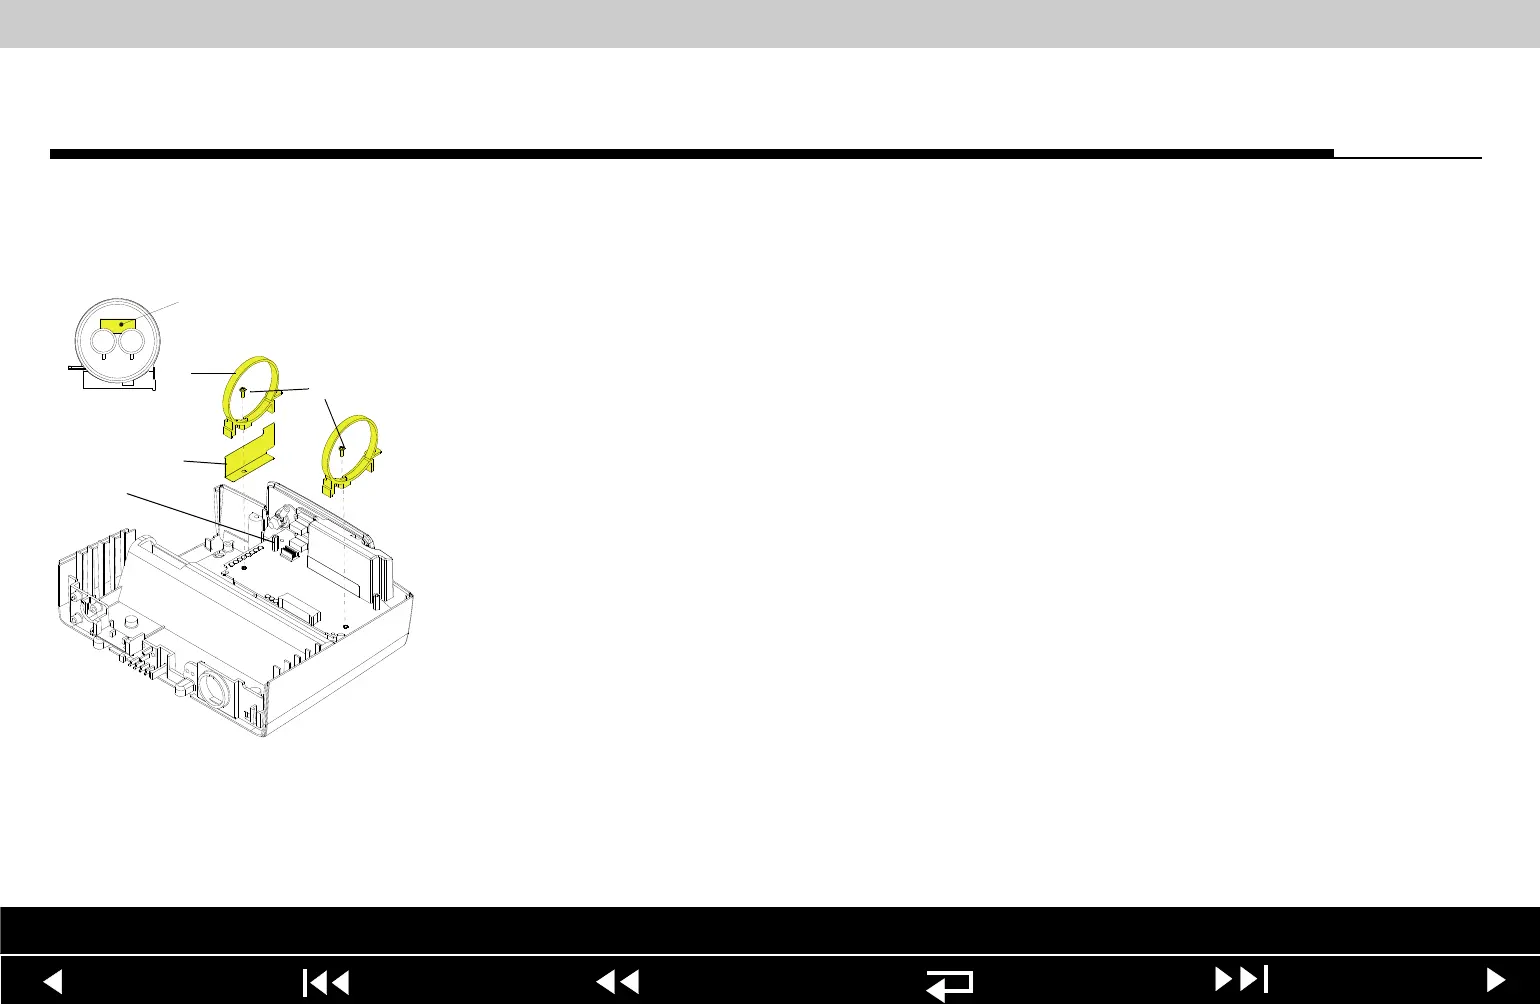
A13 Energy Capacitor
Installation
To install the A13 Energy Capacitor:
1. Ensure that two capacitor bracket standoffs (22) are on the power module.
2. Install the capacitor shield (238) and the two capacitor brackets (95) onto the
standoffs using two new 4-40 0.312 screws (173); torque to 6.8 in-lb (if the
brackets were removed).
3. Inspect the A13 Energy Capacitor ensuring that the plastic sleeve and poron
tape are positioned correctly and securely.
Note: The plastic sleeve must be wrapped tightly around the capacitor, with
the wrap joint at the top of the capacitor. Poron tape must secure the sleeve
at both ends of the capacitor.
4. Inspect the A13 Energy Capacitor to ensure that foam tape (240) is present
(optional on LIFEPAK 20 device).
5. Install the capacitor into the capacitor brackets (95) with the capacitor cable
end toward the printer shroud and the warning label visible at the top of the
capacitor.
6. Install two new 4-40 0.312 screws (173) into the capacitor brackets; torque
to 6.8 in-lb.
238
95
173
22
240 Center
Between Terminals
Parts List Interconnect Diagram Module View Connectors View Main Assemblies
9-124