MFP EXPANSION
SM 1-37 B121 Series/B259 Series
Installation
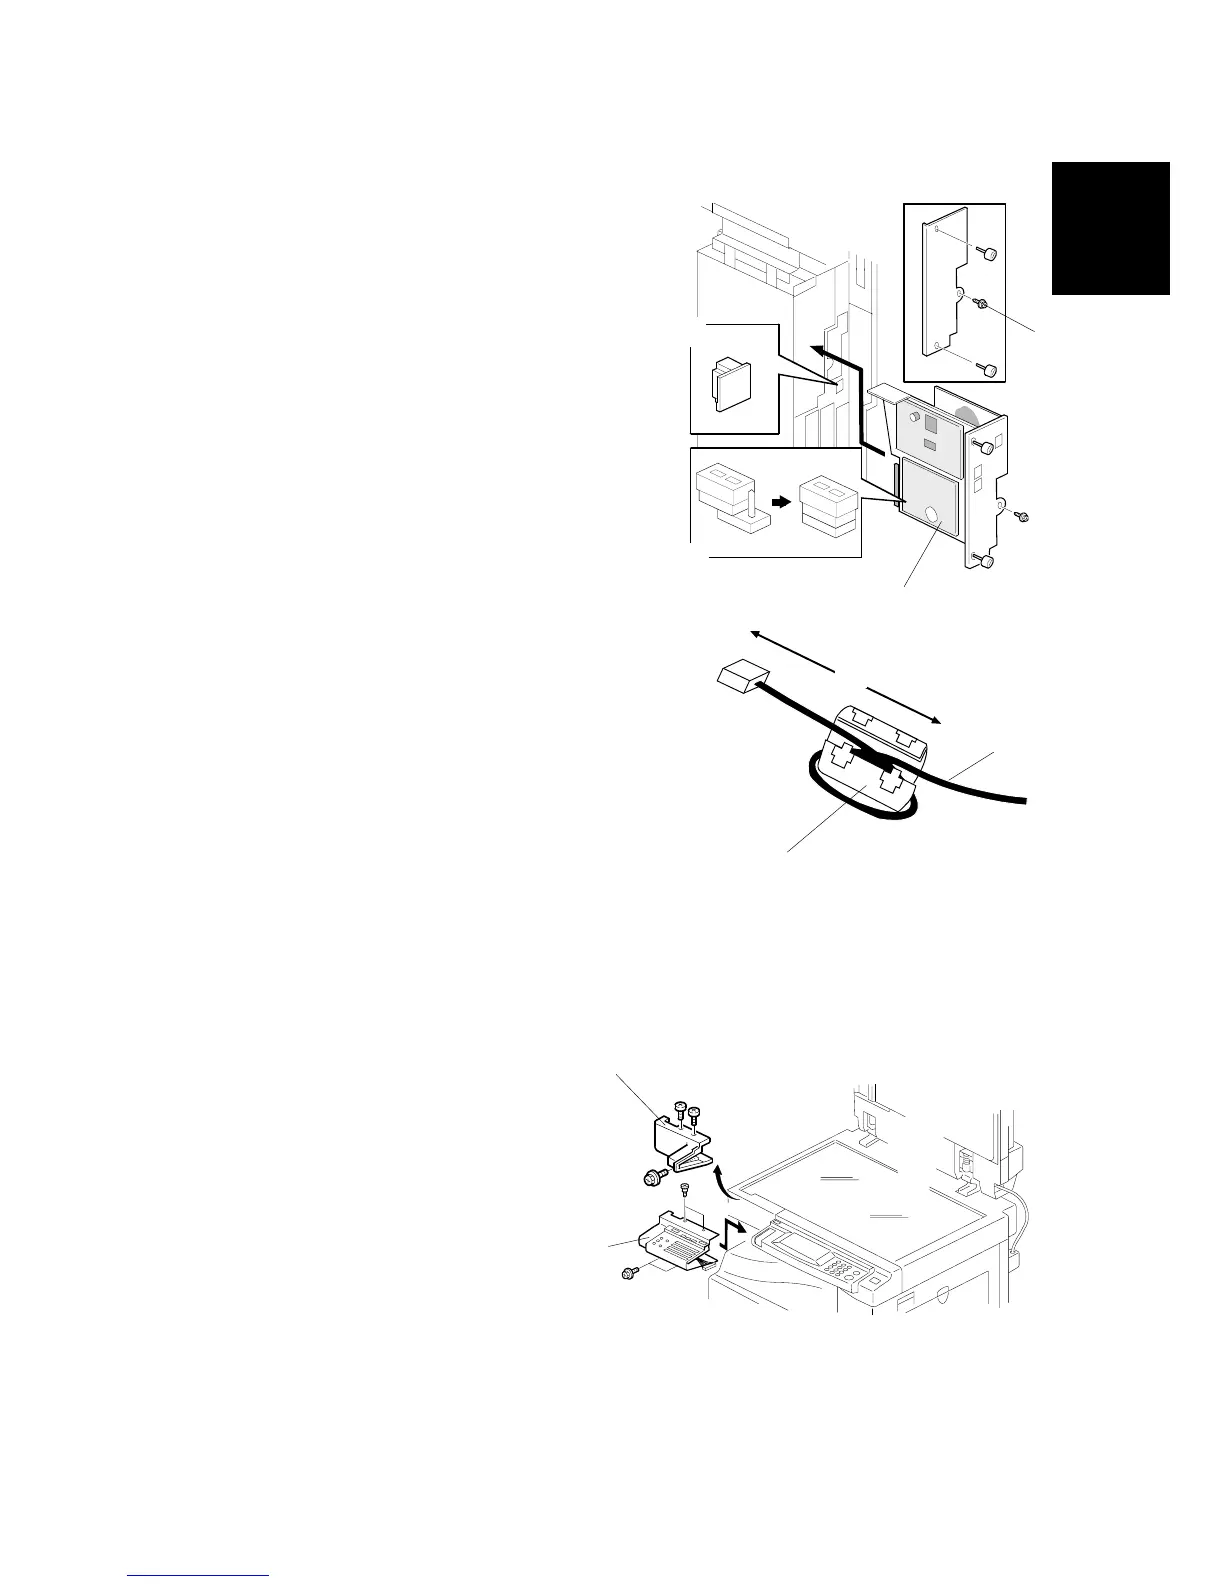
Step 4–Fax
1. Install the FCU [A] into the slot ( x 3
[including the screw [B] removed in Step 1]).
2. Short the jumper [C].
NOTE: This jumper is the battery switch.
3. Attach the connector cover [D] if you do not
connect a LAN able.
4. Attach the ferrite core [E] to the telephone
cable [F]. The end of the ferrite core must
be about 5 cm (2") from the end of the
cable [G].
Initializing the Fax Unit
When you press the Fax key for the first time after installation, an error occurs. This
is not a functional problem. Press OK. The fax
starts its initialization program.
NOTE: If another error occurs after initialization,
this can be a functional problem.
Step 5–Reassembling
1. Reassemble the controller box.
2. Install the rear cover.
1.12.3 INSTALLING PANELS AND KEYS
Step 6–Panel
1. Remove the front upper left cover
[A] ( x 3).
2. Install the optional operational
panel [B] ( x 1, x 4 [including
three screws removed in step 1]).
If installing the printer/scanner only, do
step 7.
If installing the fax only, do step 8.
If installing both the printer/scanner and the fax, do step 9.
B658I906.WMF
B658I907.WMF
B658I908.WMF
[B]
[A]
[B]
[A]
[C]
[E]
[F]
[G]
[D]