MFP EXPANSION
B121 Series/B259 Series 1-38 SM
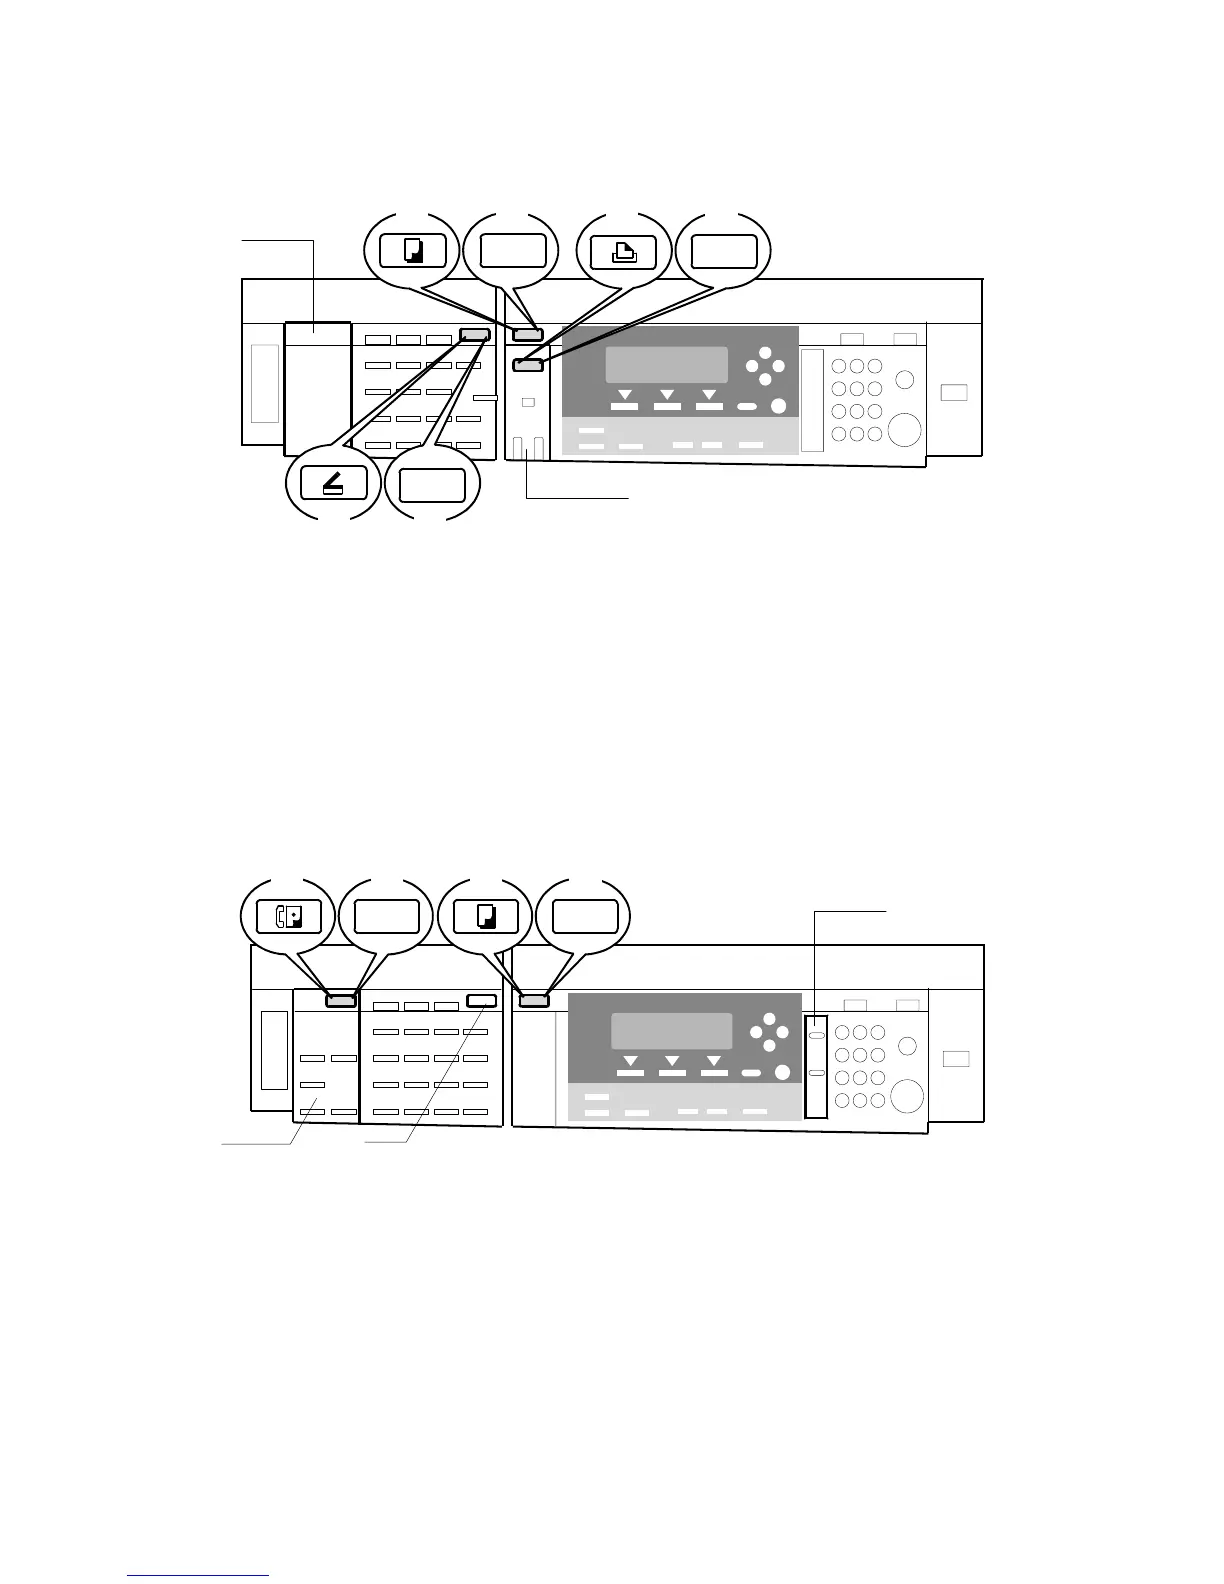
Step 7–Printer/Scanner Keys
1. Remove the dummy cover (from the basic operation panel) and install the copy
key [A] or [a].
2. Remove the dummy panel (from the basic operation panel) and install the
printer panel [B].
3. Install the scanner key [C] or [c] on the optional operation panel.
4. Install the dummy panel [D] on the optional operation panel.
5. Install the printer key [E] or [e] on the basic operation panel.
Step 8–Fax Keys
1. Remove the dummy cover (from the basic operation panel) and install the copy
key [A] or [a].
2. Remove the dummy panel (from the basic operation panel) and install the fax
panel [B].
3. Install the dummy cover [C] on the optional operation panel.
4. Install the fax panel [D] on the optional operation panel.
5. Install the fax key [E] or [e] on the optional operation panel.
Copy
Scanner
Printer
B658I909.WMF
Copy
Facsimile
B658I910.WMF
[B]
[B]
[A]
[a]
[C]
[c]
[D]
[E]
[e]
[A]
[a]
[C]
[D]
[E]
[e]