U.4.29
Date Code 20090715 User’s Guide SEL-421 Relay
Basic Relay Operations
Making Simple Settings Changes
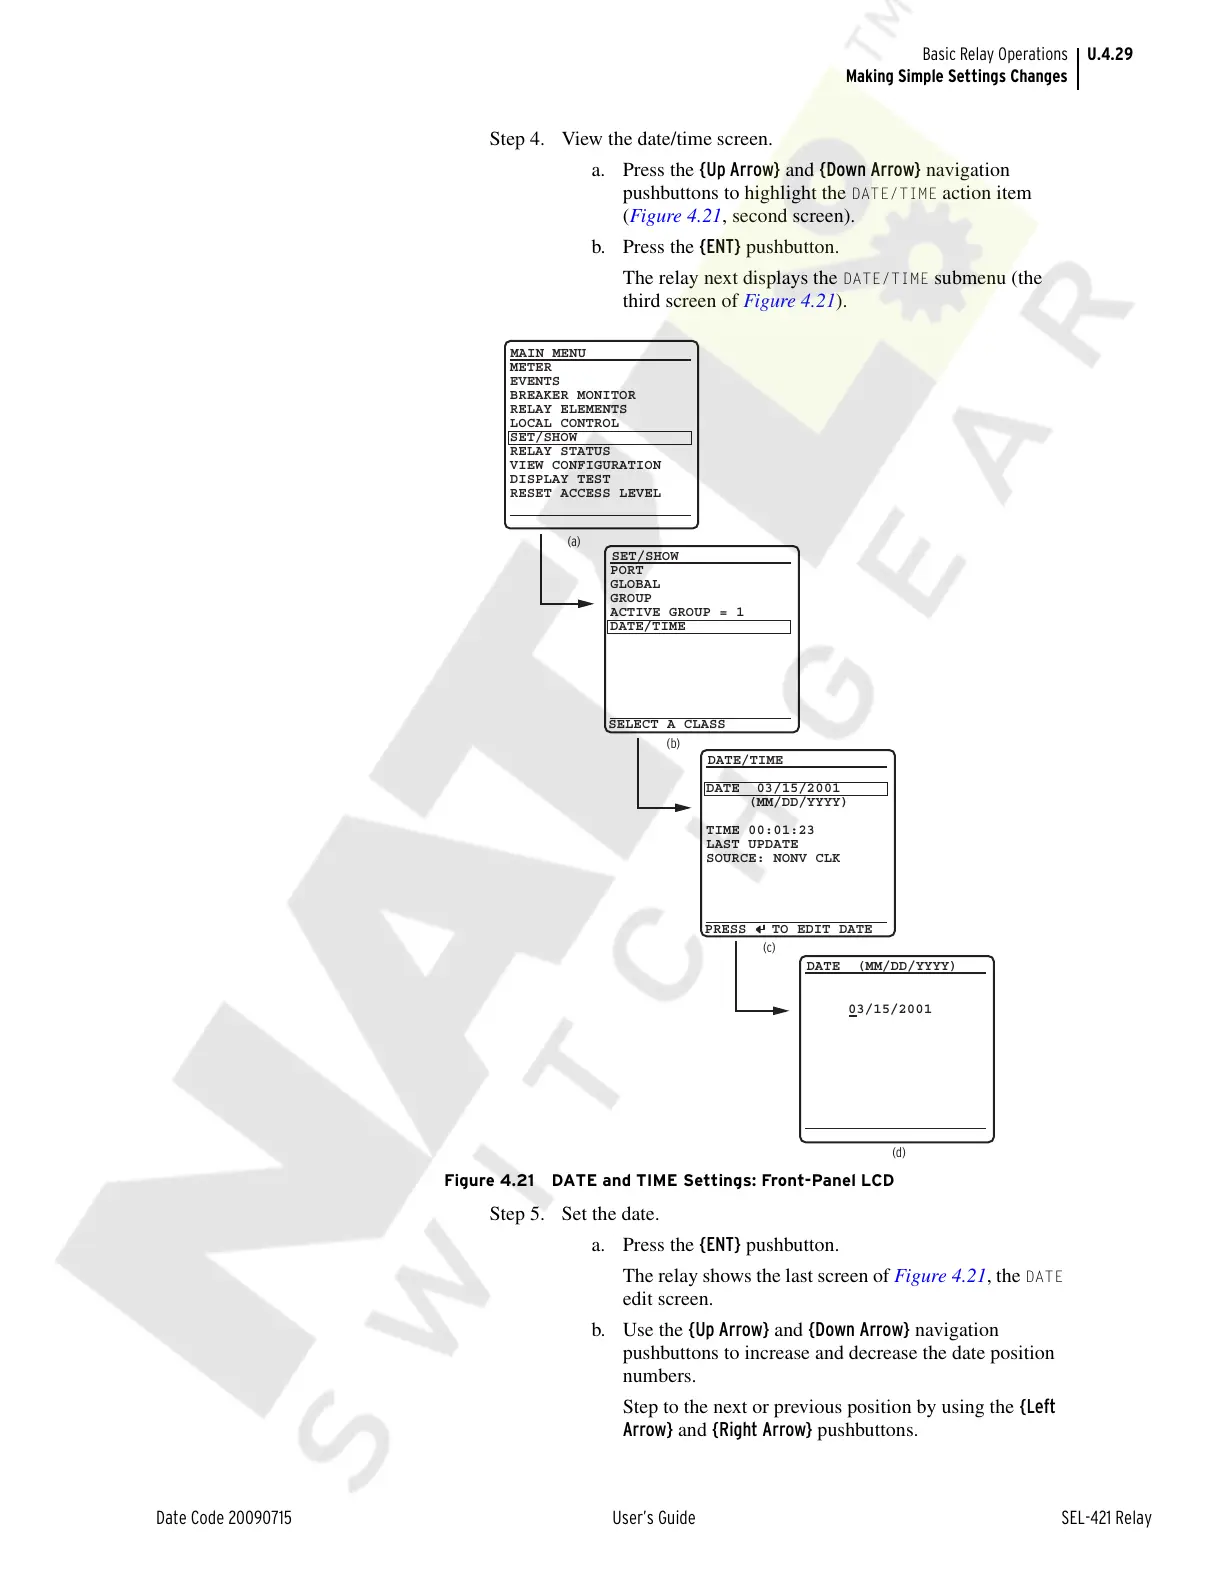
Step 4. View the date/time screen.
a. Press the {Up Arrow} and {Down Arrow} navigation
pushbuttons to highlight the
DATE/TIME action item
(Figure 4.21, second screen).
b. Press the {ENT} pushbutton.
The relay next displays the
DATE/TIME submenu (the
third screen of Figure 4.21).
Figure 4.21 DATE and TIME Settings: Front-Panel LCD
Step 5. Set the date.
a. Press the {ENT} pushbutton.
The relay shows the last screen of Figure 4.21, the
DATE
edit screen.
b. Use the {Up Arrow} and {Down Arrow} navigation
pushbuttons to increase and decrease the date position
numbers.
Step to the next or previous position by using the {Left
Arrow} and {Right Arrow} pushbuttons.
(a)
(b)
METER
EVENTS
BREAKER MONITOR
RELAY ELEMENTS
LOCAL CONTROL
SET/SHOW
RELAY STATUS
VIEW CONFIGURATION
DISPLAY TEST
RESET ACCESS LEVEL
MAIN MENU
SET/SHOW
PORT
GLOBAL
GROUP
ACTIVE GROUP = 1
DATE/TIME
(c)
DATE/TIME
DATE 03/15/2001
(MM/DD/YYYY)
TIME 00:01:23
LAST UPDATE
SOURCE: NONV CLK
03/15/2001
(d)
DATE (MM/DD/YYYY)
PRESS TO EDIT DATE
SELECT A CLASS
Courtesy of NationalSwitchgear.com