U.6.42
SEL-421 Relay User’s Guide Date Code 20090715
Testing and Troubleshooting
Relay Troubleshooting
Relay Troubleshooting
Inspection Procedure
Complete the following inspection procedure before disturbing the system.
After you finish the inspection, proceed to Troubleshooting Procedures.
Step 1. Confirm that the power is on. Do not turn the relay off.
Step 2. Measure and record the control power voltage at the relay
POWER terminals marked + and – on the rear-panel terminal
strip.
Step 3. Measure and record the voltages at all control inputs.
Step 4. Measure and record the state of all control outputs.
Step 5. Inspect the serial communications ports cabling to be sure that
a communications device is connected to at least one
communications port.
Troubleshooting
Procedures
Troubleshooting procedures for common problems are listed in Table 6.9. The
table lists each symptom, possible causes, and corresponding diagnoses/
solutions. Related SEL-421 commands are listed in bold capitals. See
Section 9: ASCII Command Reference in the Reference Manual for details on
SEL-421 commands and Section 10: Settings in the Reference Manual for
details on relay settings.
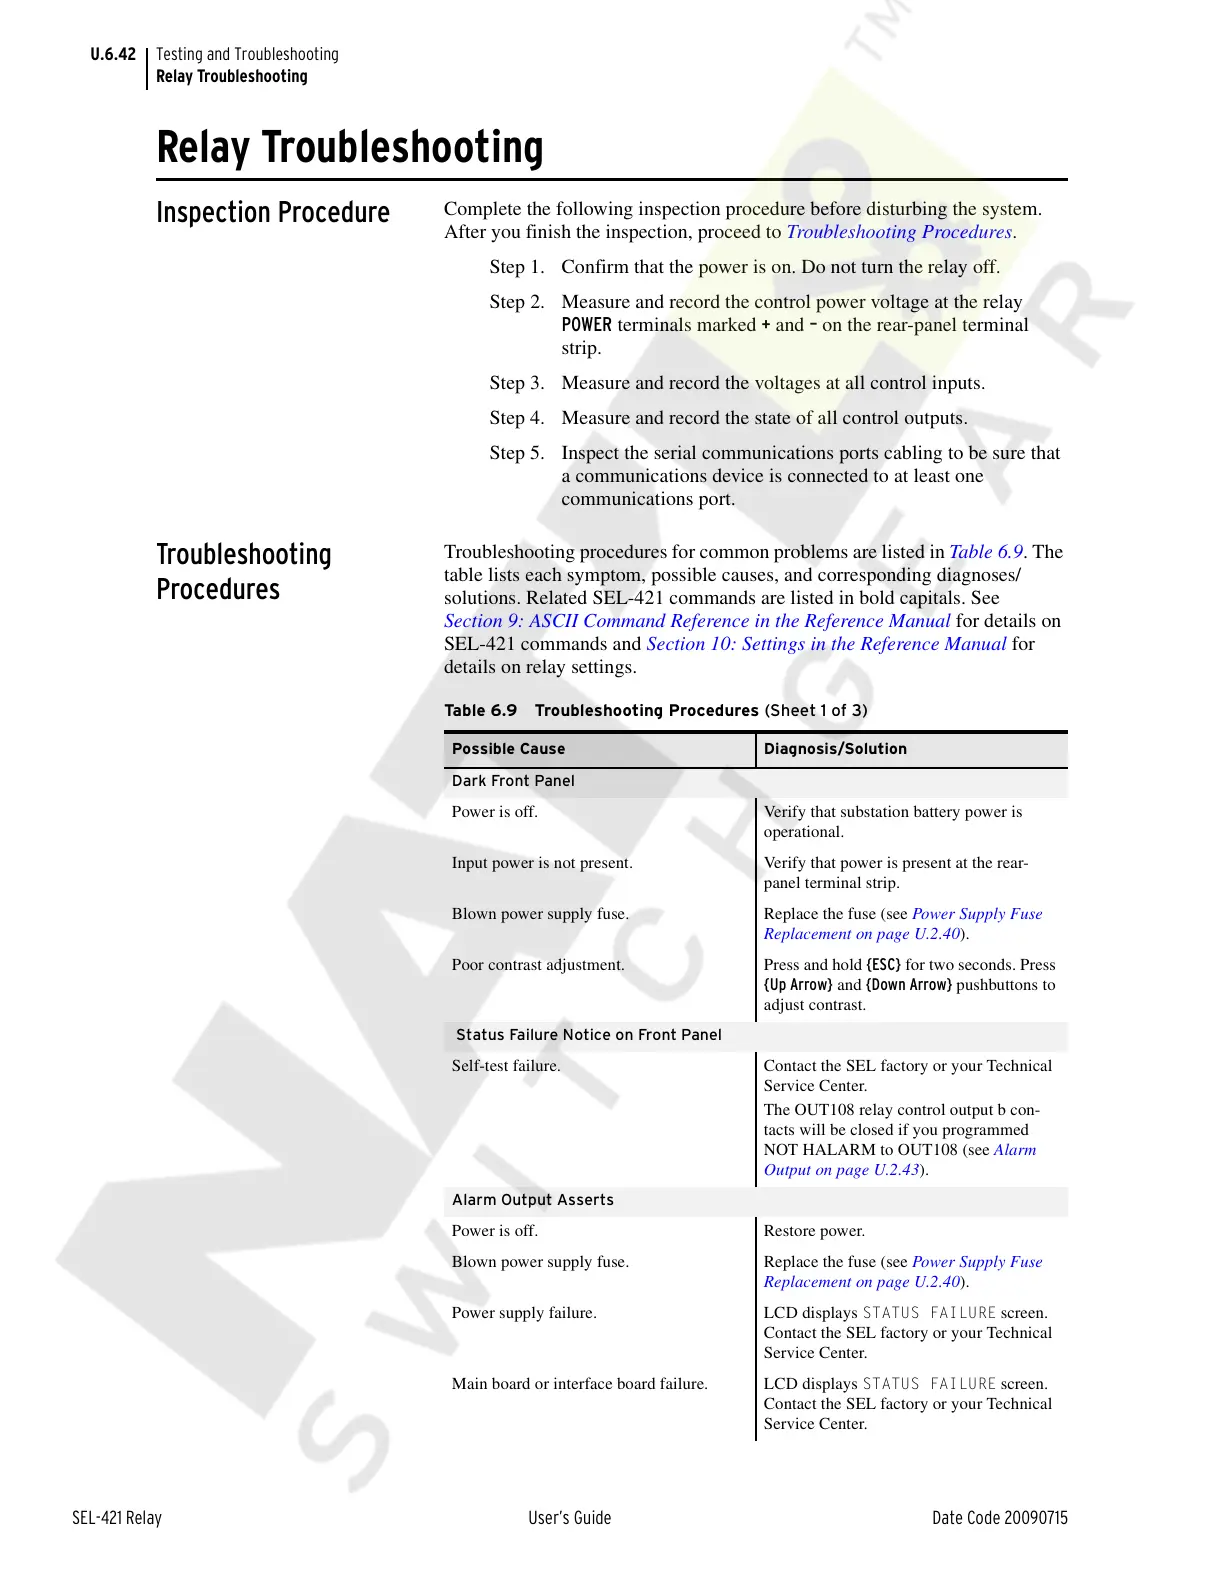
Table 6.9 Troubleshooting Procedures (Sheet 1 of 3)
Possible Cause Diagnosis/Solution
Dark Front Panel
Power is off. Verify that substation battery power is
operational.
Input power is not present. Verify that power is present at the rear-
panel terminal strip.
Blown power supply fuse. Replace the fuse (see Power Supply Fuse
Replacement on page U.2.40).
Poor contrast adjustment. Press and hold {ESC} for two seconds. Press
{Up Arrow} and {Down Arrow} pushbuttons to
adjust contrast.
Status Failure Notice on Front Panel
Self-test failure. Contact the SEL factory or your Technical
Service Center.
The OUT108 relay control output b con-
tacts will be closed if you programmed
NOT HALARM to OUT108 (see Alarm
Output on page U.2.43).
Alarm Output Asserts
Power is off. Restore power.
Blown power supply fuse. Replace the fuse (see Power Supply Fuse
Replacement on page U.2.40).
Power supply failure. LCD displays
STATUS FAILURE screen.
Contact the SEL factory or your Technical
Service Center.
Main board or interface board failure. LCD displays
STATUS FAILURE screen.
Contact the SEL factory or your Technical
Service Center.
Courtesy of NationalSwitchgear.com