U.4.61
Date Code 20090715 User’s Guide SEL-421 Relay
Basic Relay Operations
Operating the Relay Inputs and Outputs
Step 3. Type LIST <Enter> at the Local Control and Aliases prompt
to list the active control points.
This example assumes that you are using no local bits, so the
relay returns you to line
1: followed by the settings ? prompt.
Step 4. Type LB03,“5 MVA XFMR Fans”,ON,OFF,N <Enter> at the
line 1 prompt:
1: LB03,“5 MVA XFMR Fans”,ON,OFF,N <Enter>
The relay checks that this is a valid entry and responds with the
next line prompt
2: followed by the settings ? prompt.
Step 5. End the settings session.
a. Type END <Enter>.
The relay scrolls a readback of all the front-panel
settings, eventually displaying the
Save settings
(Y,N) ?
prompt. (In Figure 4.52 a vertical ellipsis
represents the readback.)
At the end of the readback information, just before the
Save settings (Y,N) ? prompt, you can see the new
local bit information.
b. Answer Y <Enter> to save your new settings.
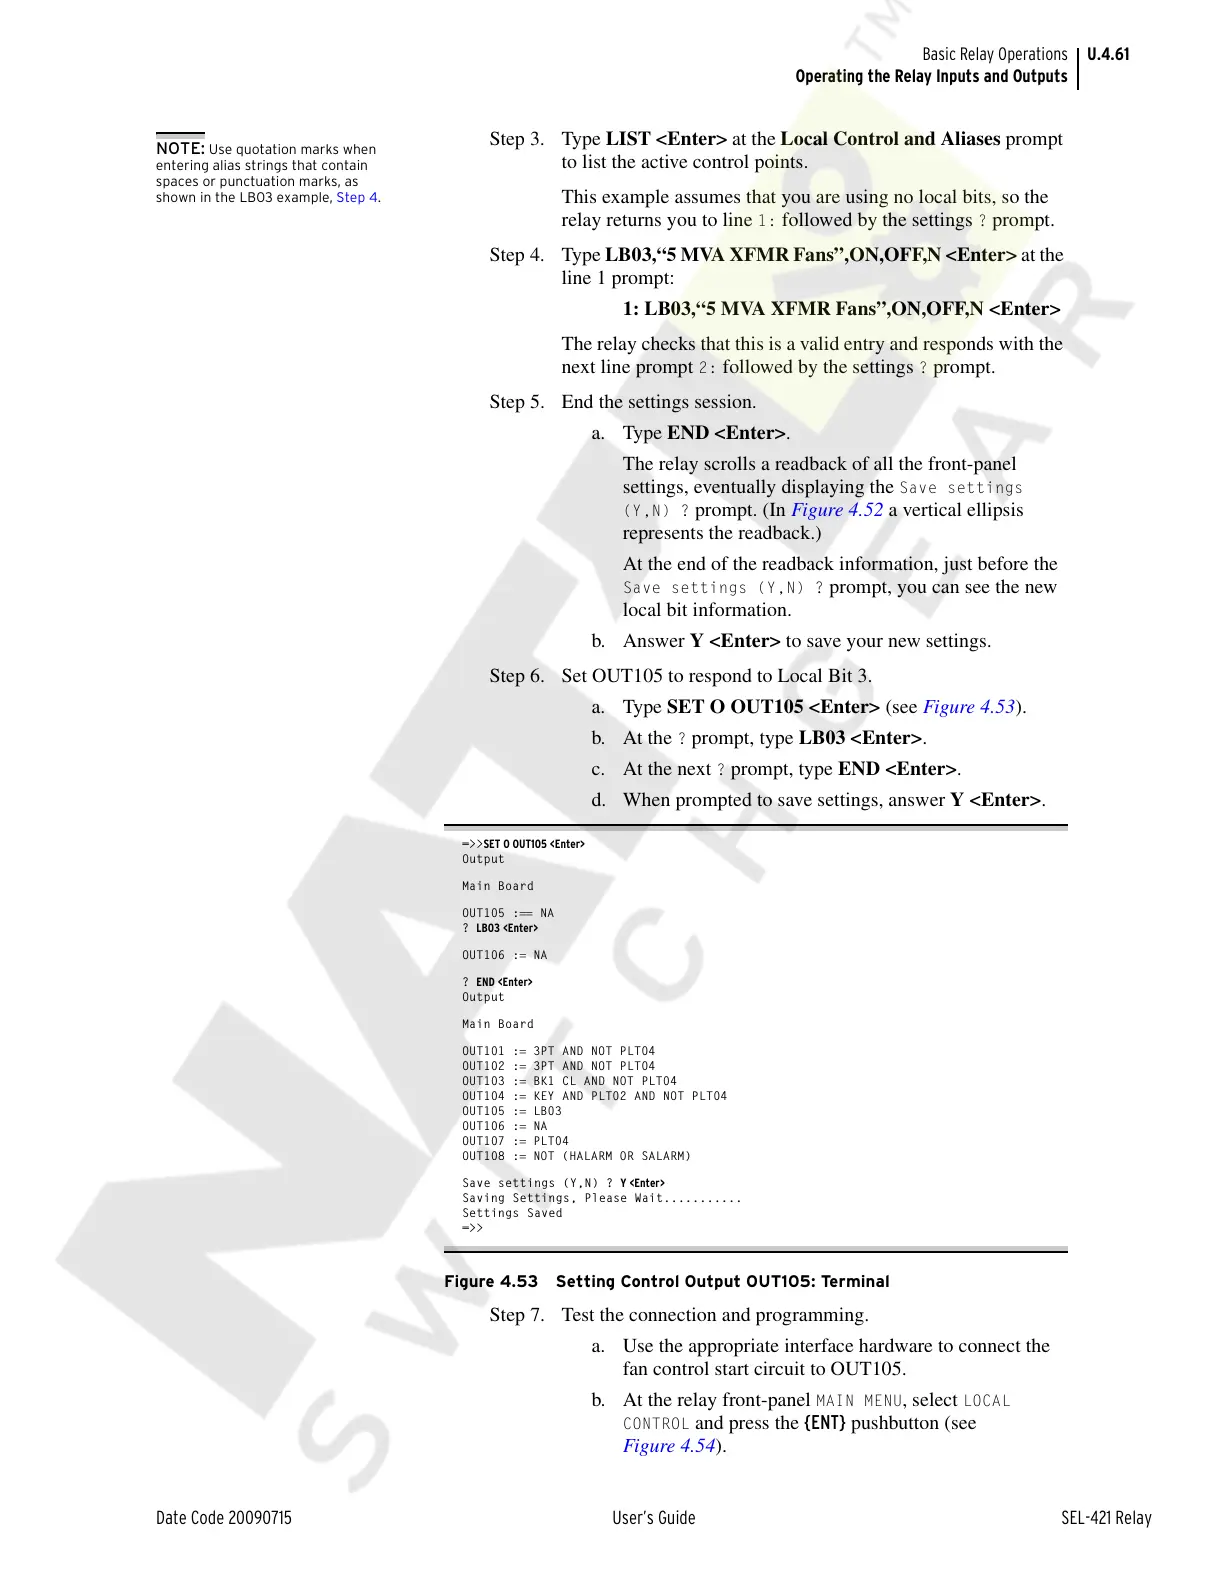
Step 6. Set OUT105 to respond to Local Bit 3.
a. Type SET O OUT105 <Enter> (see Figure 4.53).
b. At the
? prompt, type LB03 <Enter>.
c. At the next
? prompt, type END <Enter>.
d. When prompted to save settings, answer Y <Enter>.
=>>SET O OUT105 <Enter>
Output
Main Board
OUT105 :== NA
? LB03 <Enter>
OUT106 := NA
? END <Enter>
Output
Main Board
OUT101 := 3PT AND NOT PLT04
OUT102 := 3PT AND NOT PLT04
OUT103 := BK1 CL AND NOT PLT04
OUT104 := KEY AND PLT02 AND NOT PLT04
OUT105 := LB03
OUT106 := NA
OUT107 := PLT04
OUT108 := NOT (HALARM OR SALARM)
Save settings (Y,N) ? Y <Enter>
Saving Settings, Please Wait...........
Settings Saved
=>>
Figure 4.53 Setting Control Output OUT105: Terminal
Step 7. Test the connection and programming.
a. Use the appropriate interface hardware to connect the
fan control start circuit to OUT105.
b. At the relay front-panel
MAIN MENU, select LOCAL
CONTROL
and press the {ENT} pushbutton (see
Figure 4.54).
NOTE: Use quotation marks when
entering alias strings that contain
spaces or punctuation marks, as
shown in the LB03 example, Step 4.
Courtesy of NationalSwitchgear.com