Customer Replaceable Units X Encoder Strip
Page 195
© Copyright 2021 Stratasys. All rights reserved.
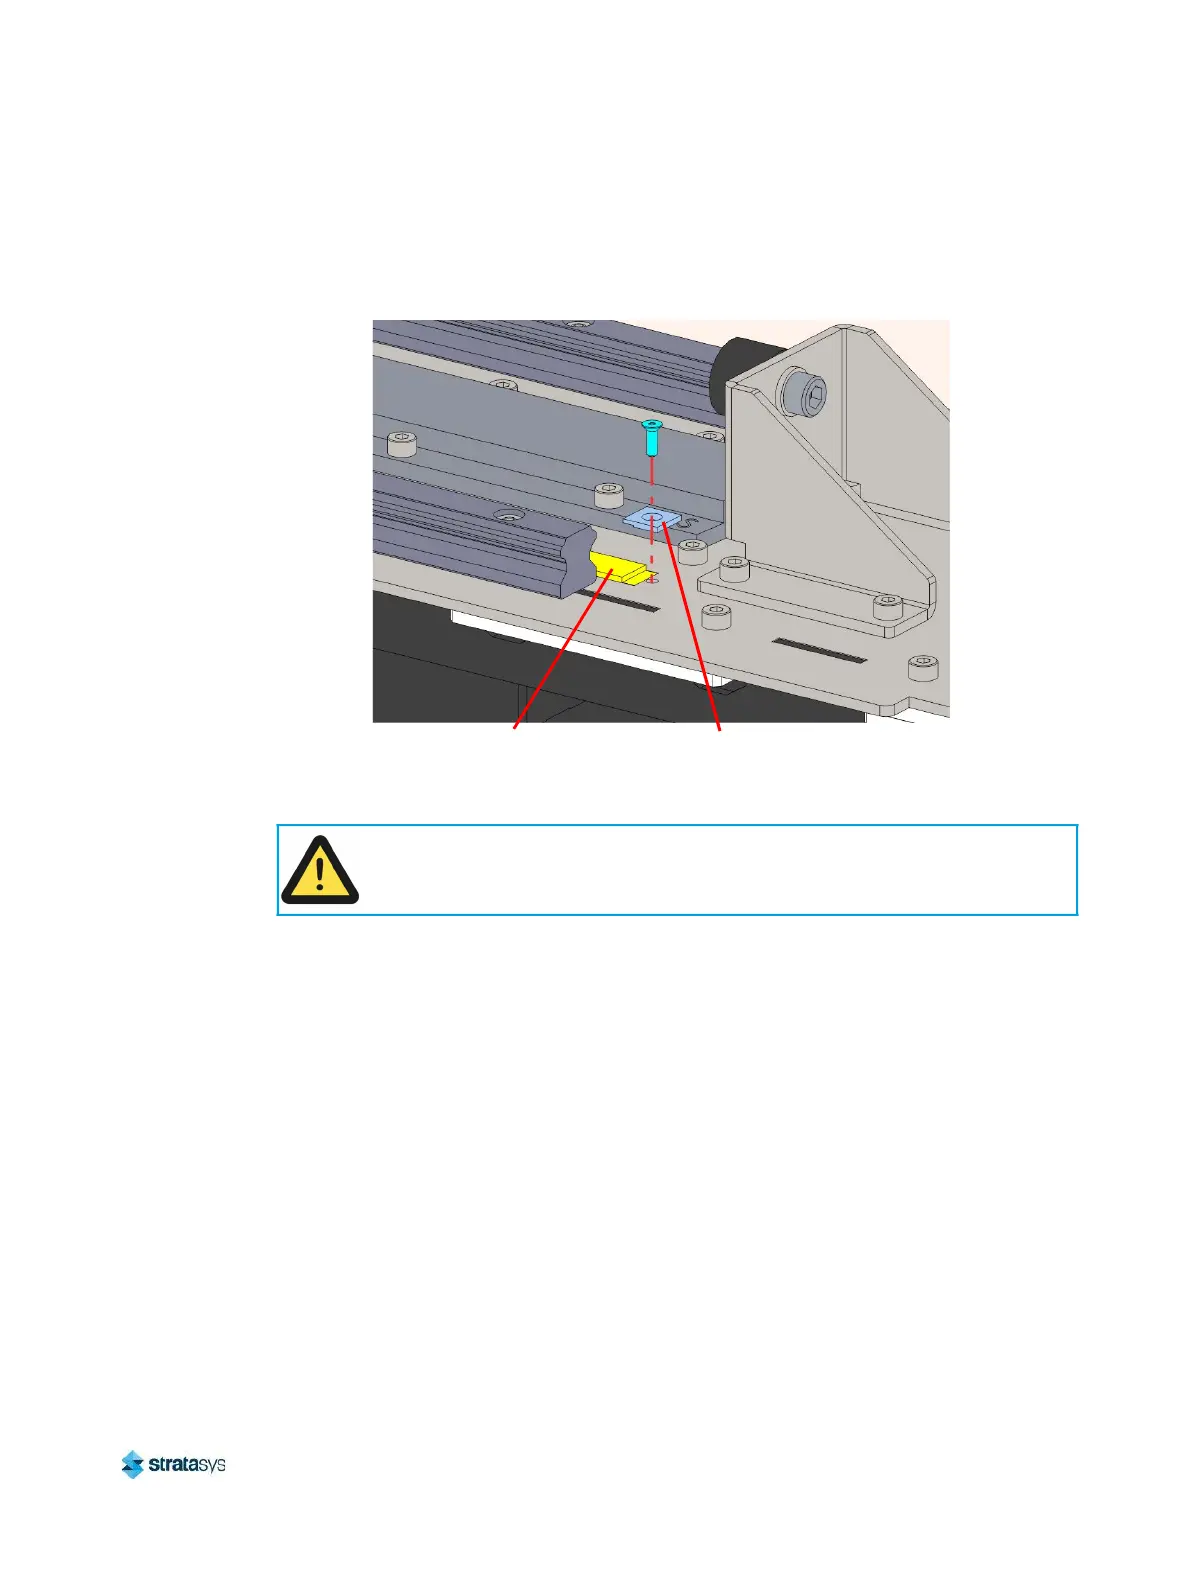
5. Using a small Phillips head screwdriver, remove the screws (2) which secure both ends of
the encoder strip to the frame. Remove the encoder strip from the printer. Keep the
retaining clips for re-installation.
Figure 32: Encoder strip mounting detail
6. Use a razor blade to remove any remaining adhesive residue on top of the printer frame.
Installing the X Encoder Strip
1. Move the Y bridge to either end of the gantry.
2. Using a small Phillips head screwdriver, install a screw to loosely secure one end of the
encoder strip (with a single retaining clip) to the frame. See Figure 32.
3. Starting at the secured end of the encoder strip, remove a small amount of the adhesive
backing at a time as you apply the encoder strip to the top of the printer frame. Align the
strip with the existing marker line until you reach the opposite end of the gantry. Move the Y
bridge as necessary to access the encoder strip.
4. Using a small Phillips head screwdriver, install a screw to secure the loose end of the
encoder strip (with a single retaining clip) to the frame. See Figure 32.
5. Tighten the screws at both ends of the encoder strip.
6. Close the top access doors.
7. Power ON the printer.
8. Verify that auto-home is successful.
Caution:
Do not allow the encoder strip to contact the magnetic plates in the gantry, or any
other magnetic components.
Encoder Strip
Retaining Clip
 Loading...


