Customer Replaceable Units Filament Ports Assembly
Page 232
© Copyright 2021 Stratasys. All rights reserved.
Installing the Filament Ports Assembly
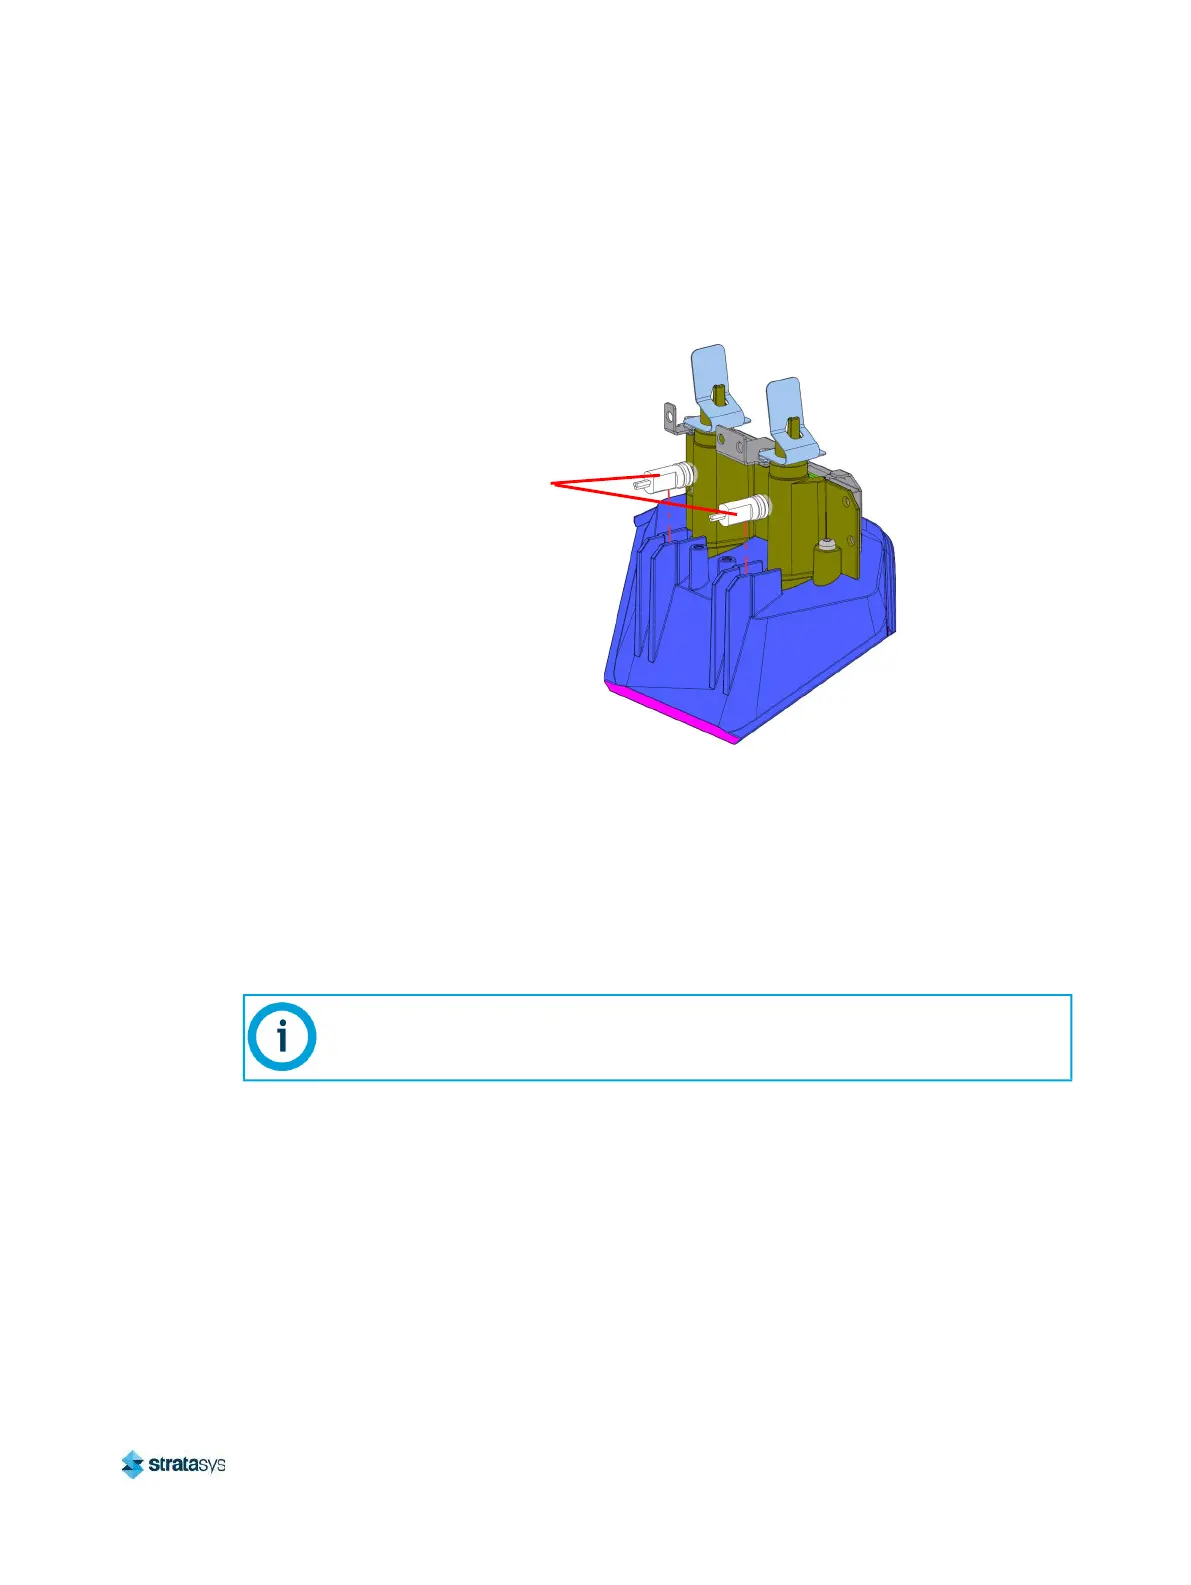
1. Insert the LED assemblies into the appropriate (model or support) recessed feature of the
filament ports assembly housing.
Figure 65: Filament Port Housing LED Locations
2. Connect the cables to the appropriate (model or support) filament key reader boards.
3. Using a T20 Torx wrench, install the screws (2) securing the cover bracket to the filament
ports assembly. See Figure 64.
4. Use a 3mm hex wrench to install the mounting screws (2) that secure the filament ports
assembly to the filament support bracket. See Figure 63.
5. Press and hold the locking tabs on the filament ports housing.
6. Reconnect the material tubes to the filament ports. Push the tubes as far as possible
(0.6 inch/16 mm) into the holes inside the locking tabs. See Figure 62.
7. Release the locking tabs to secure the material tubes.
8. Close the top rear access door.
9. Power ON the printer.
10. Verify proper operation by loading material to the head.
Verify that tubes are going to the correct model and support connections.
LED
Assemblies (2)