2. Mount the the instrument’s accelerometer to vibration calibrator or attach
the acoustic calibrator SV 36 (or equivalent 114 dB @ 1000 Hz) to the
instrument’s microphone.
3. Switch on the calibrator and wait approximately 30 seconds before starting
the calibration measurement.
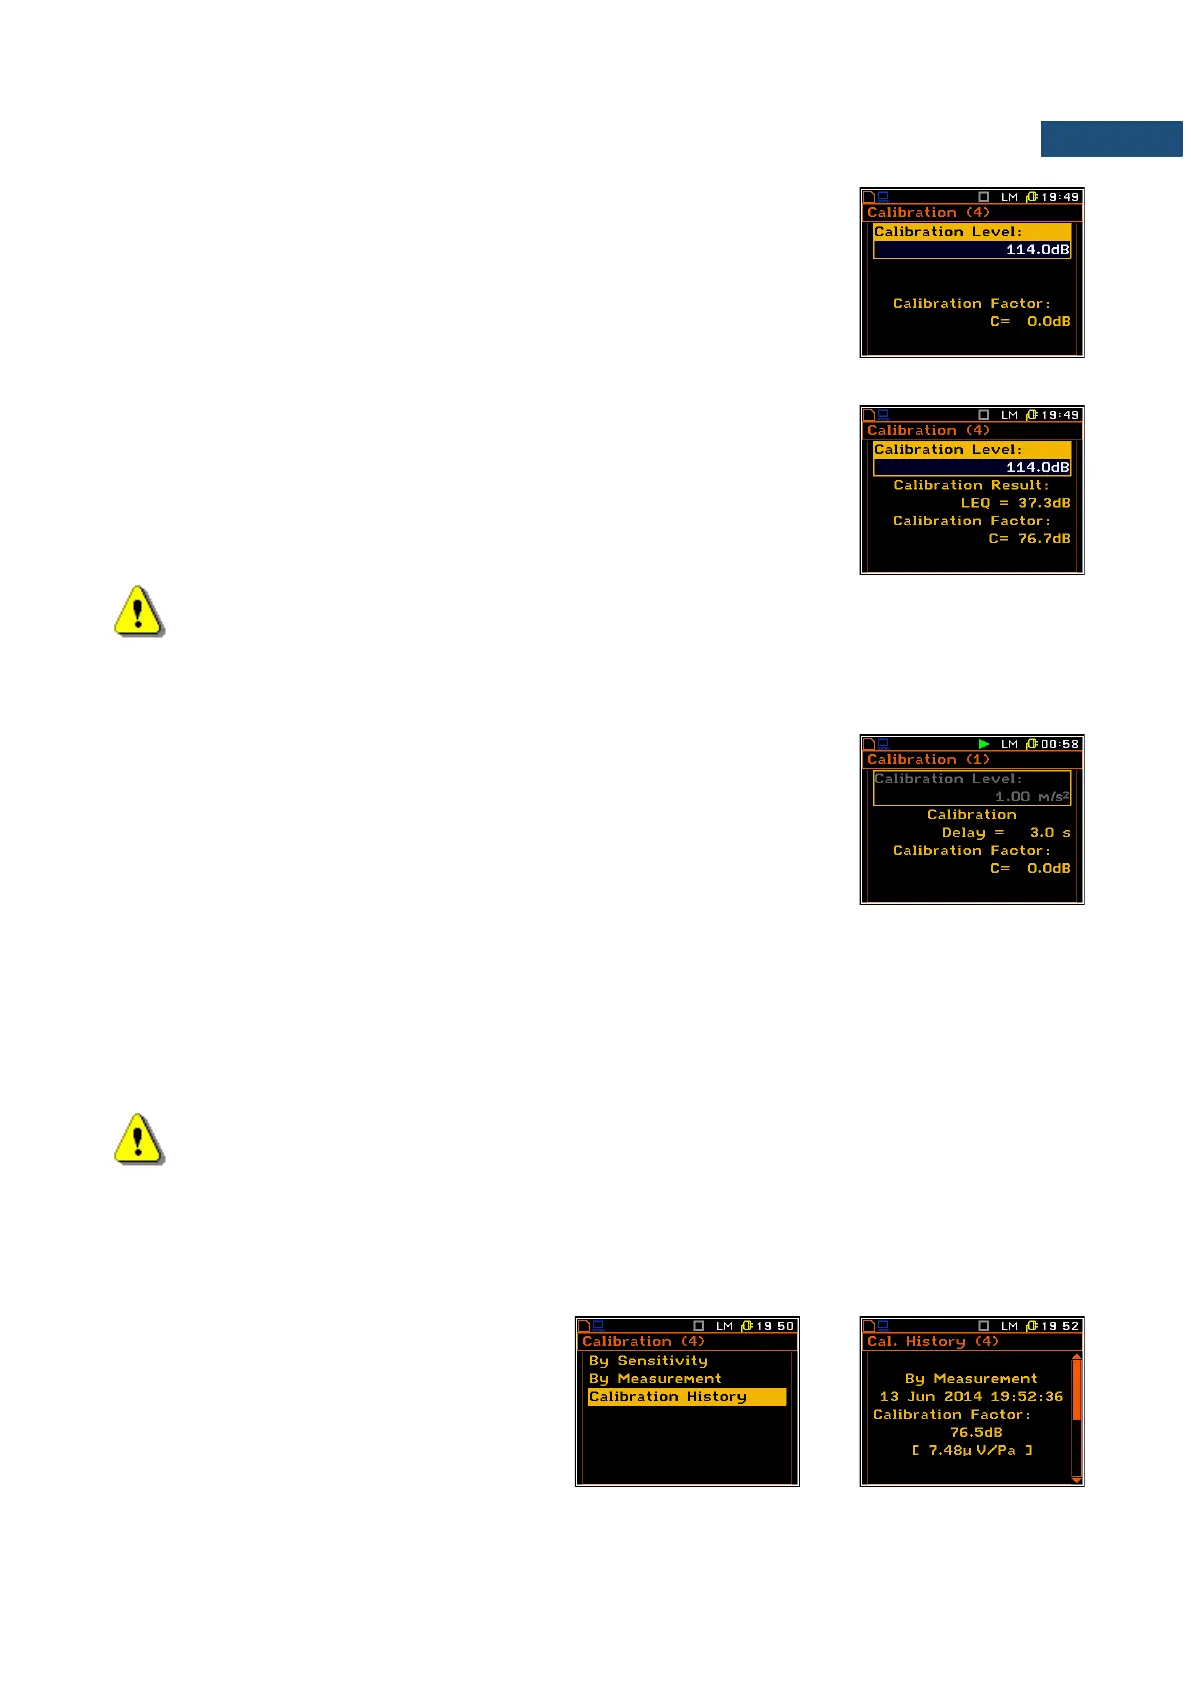
4. Start the calibration measurement by pressing the <Start/Stop> key.
Note: It is also possible to use the pistonphone, which generates the signal ca 124 dB
or different type of acoustic calibrator dedicated for ½” microphones. In any case, before starting
the calibration measurement, the user has to set (by means of the ◄ / ► key) the level of the signal
generated by the given calibrator (Calibration Level position in the By Measurement list), which is
usually stated in the calibration certificate of the unit (the value of the Calibration Level set by the
producer of SVAN 958A for sound is equal to 114 dB, and for vibration – to 1.00 m/s
2
).
The measurement starts after 5 seconds delay. The calibration measurement
time is also predefined to 5 seconds. During the calibration period the <ESC>
and <Pause> keys do not operate but it is possible to stop the measurement
using the <Start/Stop> key. Waiting for the calibration measurement to begin,
a Delay is counted down. At the end of the measurement, its result is displayed
on the display in the bottom line.
It is recommended to repeat the calibration measurement a few times to ensure the integrity of the calibration.
The obtained results should be almost identical (with 0.1 dB difference). Some possible reasons for unstable
results are as follows:
• the calibrator is not properly attached to the transducer,
• there are external disturbances,
• the calibrator or the measurement channel (accelerometer, microphone or the instrument itself) are
damaged.
Note: During the calibration measurement, the external disturbances (vibrations or acoustic noise)
should not exceed a value of 100 dB.
5. Press <ENTER> in order to accept the calibration measurement result.
The calibration factor is calculated, stored and displayed after pressing the <ENTER> key.
3.3.4 History of the calibrations – Calibration History
The Calibration History position opens the
Cal. History list, which displays up to ten last
calibration records for the selected channel.