
J
juliesmithAug 29, 2025
What to do if Waters 717plus Laboratory Equipment CAR cannot run with door open?
- CCatherine CombsAug 29, 2025
If the CAR cannot run with the door open, close the door.
What to do if Waters 717plus Laboratory Equipment CAR cannot run with door open?
If the CAR cannot run with the door open, close the door.
What to do if transducer pressure is too low during calibration of Waters 717plus?
If the transducer pressure is too low, autozero the transducer before recalibrating.
What to do if transducer pressure is too high during calibration of Waters 717plus?
If the transducer pressure is too high, autozero the transducer before recalibrating.
What to do if syringe cannot move with v2 and v3 closed in Waters 717plus Laboratory Equipment?
If the syringe cannot move with valves 2 and 3 closed, open valves 2 and 3 before moving the syringe.
What to do if low temperature limit exceeded in Waters 717plus?
If the low temperature limit is exceeded, reset the autosampler.
What to do if pressure is above 750 psi during calibration of Waters 717plus?
If the pressure is above 750 psi during calibration, lower the pump pressure to between 400 and 600 psi, then recalibrate.
What to do if pressure increases on compression check for Waters 717plus Laboratory Equipment?
If pressure increases on the compression check, perform a leak test.
What to do if I cannot run stat while purging Waters 717plus Laboratory Equipment?
If you cannot run stat while purging, press Clear and wait for the purge to finish.
What to do if I cannot purge while initializing Waters Laboratory Equipment?
If you cannot purge while the system is initializing, press Clear and wait for the initialization to finish.
What to do if door open time exceeded limit in Waters 717plus?
If the door open time has exceeded the limit, close the door and allow the sample compartment to equilibrate.
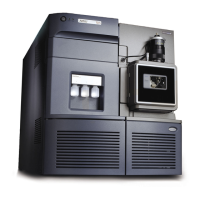
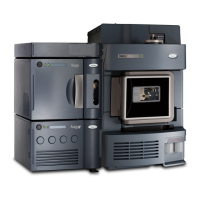
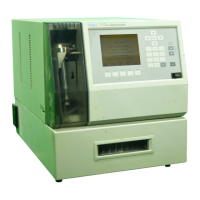
Provides a general overview of the Waters 717plus Autosampler's purpose and function.
Details the key capabilities and functionalities of the autosampler.
Explains how the autosampler communicates with other chromatography system components.
Describes the system's communication capabilities via the IEEE-488 network.
Details the data transfer interface using RS-232 communication.
Describes the system's capabilities for flushing and testing gas content.
Identifies and describes the main parts and modules of the autosampler unit.
Specifies the necessary space, environmental conditions, and utilities for installation.
Outlines the environmental parameters required for optimal autosampler performance.
Details the electrical specifications for connecting the autosampler to a power source.
Provides instructions for safely removing the unit from its packaging and checking contents.
Guides the user through connecting the autosampler to the AC power supply.
Explains how to connect the various fluid and waste lines to the autosampler.
Details the procedures for connecting communication cables for system integration.
Covers the setup and signals for the terminal strip connections for external components.
Explains how to connect the autosampler to system controllers for coordinated operation.
Describes how to enable the auto zero function for accurate pressure readings.
Details the process for establishing network connections using the IEEE-488 bus.
Guides on connecting the autosampler to data modules via RS-232 for data transfer.
Covers procedures for modifying the autosampler's hardware setup, like cover removal or adding modules.
Provides instructions for safely removing and reinstalling the autosampler's outer cover.
Provides step-by-step instructions for installing the optional heater/cooler module.
Explains how to install the auxiliary loop for increased sample injection volumes.
Guides the user through the initial power-on sequence and system initialization.
Describes how to navigate and interact with the autosampler using its front panel interface.
Explains how to access the main system operations and menus via function keys.
Details how to input and modify system parameters using the keypad and menus.
Provides instructions for purging the system to prepare it for operation or maintenance.
Outlines the essential steps for calibrating the injector seal pak for accurate performance.
Details the procedure for priming the needle wash system to ensure proper operation.
Covers setting up system parameters to enable communication and define hardware configurations.
Guides on configuring parameters for communication with other LC system components.
Explains how to configure the signal parameters for terminal strip connections.
Describes how to perform system checks to ensure proper functionality after installation or daily use.
Provides procedures for safely shutting down and storing the autosampler.
Gives a high-level summary of the autosampler's operational workflow and features.
Explains the process of preparing samples and selecting appropriate vials for injection.
Provides guidelines for selecting appropriate solvents for sample preparation and dissolution.
Discusses the importance of filtering samples to prevent blockages and maintain system performance.
Guides the user on choosing the correct sample vials based on sample and injection parameters.
Guides on choosing a suitable solvent for the needle wash system based on sample chemistry.
Details the steps for correctly loading sample vials into the autosampler carousel.
Covers essential checks and procedures to maintain consistent and reliable injection performance.
Describes how to perform a purge cycle to ensure system readiness and remove air or old mobile phase.
Explains how to conduct a compression check to test for gas in the mobile phase.
Covers the process of programming, running, and monitoring automated sample injection sequences.
Details how to set up and define parameters for automated sample runs.
Explains how to program specific functions and options for each step in an auto run.
Describes how to program and run auto standards to ensure accuracy during sample analysis.
Explains how to automate the addition of common solutions or reagents to samples.
Details how to program automated transfer of solutions from vials to sample vials.
Covers programming contact closure outputs to control external devices during a run.
Provides instructions on how to initiate and terminate automated sample runs.
Explains how to perform priority sample injections that interrupt the ongoing auto run.
Discusses factors affecting sampling performance and how to adjust configurations accordingly.
Details how to set and manage the sample compartment temperature using the heater/cooler.
Covers physical reconfigurations for performing microbore or semiprep injections.
Explains how to adjust settings for improved injection accuracy with viscous samples.
Describes how to enable automatic purging during a run to maintain system integrity.
Provides guidelines and precautions for using buffered mobile phases in the autosampler.
Guides the user on when and how to perform a defrost cycle for the heater/cooler.
Details the procedure for removing the old syringe and installing a new one.
Covers the process for replacing the injector seal pak and needle assembly.
Provides instructions for safely removing the injector assembly from the autosampler.
Details the steps for detaching the seal pak from the injector assembly.
Explains how to remove and replace the injector needle.
Guides on how to replace in-line filters, often done to resolve high backpressure issues.
Outlines critical safety precautions and handling procedures for troubleshooting.
Describes various error message types and their potential causes.
Explains messages alerting the operator to incorrect parameter entries or operations.
Lists common error messages encountered during seal pak calibration.
Addresses errors related to the carousel, its reader, or drive mechanism.
Details error messages specific to the injector's sensors and calibration status.
Provides tables listing symptoms, causes, and corrective actions for common autoinjector problems.
Outlines specific procedures for diagnosing and resolving issues like valve leaks or manual purges.
Describes how to perform a valve leak test to isolate fluid system problems.
Guides on manually adjusting the transducer if auto zeroing fails.
Lists key performance parameters such as injection volume range, linearity, and precision.
Details physical attributes including wetted materials, dimensions, and number of vials.
Outlines operating temperature and humidity ranges for the autosampler.
Specifies the voltage, frequency, and current requirements for the unit.
Lists the specifications for IEEE-488, RS-232, and event output connections.
Provides a comprehensive list of available spare parts with their corresponding part numbers.
Discusses chemical and instrument factors that impact the consistency of injection results.
Explains the importance and methods of degassing solvents for improved chromatographic performance.
Describes common techniques like sparging, heating, vacuum, and sonication for solvent degassing.
Guides selection of vials based on sample chemical properties and compatibility.
Provides data on vial capacities and maximum injection volumes for different vial types.
| Type | Autosampler |
|---|---|
| Sample Capacity | Up to 120 vials |
| Flow Rate Range | 0.001 to 10 mL/min |
| Pressure Range | Up to 6000 psi |
| Injection Volume Range | 1 to 100 µL |
| Precision | ±0.5% |
| Operating Temperature | 4°C to 40°C |
| Communication | RS-232 |