Phaser 6125/6130 Color Laser Printer Service Manual 8-59
Service Parts Disassembly
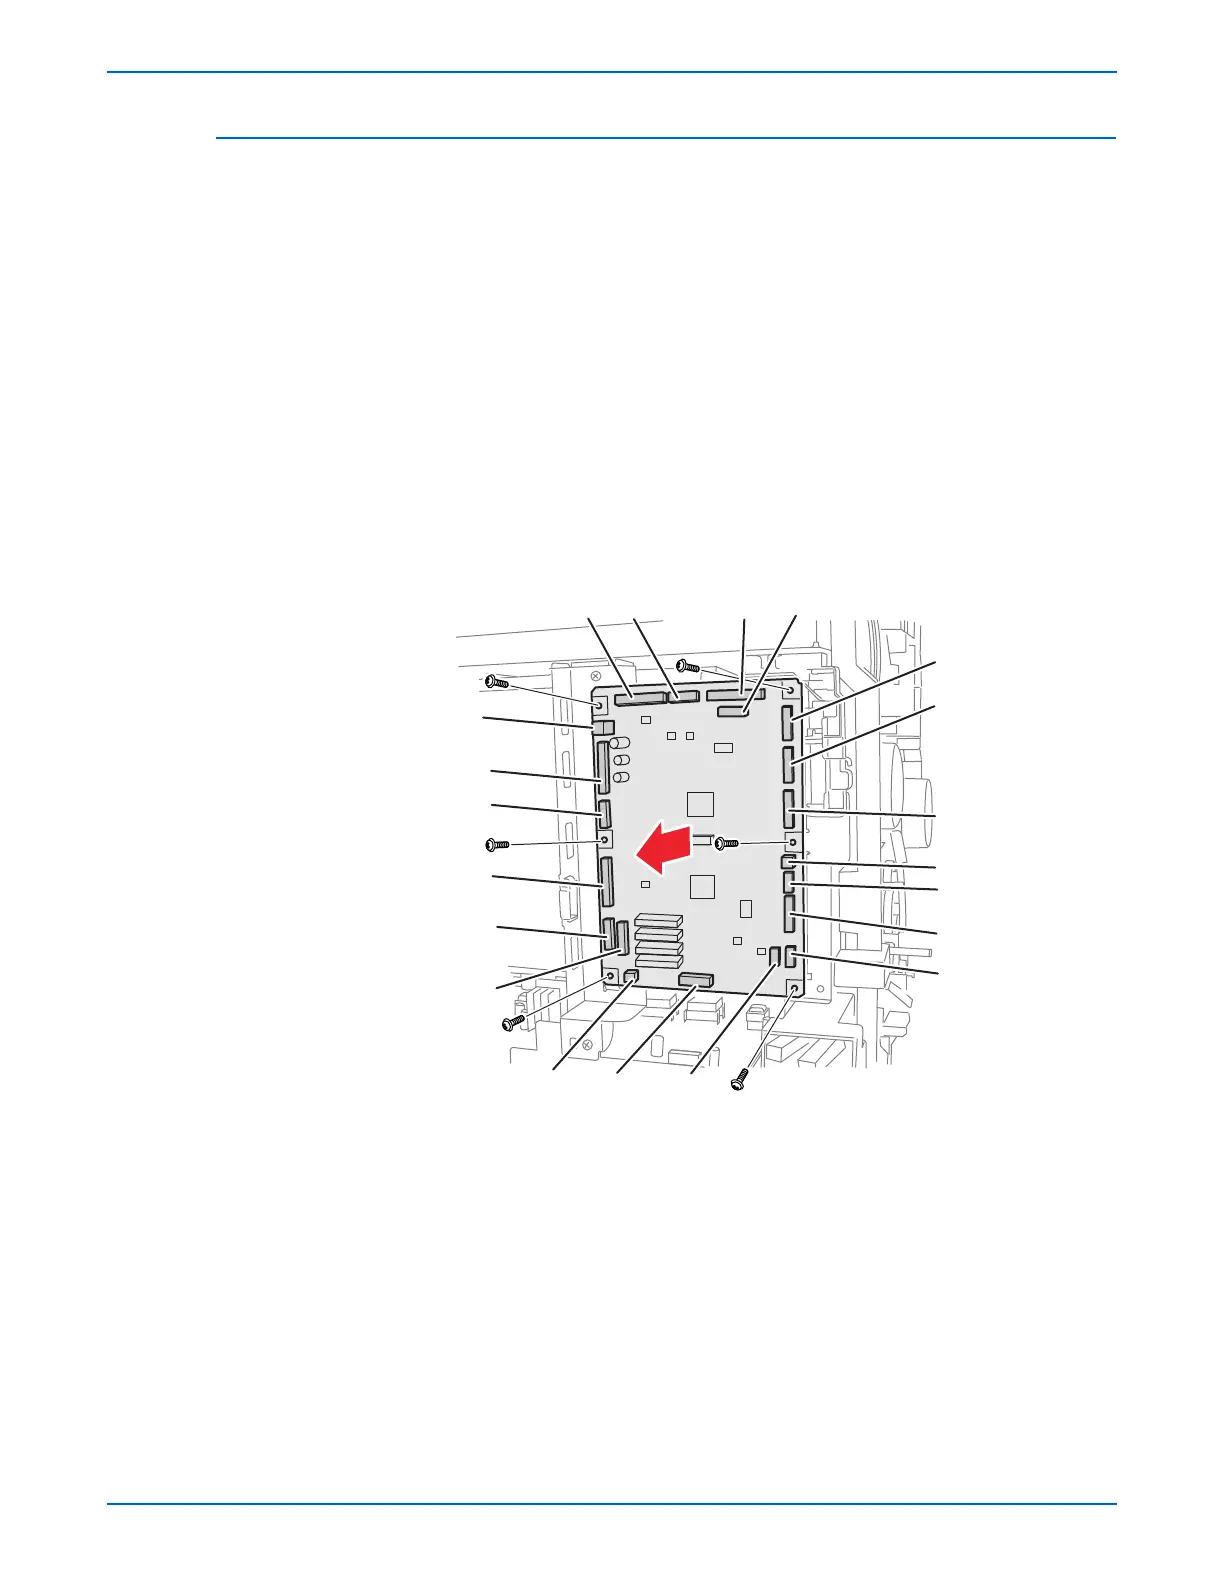
MCU Board
(PL8.2.13)
If the MCU Board is exchanged, store internal data to the Image
Processor Board before removing the MCU Board. Enter Service
Diagnostics menu: Service Mode > Engine Diag > NVM Settings >
Save NVM to ESS. Refer to “Service Diagnostics” on page 4-5 for
detailed procedures. When the new MCU Board is in place, use the Load
NVM from ESS procedure.
1. Turn off the power.
2. Remove the I/P Board Cage (page 8-44).
3. Unplug all connectors from the MCU Board.
4. Remove the six screws (silver, 6mm) that attach the MCU Board to the
printer.
5. Remove the MCU Board from the printer.
P/J16
P/J20
P/J28
P/J23
P/J26
P/J24
P/J21
P/J22
P/J42
P/J11
P/J10
P/J41
P/J40
P/J15
P/J14
P/J17
P/J31
P/J18
P/J19
P/J29
s6130-140

 Loading...


