17-3
IM 05P02C41-01EN
Installation and Wiring
17
17.2 MountingMethod
WARNING
Be sure to turn OFF the power supply to the controller before installing it on the
panel to avoid an electric shock.
Mounting the Instrument Main Unit
Provide an instrumented panel steel sheet of 1 to 10 mm thickness.
After opening the mounting hole on the panel, follow the procedures below to install the
controller:
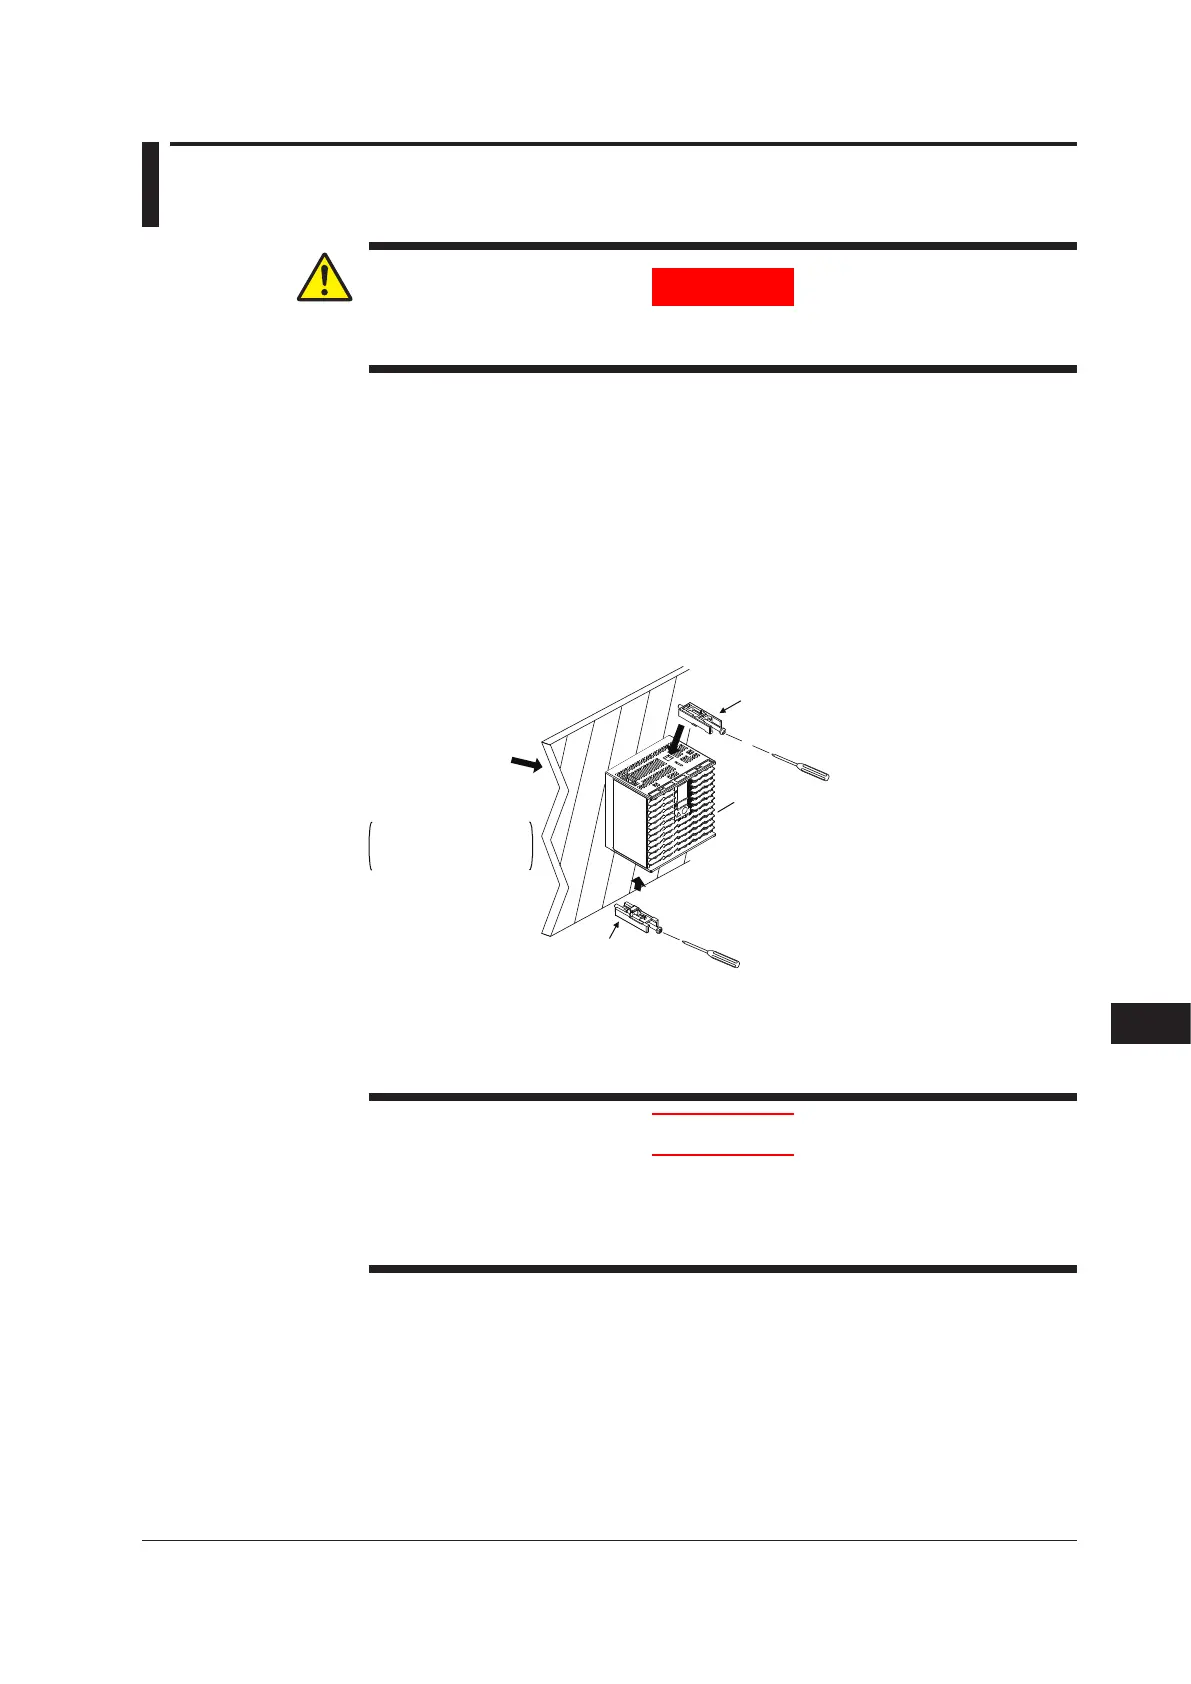
1. Insert the controller into the opening from the front of the panel so that the terminal
board on the rear is at the far side.
2. Set the brackets in place on the top and bottom of the controller as shown in the
figure below, then tighten the screws of the brackets. Take care not to overtighten
them.
Bracket
(top mounting hardware)
Terminal board
Bracket
(bottom mounting hardware)
Panel
Insert a screwdriver into the
brackets to tighten the screws.
Direction to insert the
controller
Appropriate
tightening torque:
Insert the controller
into the opening at
the front of the panel.
To uninstall the controller, perform the procedure in the reverse order.
CAUTION
1) Tighten the screws with appropriate tightening torque within 0.25 N•m. Otherwise
it may cause the case deformation or the bracket damage.
2) Make sure that foreign materials do not enter the inside of the instrument
through the case's slit holes.

 Loading...


