7.16.2
Unit movements demo (without PC connection)
The following procedure allows the simulation of the panoramic exam movements
without connection with the PC.
With this setting is possible to perform a single exam simulation or activate an
automatic continuous movements program.
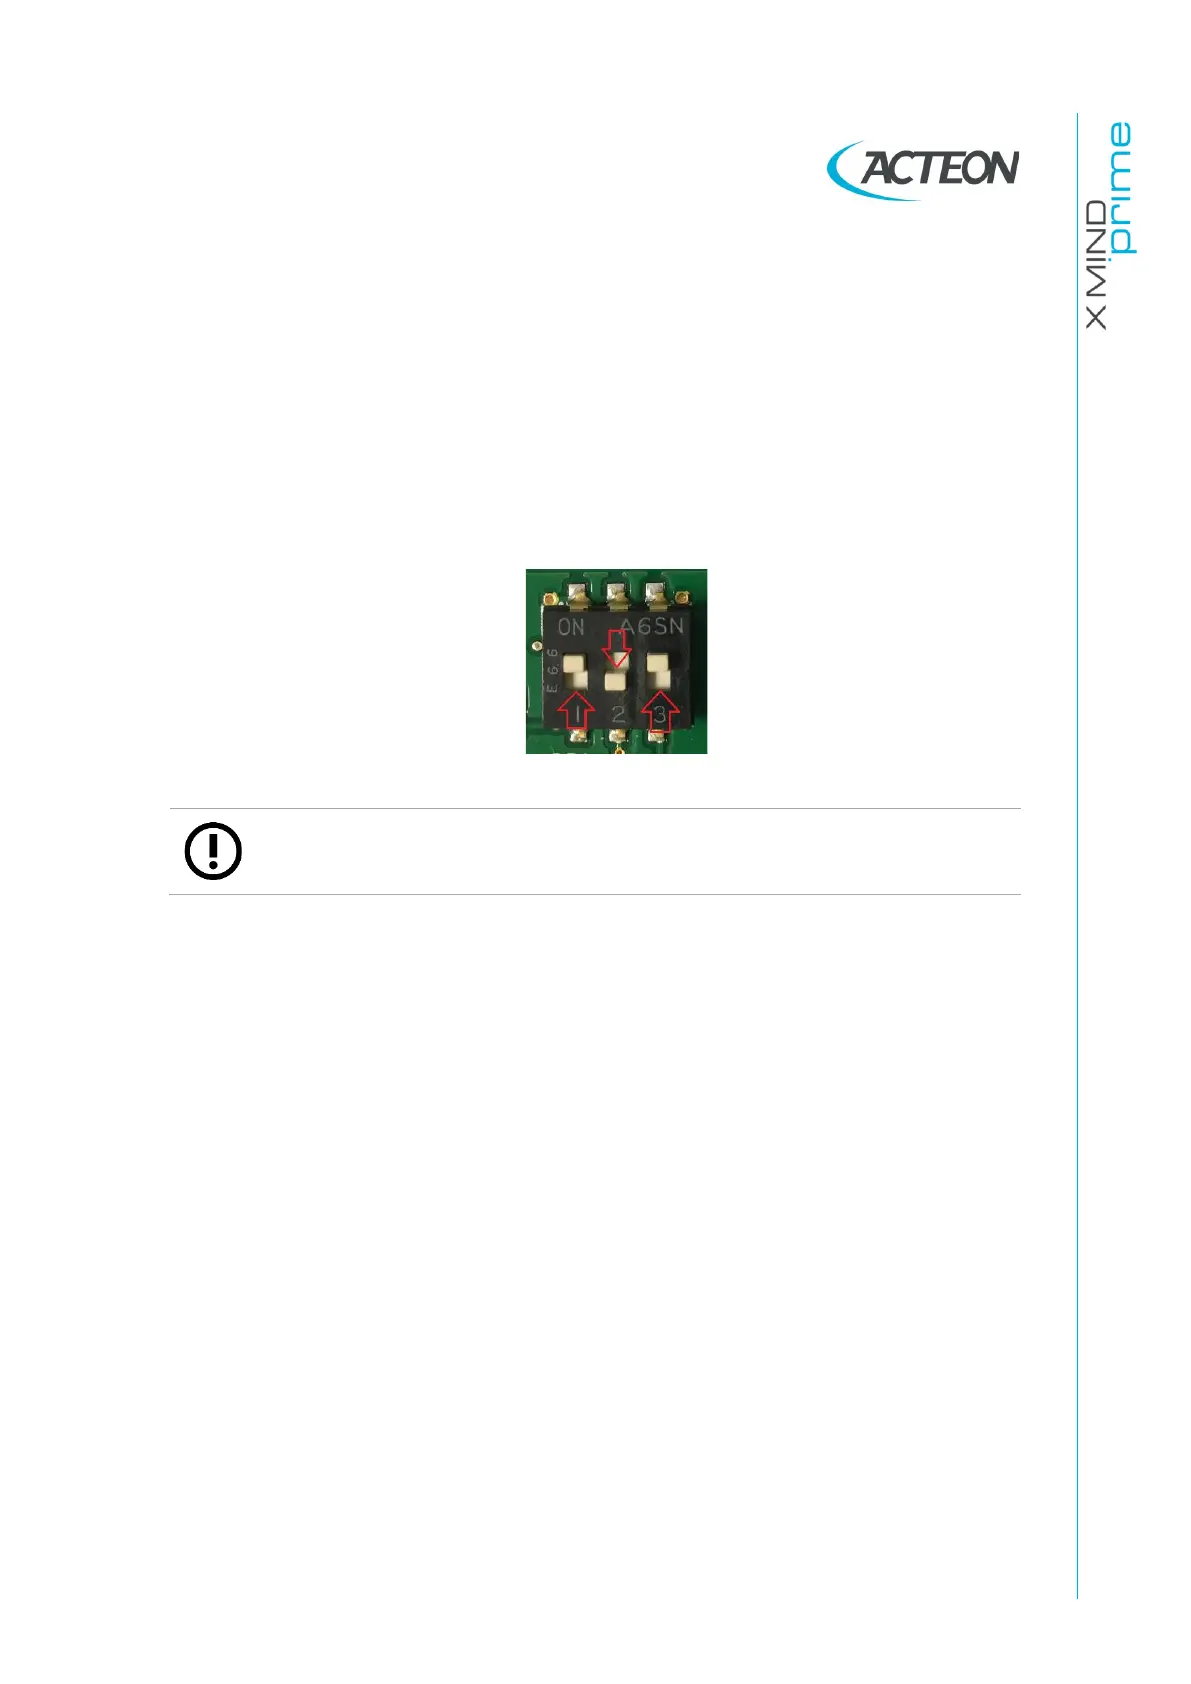
Set the MCU DIP-Switches to “Exhibition demo mode”: ON-OFF-ON (see paragraph
4.2.2.1)
7.16.2.1
Single Panoramic or Ceph exam simulation
1.
Switch ON the unit.
2.
When the keyboard green LED blinks slowly (one pulse per second), press the
>0< button and wait the end of the axis reset.
3.
To take a panoramic simulation press the >0< button and wait the end of the
movements. (Make sure that the 3D sensor is closed in 3D panoramic position)
4.
Press the X-ray button until the end of the panoramic rotation.
5.
At the end of the rotation press the >0< button and the unit come back to the
start position ready for another panoramic exam simulation.
6.
To take a ceph simulation open the sensor press the x-ray button to open the
3D sensor and then rotate it into the ceph exam position, press the >0< button
and wait the end of the movements.
7.
Press the >O< button and wait the end of the movements.
8.
Press the X-ray button until the end of the ceph exam simulation.
9.
At the end the machine returns back to the patient entry position.
10.
If you want to perform a new ceph simulation repeat the steps from 7 to 9. If
you want to perform a panoramic exam, close the 3D sensor to panoramic 3D



 To Next Page