Sample mode
170
7. If you selected LOOP as the playback method, set the loop start/loop end points
in the same way.
■ Setting various points while the sample plays
Here’s how you can set the start/end points or loop start/loop end points manually while
you listen to the sample.
1. In the Trim/Loop page, press the [F6] key (P
®
ALL).
The sample will begin playing from the beginning. During playback, the function key
display will change as follows.
A [F2] key (START)
Press this key during playback to set that location as the start point.
B [F3] key (END)
Press this key during playback to set that location as the end point.
C [F4] key (LP START)
Press this key during playback to set that location as the loop start point.
D [F5] key (LP END)
Press this key during playback to set that location at the loop end point.
E [F6] key (P
®
STOP)
Stops playback.
2. While the sample plays, press a function key to set the desired point.
The corresponding point will be set.
3. If necessary, return to the Trim/Loop page and make fine adjustments to the
locations of each point.
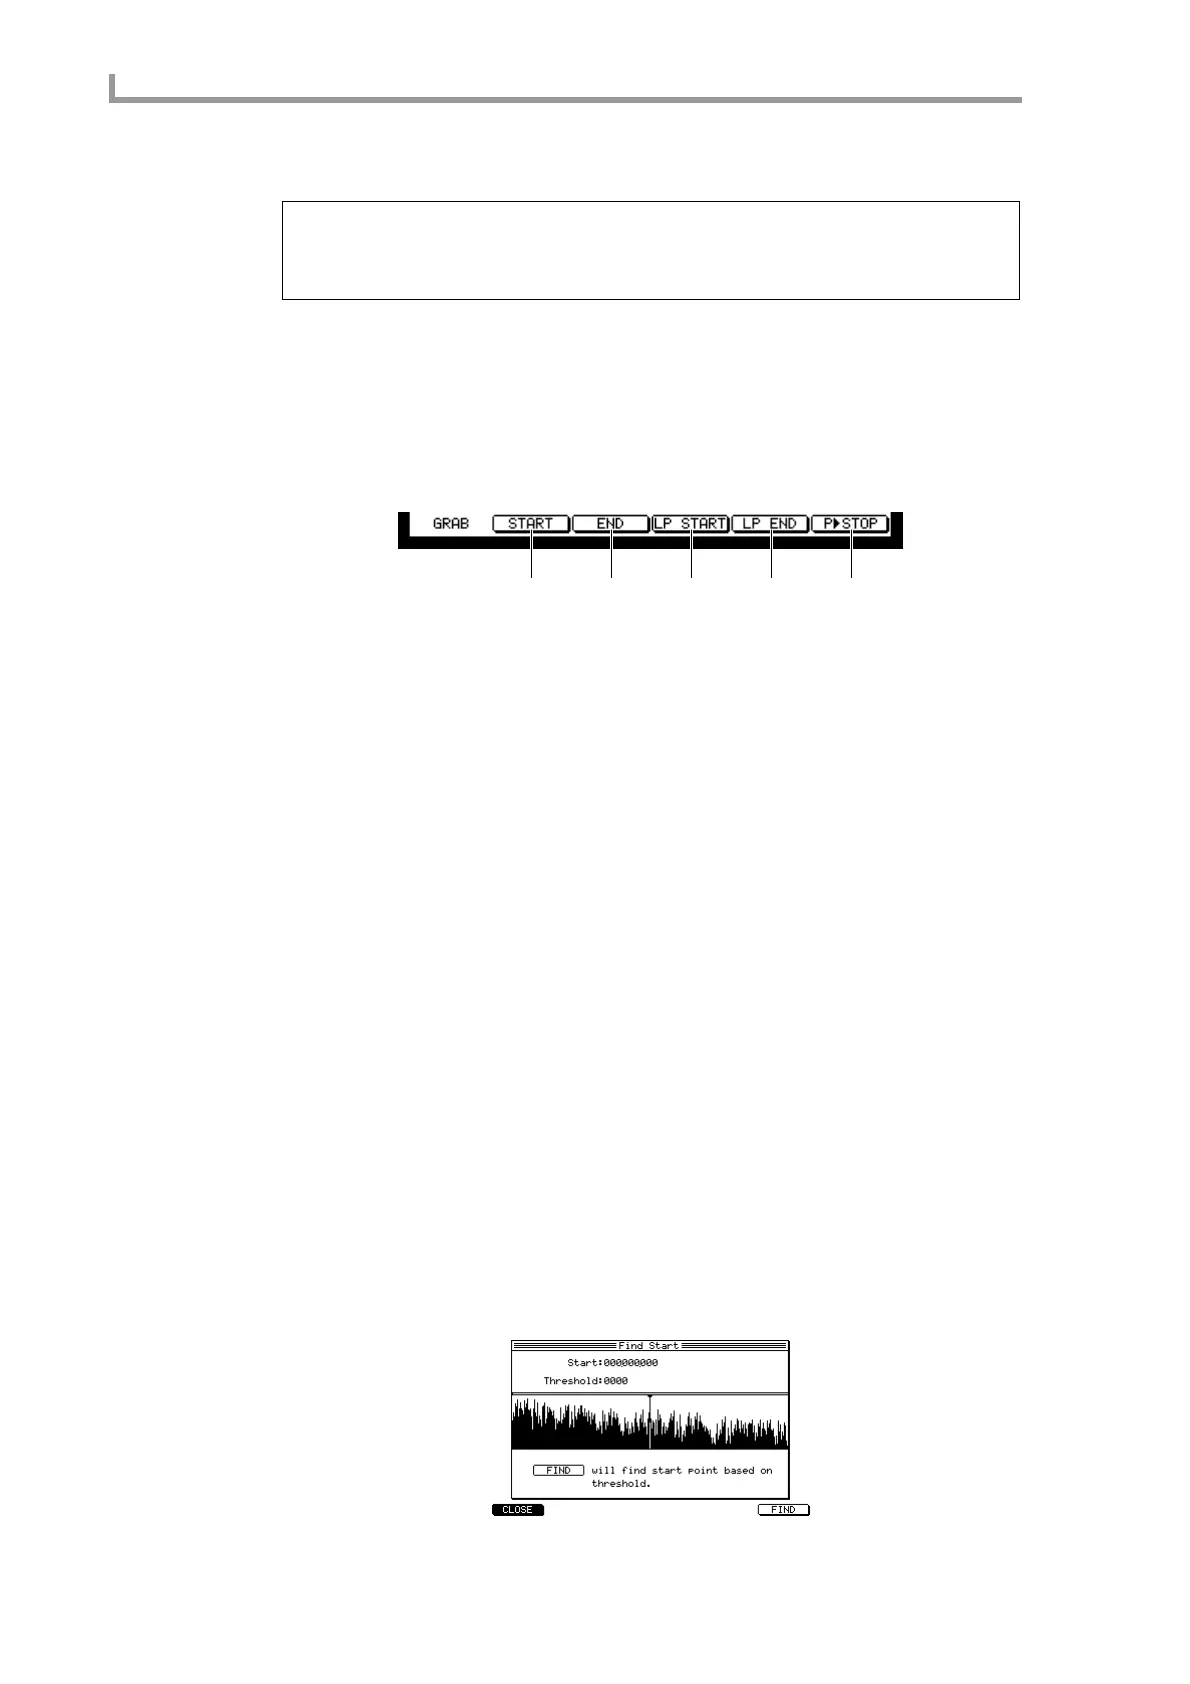
■ Automatically detecting the start/end points
The locations at which the waveform exceeds a specified level (threshold) can automati-
cally be detected as the start/end points. For example, this function provides a convenient
way to quickly find the attack portion of a drum or percussion sound that you have sam-
pled.
1. In the Trim/Loop page, move the cursor to the Start field or END field, and
press the [WINDOW] key.
Depending on the location of the cursor, either the Find Start popup window or the Find
END popup window will appear.
Hint: By holding down the [SHIFT] key and using the CURSOR [
√
]/[
®
] keys, you can change the
place (digit) that is modified by the [JOG] dial.
It is also possible to set the start/end points or loop start/loop end points simply by pressing a key while
you listen to the sample play. For details, refer to the section that follows.
1 2 3 4 5
 Loading...


