Save page
89
4. Move the cursor to the data list, and use the CURSOR [
π
]/[
†
] keys to move the
cursor to the sequence that you want to save.
When the cursor is in the data list, you can also turn the [JOG] dial to select a sequence.
5. In the file list block, select the folder in which you want to save the data.
6. To execute the Save operation, press the [F6] key (DO IT).
The individual sequence will be saved in the selected folder.
If an identically-named file already exists in the save-destination folder, the File Exists
popup window will appear when you execute the Save operation. Either press the [F3]
key (RENAME) to change the name of the file, or press the [F5] key (REPLACE) to over-
write the existing file.
■ Saving samples
Here’s how to save one or more samples from memory to a storage device.
1. In the Save page, move the cursor to the Type field and turn the [JOG] dial to
select SAVE SAMPLEs.
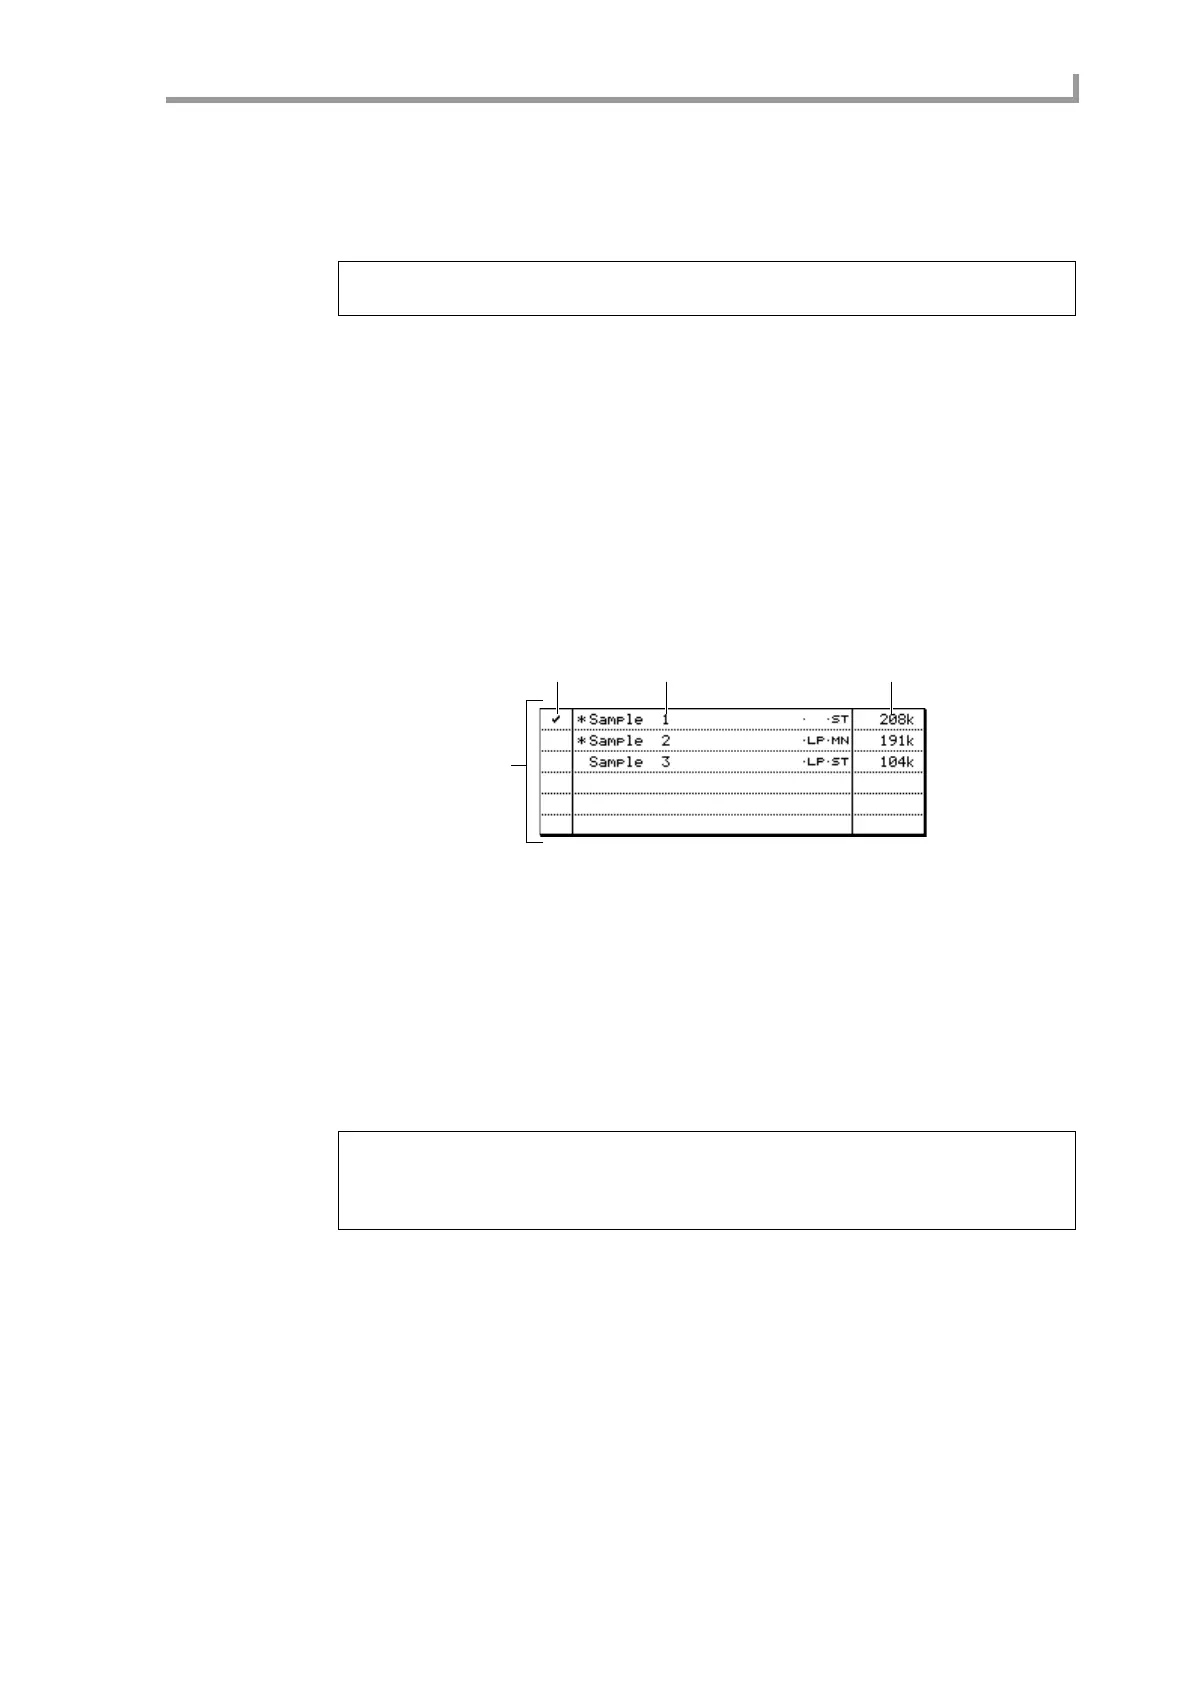
The data list block will change to a display like the following.
A Sample list field
Lists the samples that are in internal memory.
B Tag field
Assigns a tag to individual samples, selecting them for saving.
C Sample field
Lists the samples in memory (and displays information about the samples). If you are
saving a single sample, the sample selected in this field is the one that will be saved.
D Size field
Indicates the size of the sample.
2. If you want to save a single sample, move the cursor to the sample list field, and
select the sample that you want to save.
3. If you want to save two or more samples, move the cursor to the Tag field and
assign a tag to each sample you want to save.
4. Move the cursor to the Disk field, and turn the [JOG] dial to open the Disk List
popup window.
5. Move the cursor to the storage device on which you want to save the data, and
press the [F6] key (SELECT).
That storage device will be selected as the save-destination, and the popup window will
close.
Hint: When you execute the Save operation, the file will be saved in the folder that is selected in the
left side of the file list (i.e., the level whose contents are shown in the right side of the file list).
Hint: The * symbol in front of the sample name indicates that the sample has been edited after it was
last saved or loaded.
If you press the [WINDOW] key in the Tag field, a popup window will appear in which you can clear
all tags at once.
2
1
3 4