Main page
29
E Transmit program changes in this track field
Specifies whether program change events within the track will be transmitted. Program
change events will be transmitted if you select YES, and will be ignored if you select NO.
F [F1] key (CLOSE)
Updates the settings and closes the popup window.
2. Set each field as desired.
3. To update the settings, press the [F1] key (CLOSE).
■ Performing auto punch-in/out
Here’s how to use auto punch-in/out to automate sequence recording.
1. Select the sequence that you want to record.
2. Move the cursor to the A.Punch field, and press the [WINDOW] key.
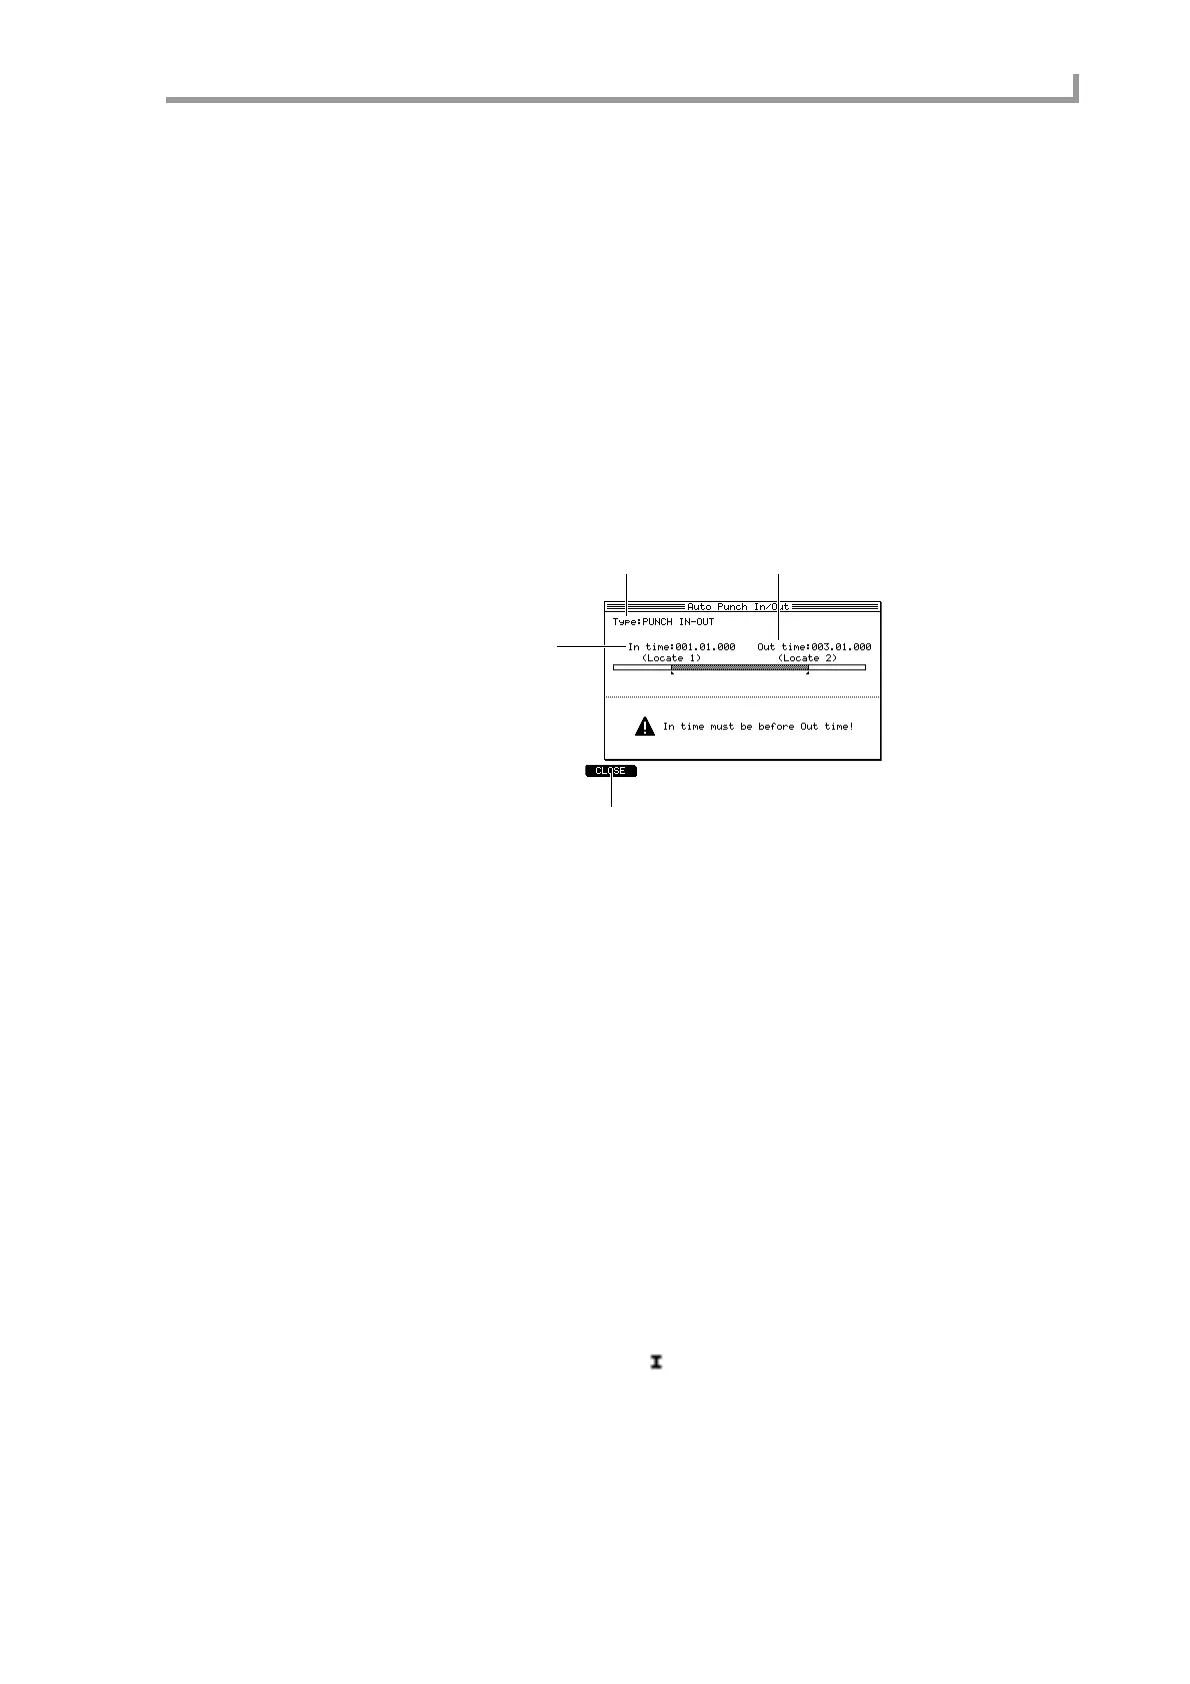
The Auto Punch In/Out popup window will appear.
A Type field
Selects the way in which auto punch-in/out will be performed: PUNCH IN ONLY (auto-
mate only punch-in), PUNCH OUT ONLY (automate only punch-out), or PUNCH
IN-OUT (automate punch-in/out).
B In time field
Specifies the punch-in point.
C Out time field
Specifies the punch-out point.
D [F1] key (CLOSE)
Finalizes the settings and closes the popup window.
3. Make sure that the Type field is set to PUNCH IN-OUT.
If you want to perform only punch-in or punch-out, move the cursor to the Type field and
turn the [JOG] dial to select PUNCH IN ONLY or PUNCH OUT ONLY.
The graphic in the center of the popup window will change according to the punch-in/out
type you select.
4. Move the cursor to the In time field, and turn the [JOG] dial to specify the
punch-in point.
The punch-in point is indicated by a symbol in the position bar of the Main page.
1 3
2
4