To configure traffic shaping:
1. Click the Traffic Shaping item (Configuration tab > Data menu > QoS submenu >
Traffic Shaping); the following page appears:
Figure 42-4: Configuring Traffic Shaping
2. Click the New Entry link; the following page appears.
Figure 42-5: Adding Device for Traffic Shaping
3. From the 'Device' drop-down list, select the interface for which you want to shape the
traffic. If you want to apply the settings on all LAN devices, select Default LAN
Device.
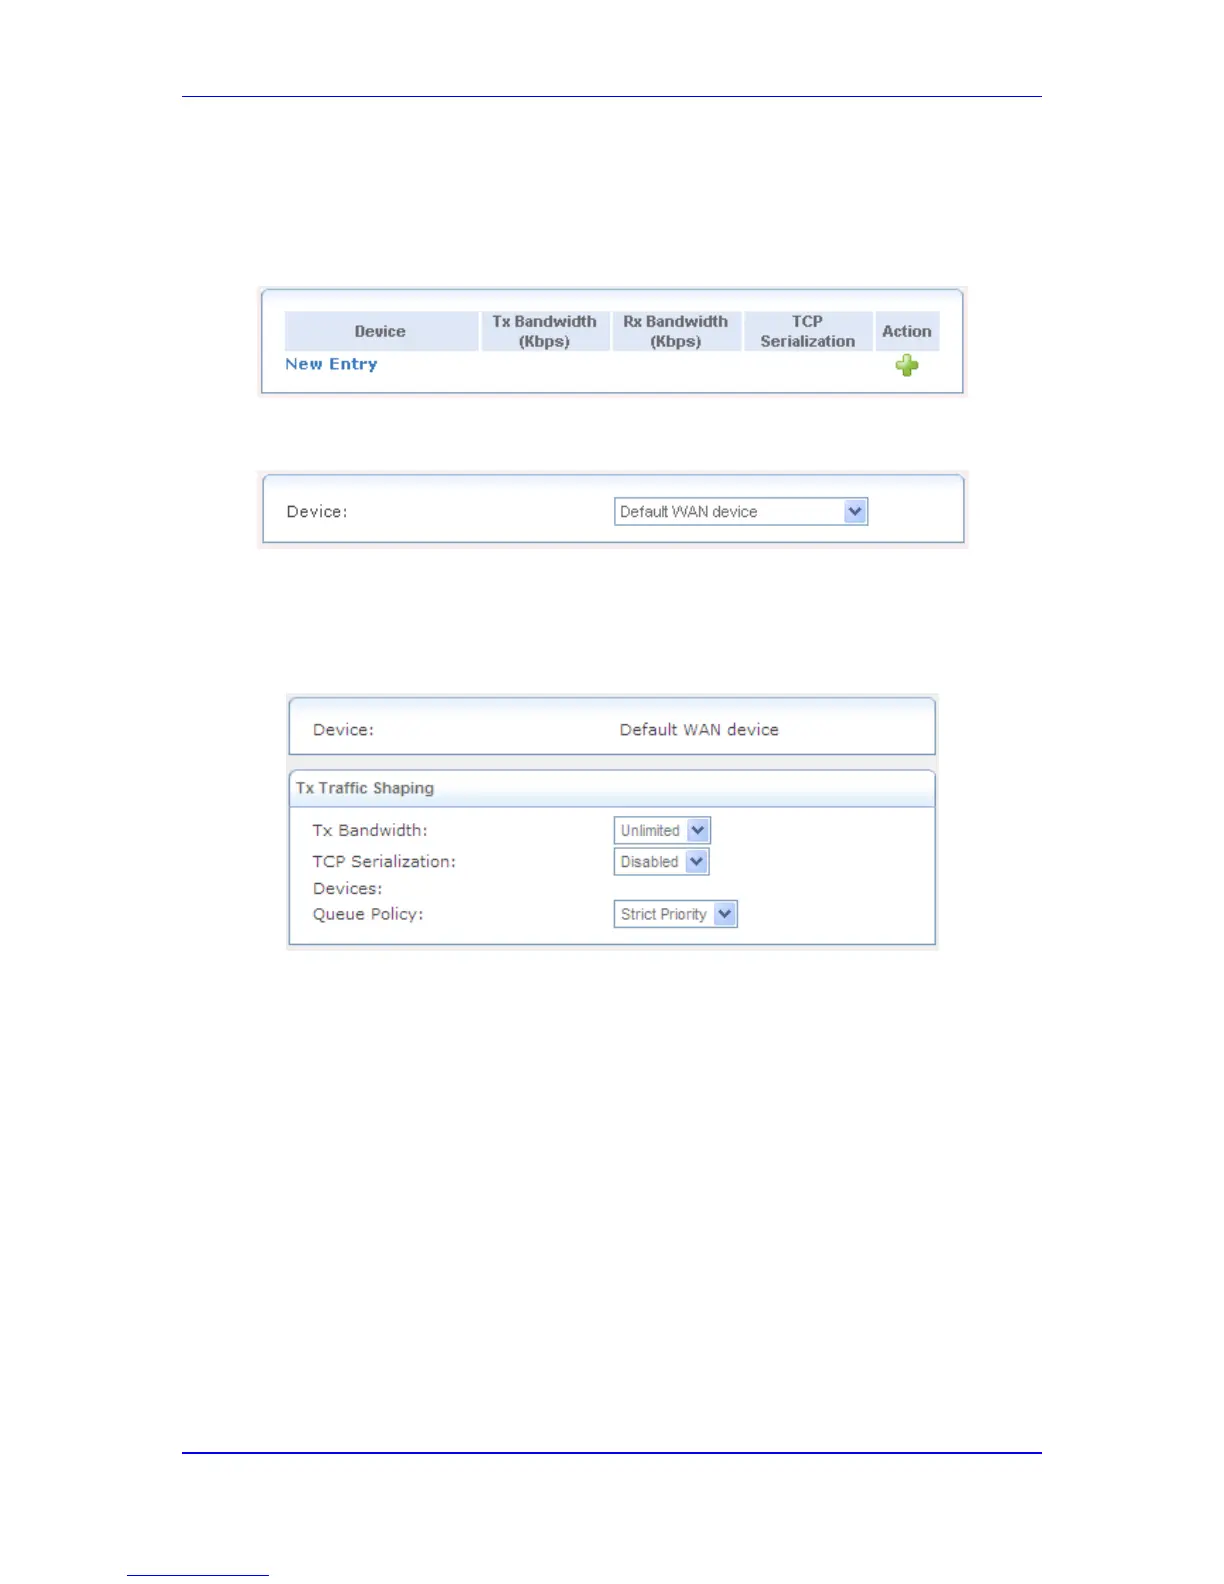
4. Click OK; the following page appears:
Figure 42-6: Defining Device Traffic Shaping
5. From the 'Tx Bandwidth' drop-down list, select the device's bandwidth transmission
rate limit. If you want to specify a TX bandwidth, see Step 8.
6. From the 'TCP Serialization' drop-down list, select whether TCP Serialization is
enabled or disabled. You can enable TCP Serialization for active voice calls only or for
all traffic. If you select Enable, the 'Maximum Delay' field appears for defining the
maximal allowed transmission time frame (in milliseconds) of a single packet. Any
packet that requires a longer transmission time is fragmented to smaller sections. This
avoids transmission of large, bursty packets that may cause delay or jitter for real-time
traffic such as VoIP. If you insert a delay value in milliseconds, the delay in number of
bytes is automatically updated on refresh.
7. From the 'Queue Policy' drop-down list, select the Tx traffic queueing method. This
can be based on a shaping class (Class Based) or on the pre-defined priority levels
(Strict Priority). Note that when based on shaping class, the class's bandwidth
requirements are met regardless of the priority, and only excess bandwidth is given to
traffic with a higher priority. However, when unlimited bandwidth is selected for the Tx
traffic, the queue policy can only be based on the pre-defined priority levels (i.e., Strict
Priority).
8. If you want to specify a TX bandwidth, select Specify from the 'Tx Bandwidth' drop-
down list and then enter the maximum Tx bandwidth.
a. In the table, click the New Entry link; the following page appears:
 Loading...