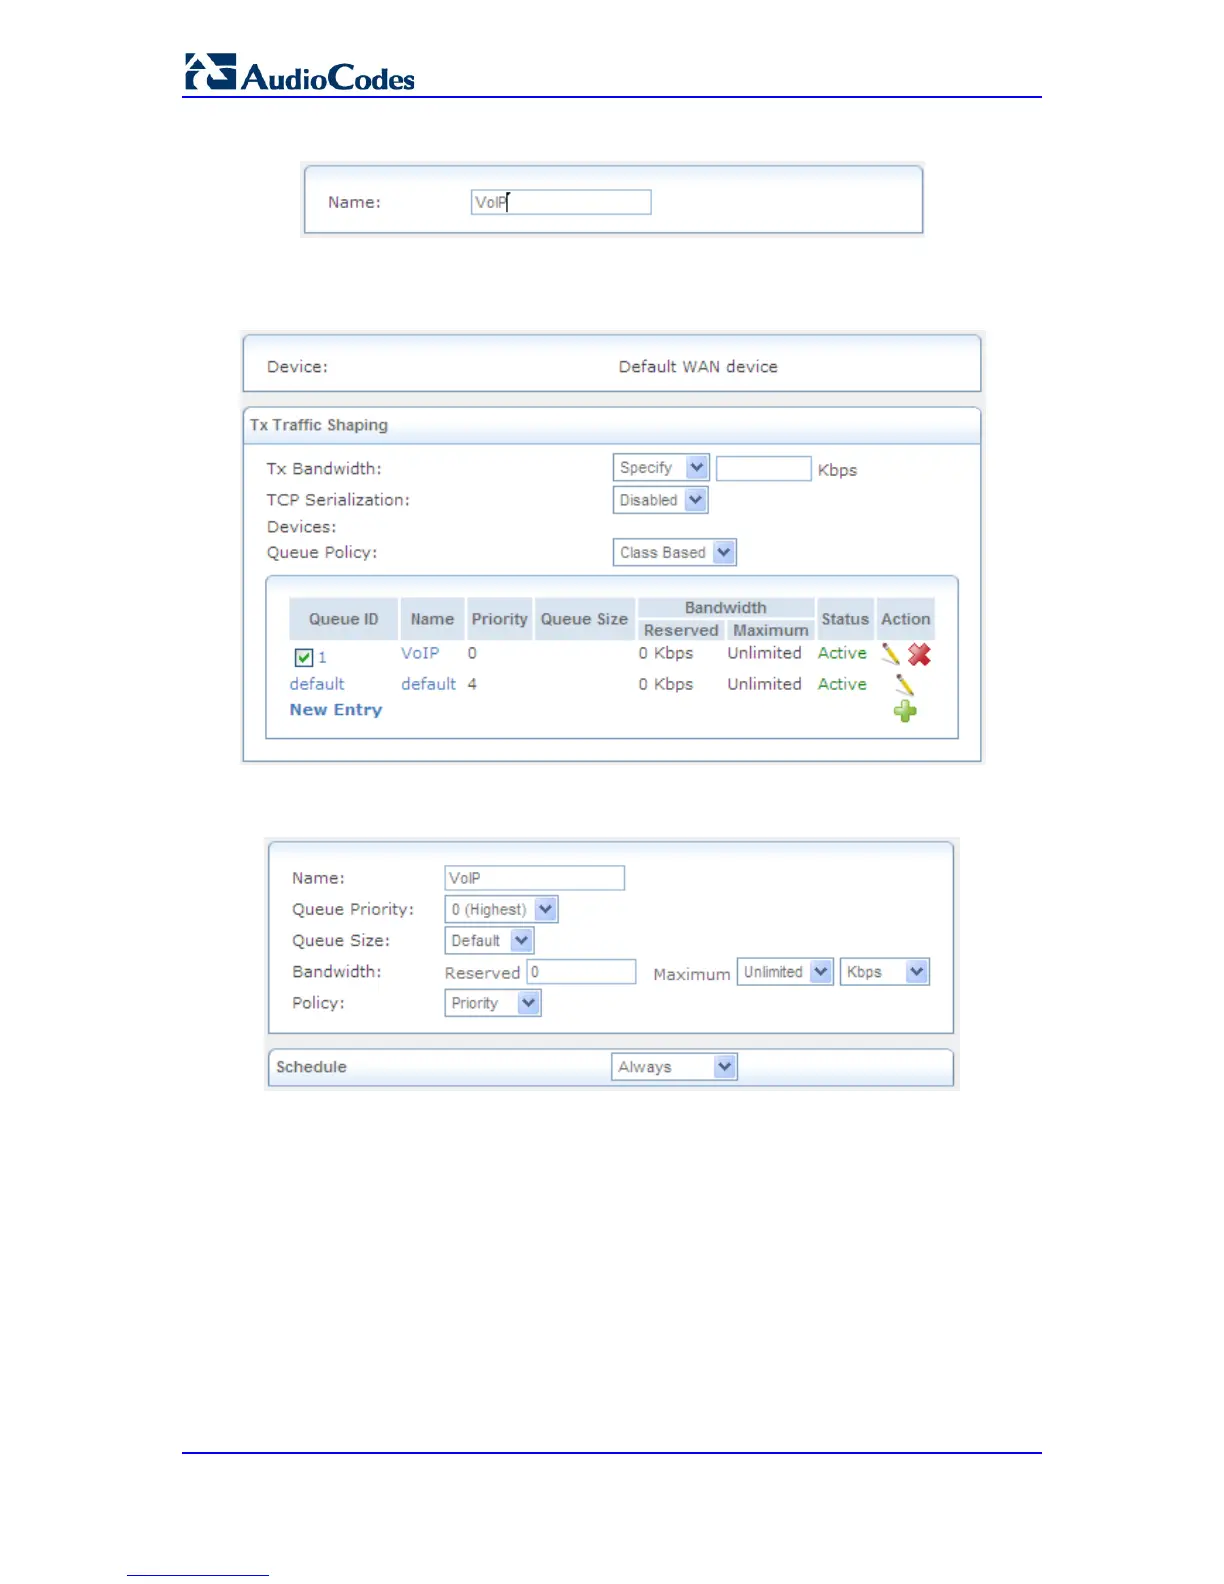
Figure 42-7: Adding Tx Shaping Class
b. In the 'Name' field, enter a new Tx traffic shaping class name (e.g., Class A), and
then click OK to save the settings; the class is added to the table.
Figure 42-8: Class Name Added to Table
c. Click the newly added class name; the following page appears:
Figure 42-9: Defining Shaping Class
d. Configure the following fields:
♦ Name: Name of the class.
♦ Queue Priority: Priority level of the class (where zero is the highest and
seven the lowest).
♦ Queue Size:
♦ Bandwidth: Reserved transmission bandwidth in kilobits per second. You
can limit the maximum allowed bandwidth by selecting Specify and then
defining the Kbits/s.
♦ Policy: Class policy determines the policy of routing packets inside the
class:
Priority: Priority queuing utilizes multiple queues, so that traffic is
distributed among queues based on priority. This priority is defined
 Loading...