2.2 Enabling the RTC (Real-Time Clock) Battery
The H2 Series inverter comes from the factory with a CR2032 lithium-manganese battery pre-installed
on the I/O CPU PCB. The battery powers the inverter’s built-in RTC. The battery is installed with a
protective insulation strip to prevent battery discharge. Remove this protective film before installing
and using the inverter.
2.2.1 Battery Access
Follow the instructions below to activate (or replace) the battery. Remove the protective insulation strip
underneath the battery to enable the RTC feature on the H2 series inverters.
Loosen the screw(s) on the power cover then remove the power cover.
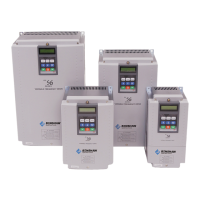
240V: 7.5 HP ~ 25 HP (5.5 kW ~ 18.5 kW) 240V: 30 HP ~ 60 HP (22 kW ~ 45 kW)
480V: 7.5 HP ~ 40 HP (5.5 kW ~ 30 kW) 480V, 575V: 50 HP ~ 125 HP (37 kW ~ 90 kW)
575V: 7.5 HP ~ 40 HP (5.5 kW ~ 30 kW)
ESD (Electrostatic discharge) from the human body may damage sensitive electronic components
on the PCB’s. Therefore, be extremely careful not to touch the PCB or the components on the
PCB with bare hands while you work on the I/O CPU PCB.
To prevent damage to the PCB from ESD, touch a metal object with your hands to discharge any
electrical charge before working on the PCB, or wear an anti-static wrist strap and ground it on a
metal object.
Ensure that the inverter is turned off and DC bus voltage has dropped to a safe level before
opening the terminal cover when enabling or replacing the RTC battery.
 Loading...