3 - 47
Upper shaft, Needle bar and Presser foot unit
Application of Assembly
Application
Application
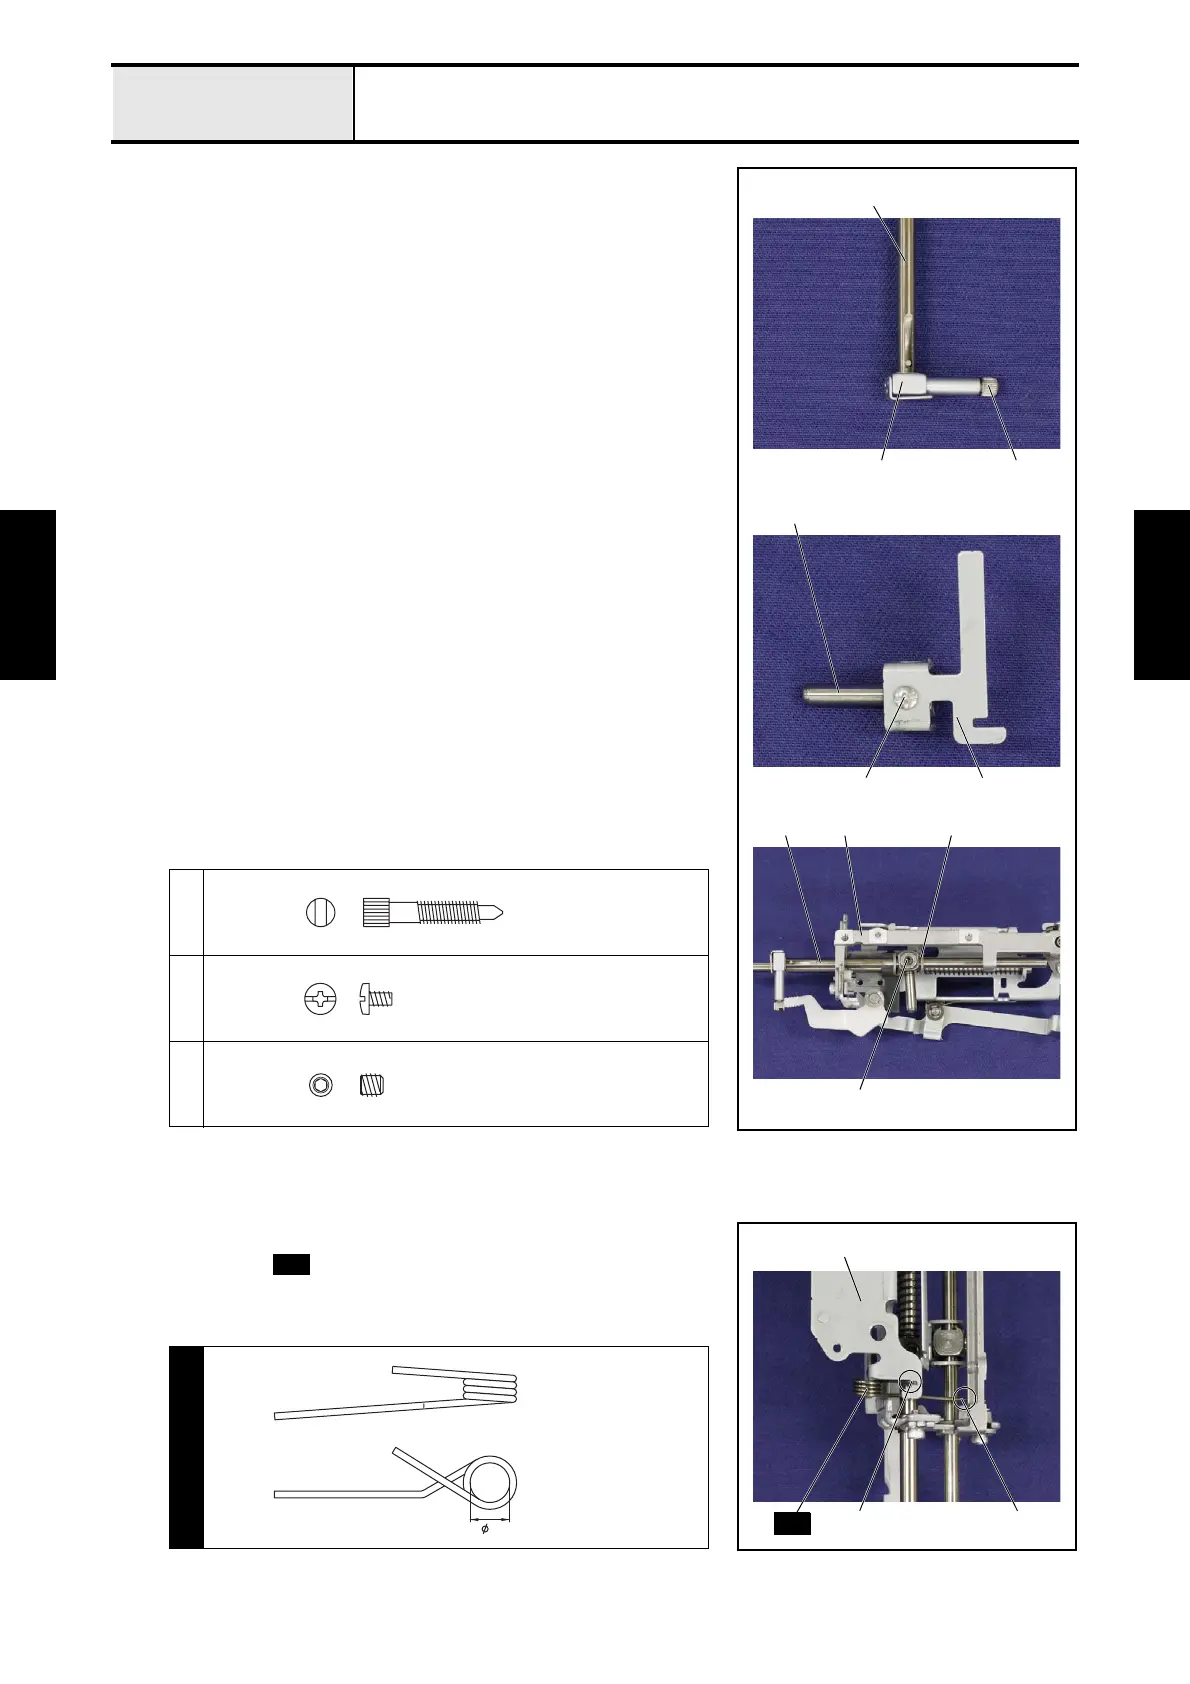
1-11 Attachment of Needle bar assy N
1. Tighten the needle clamp screw 1 to the needle block 1 of the needle bar
assy N 2.
2. Set the needle bar block 3 to the needle thread position setter 4 with the
screw 2.
3. Inset the needle bar assy N 2 into the bottom side hole of the needle bar
supporter assy 5, the needle thread position setter 4 and the upper side
hole of the needle bar supporter assy 5, and then tighten the screw 3
temporarily.
*Key point
• Fully tighten the screw 3 after performing "4-21 Adjustment:
Needle bar height".
1
2
3
1
2
1
4
3
2
2
3
5 4
Needle Clamp Screw
Screw, Bind
M2.6X4
Set Screw, Socket (FT)
M4X4
1-12 Attachment of Spring
1. Set the spring to the tab of the base holder assy 1, and then hang the
shorter hook side of the spring on the notch part 2 of the base holder assy
1, and hang the longer hook side of the spring on the groove part 3 of the
needle bar supporter assy.
S08
2
1
3
S08
S08
7
SPRING
XE9141***
 Loading...


