Inspection and
Adjustment
Inspection and
Adjustment
4 - 38
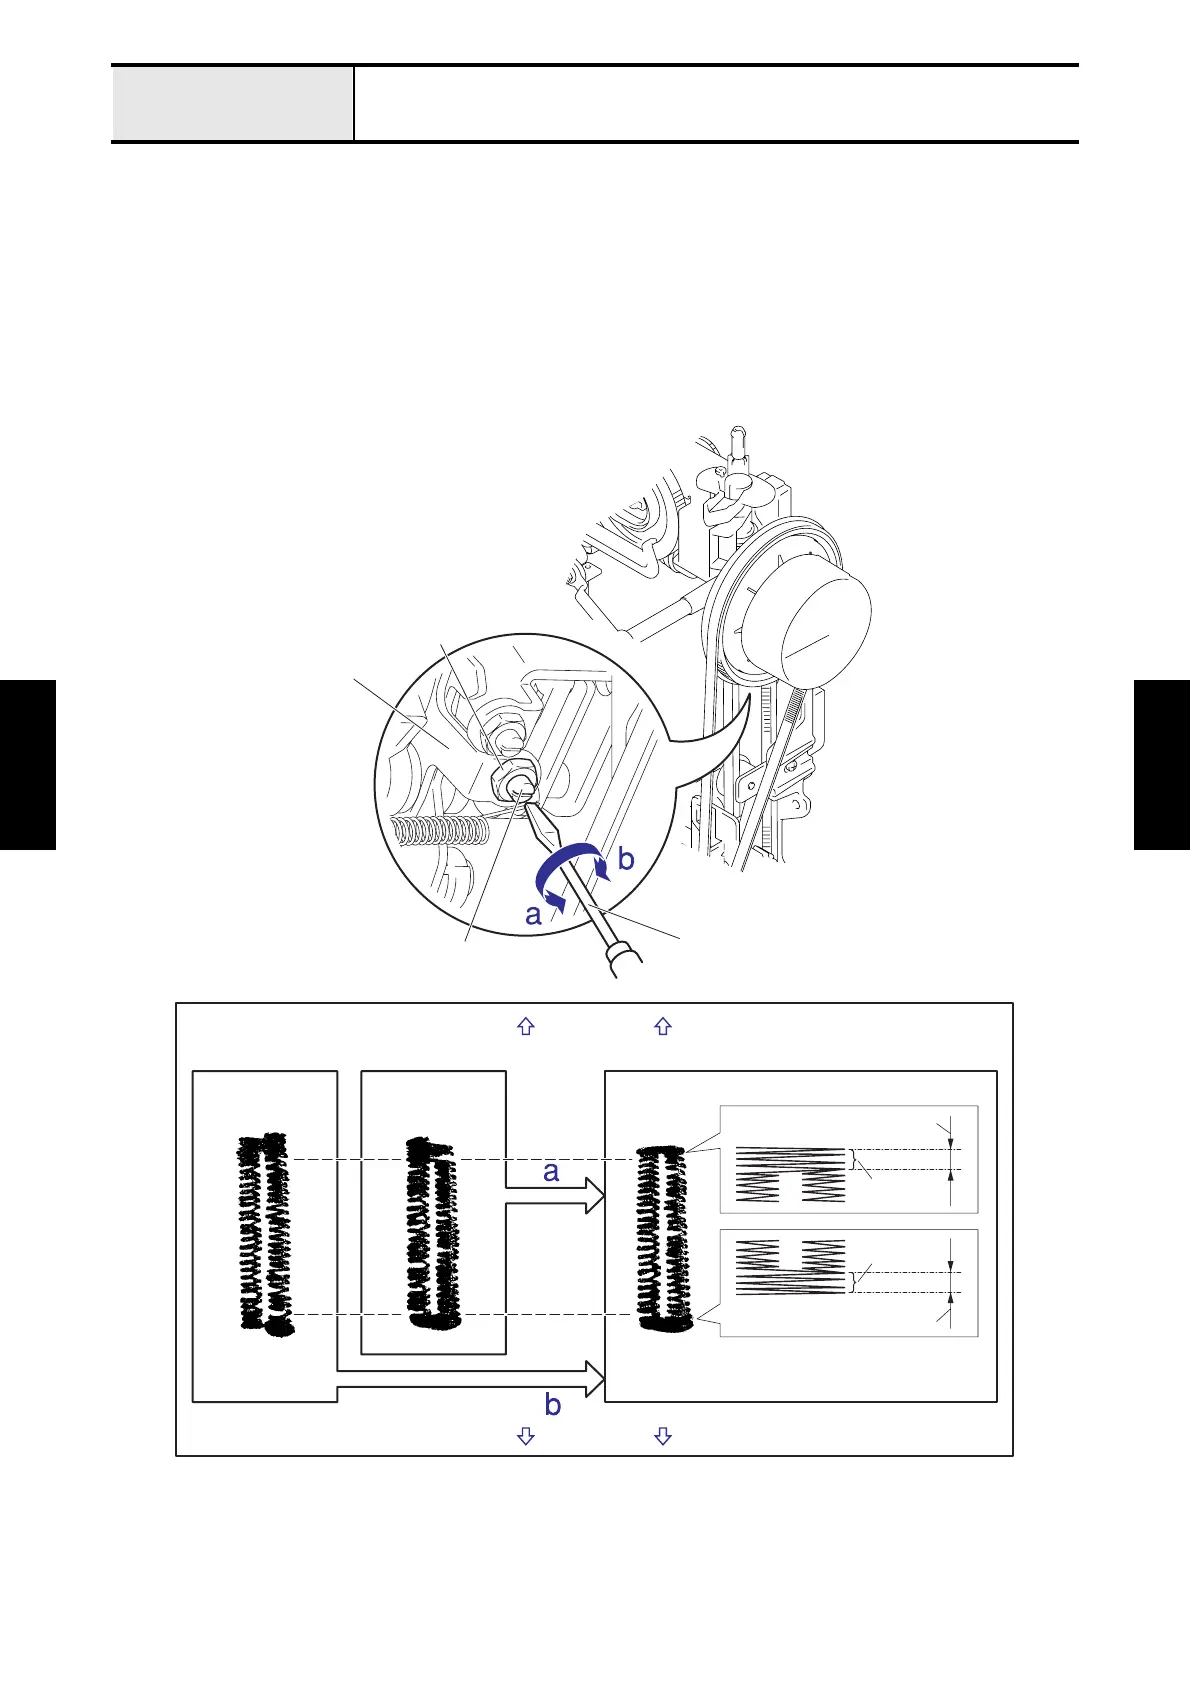
Adjustment BH stitch bar tack feed distance
<From previous page>
11. Loosen the nut 4 of the adjusting screw of the BHF finger assy.
12. Adjust the stitch bar tack feed distance by turning the adjusting screw of the BHF finger assy.
*Key point
• Loosen the adjusting screw. (Turn to the direction “a”) → Reverse the bar tack. (Fig. 2 “a”)
• Tighten the adjusting screw. (Turn to the direction “b”) → Forward the bar tack. (Fig. 2 “b”)
13. Tighten the nut 4 of the adjusting screw of the BHF finger assy to secure the adjusting screw.
*Key point
• When tightening the nut 4 of the adjusting screw, keep the adjusting screw from moving.
Adjusting screw
Flat screwdriver
Nut 4
BHF finger assy
NG OK
10 pitches
1 mm or less
1 mm or less
NG
10 pitches
Fig. 2
Rear side
Front side
 Loading...


