3 - 80
Main frame and Covers
Application of Assembly
Application
Application
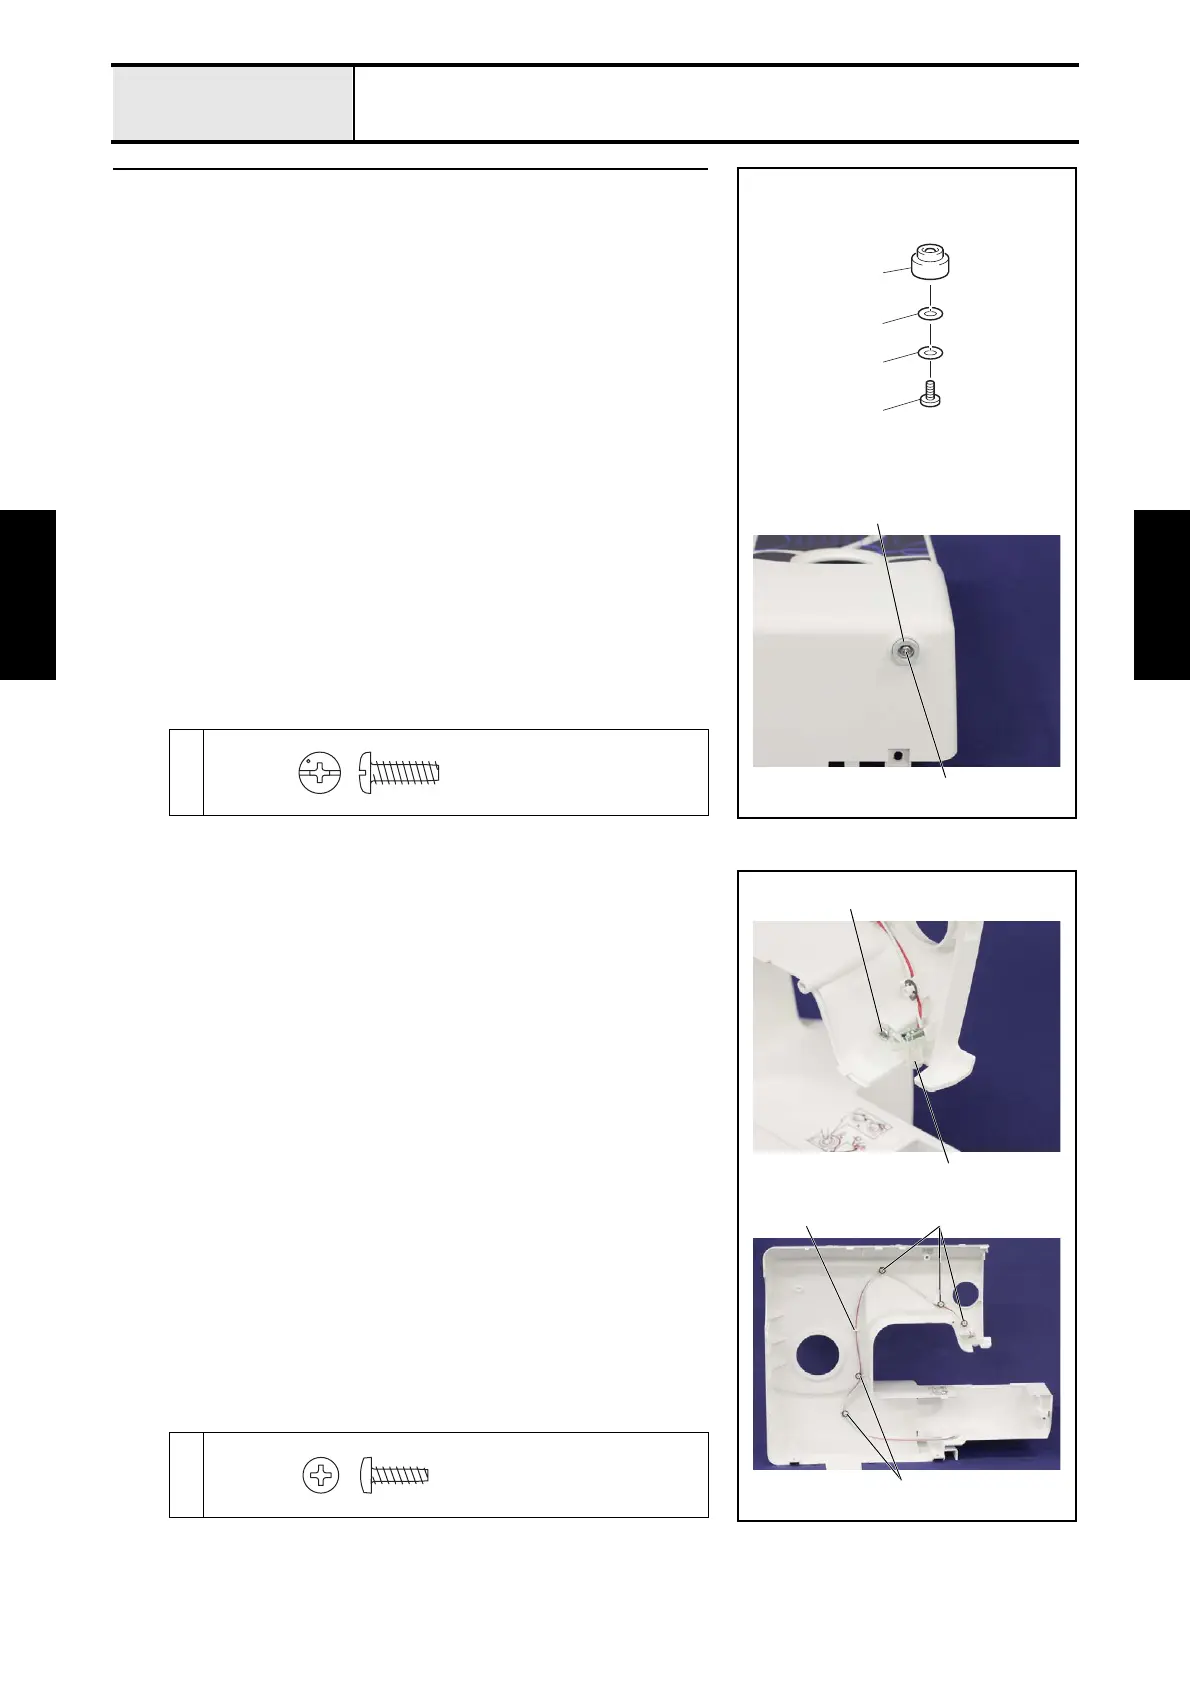
2 Assembly of Front cover assy
2-1 Attachment of Rubber cushion A
1. Set the rubber cushion A 1, the washer 2 and the washer plain M3.5 3
to the bottom side of the front cover assy, and then secure them with screw
1.
1
1
2
1
3
1
1
Taptite, Pan B
M3.5X12
2-2 Attachment of LED lamp supply assy
1. Set the LED lamp supply assy 1 to the inside of the front cover assy, and
then secure it with the screw 1.
2. Pass the lead wire through the 5 guide parts and the hook part 2 as shown
in the right figure, and then attach the 5 retaining rings CS4 3 to the 5
bosses of the 5 guide parts.
*Key point
• Refer to “Special Instructions of Wiring”.
1
1
1
3
3
2
Taptite, Bind B
M3X10
 Loading...


