2 - 37
Feed control mechanism
Basic of Assembly
Basic
Basic
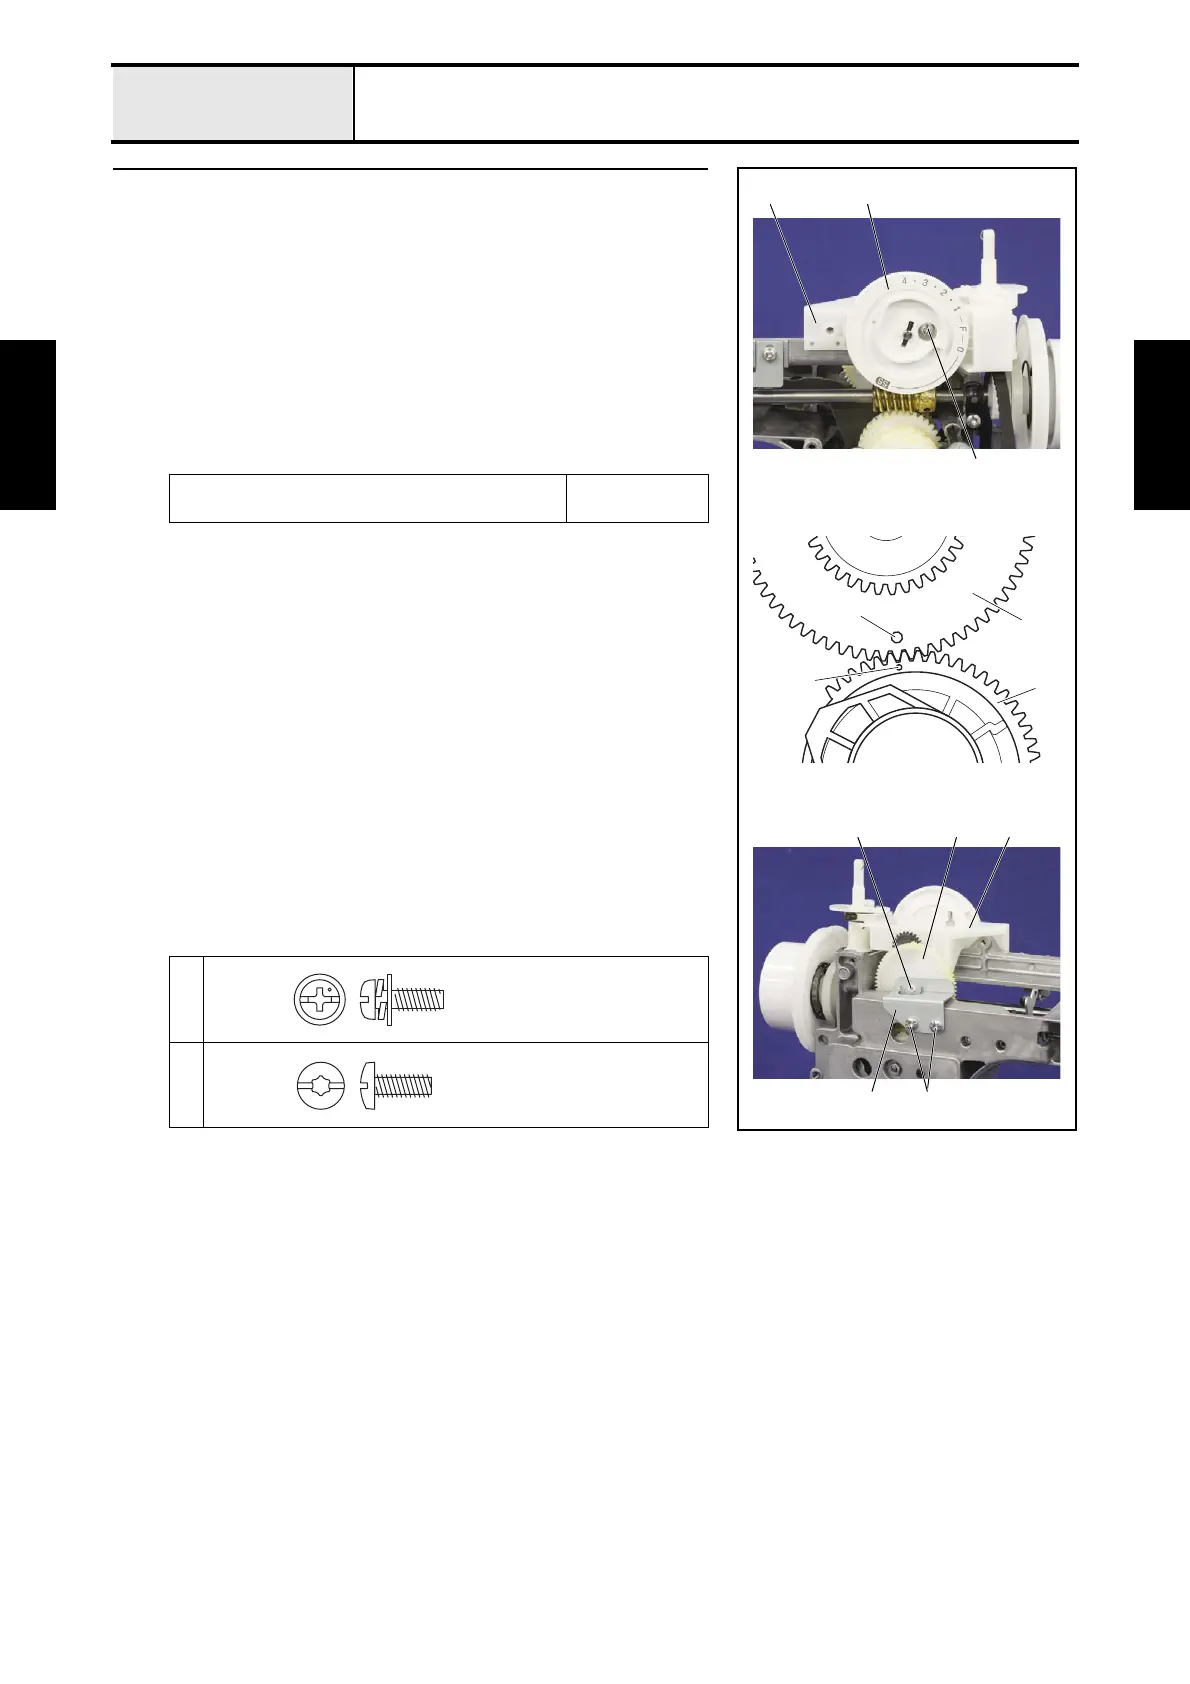
1 Attachment of Feed bracket assy
1. Move the dial 1 of the feed bracket assy 2 to the position [4], and set the
feed bracket assy 2 to the arm bed, and then tighten the screw 1
temporarily.
*Key point
• Check that align the mark 3 of the idle gear 4 with the mark
5 of the feed adjusting cam 6.
• Fully tighten the screw 1 after performing "2-43 Attachment of
Z dial assy".
2. Set the positioning hole of the feed bracket support plate 7 to the boss 8
of the idle gear 4, and then secure them to the back side of the arm bed
with the 2 screws 2.
→Refer to 3 - 54 of the Assembly.
Lubricate the EPNOC AP(N) 0 to the
circumference (4 locations) of the idle gear 4.
3mm dia. ball
1
2
4
6
3
5
7
4
2
8
1
1
2
2
Screw, Pan (S/P washer)
M4X12
Taptite, Bind S
M4X10
 Loading...


