2 - 39
Feed control mechanism
Basic of Assembly
Basic
Basic
4 Attachment of Reverse sewing lever A
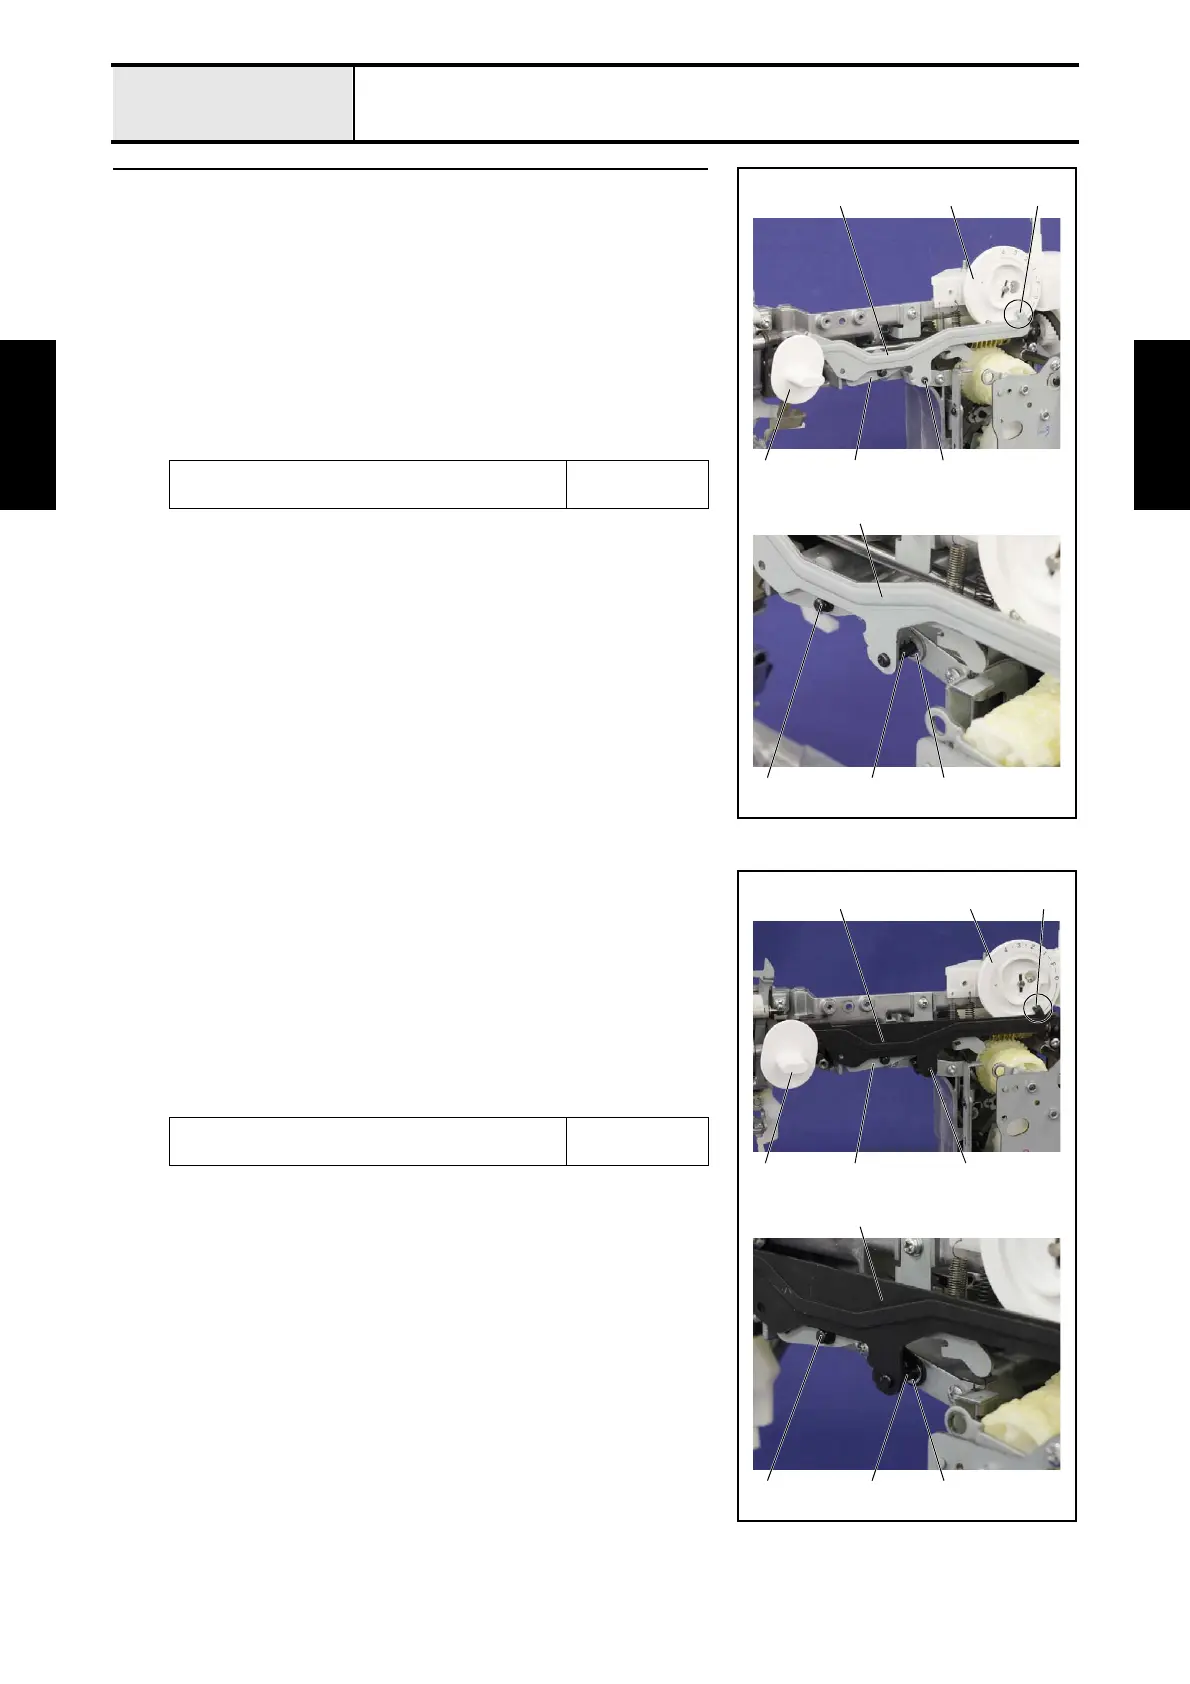
Type A
1. Set the reverse sewing lever A 1 to the shaft of the lever holder sub assy
2 while pushing down the reverse sewing lever B assy 3.
*Key point
• Check that there is the reverse sewing lever A 1 below the
shaft of the reverse sewing lever B assy 3.
• Check that hang the hook part 4 of reverse sewing lever A 1
on the groove of the dial 5.
2. Attach the retaining ring E4 6 to the shaft of the lever holder sub assy 2.
3. Attach the reverse sewing button 7 to the reverse sewing lever A 1.
Lubricate the EPNOC AP(N) 0 to the shaft of the
lever holder sub assy 2.
3mm dia. ball
1
7 23
5 4
1
2 63
Type B
1. Set the reverse sewing lever A 1 to the shaft of the lever holder sub assy
2 while pushing down the reverse sewing lever B assy 3.
*Key point
• Check that there is the reverse sewing lever A 1 below the
shaft of the reverse sewing lever B assy 3.
• Check that hang the hook part 4 of reverse sewing lever A 1
on the groove of the dial 5.
2. Attach the retaining ring E4 6 to the shaft of the lever holder sub assy 2.
3. Attach the reverse sewing button 7 to the reverse sewing lever A 1.
Lubricate the EPNOC AP(N) 0 to the shaft of the
lever holder sub assy 2.
3mm dia. ball
1
7 23
5 4
1
2 63
 Loading...


