2 - 47
Feed unit
Basic of Assembly
Basic
Basic
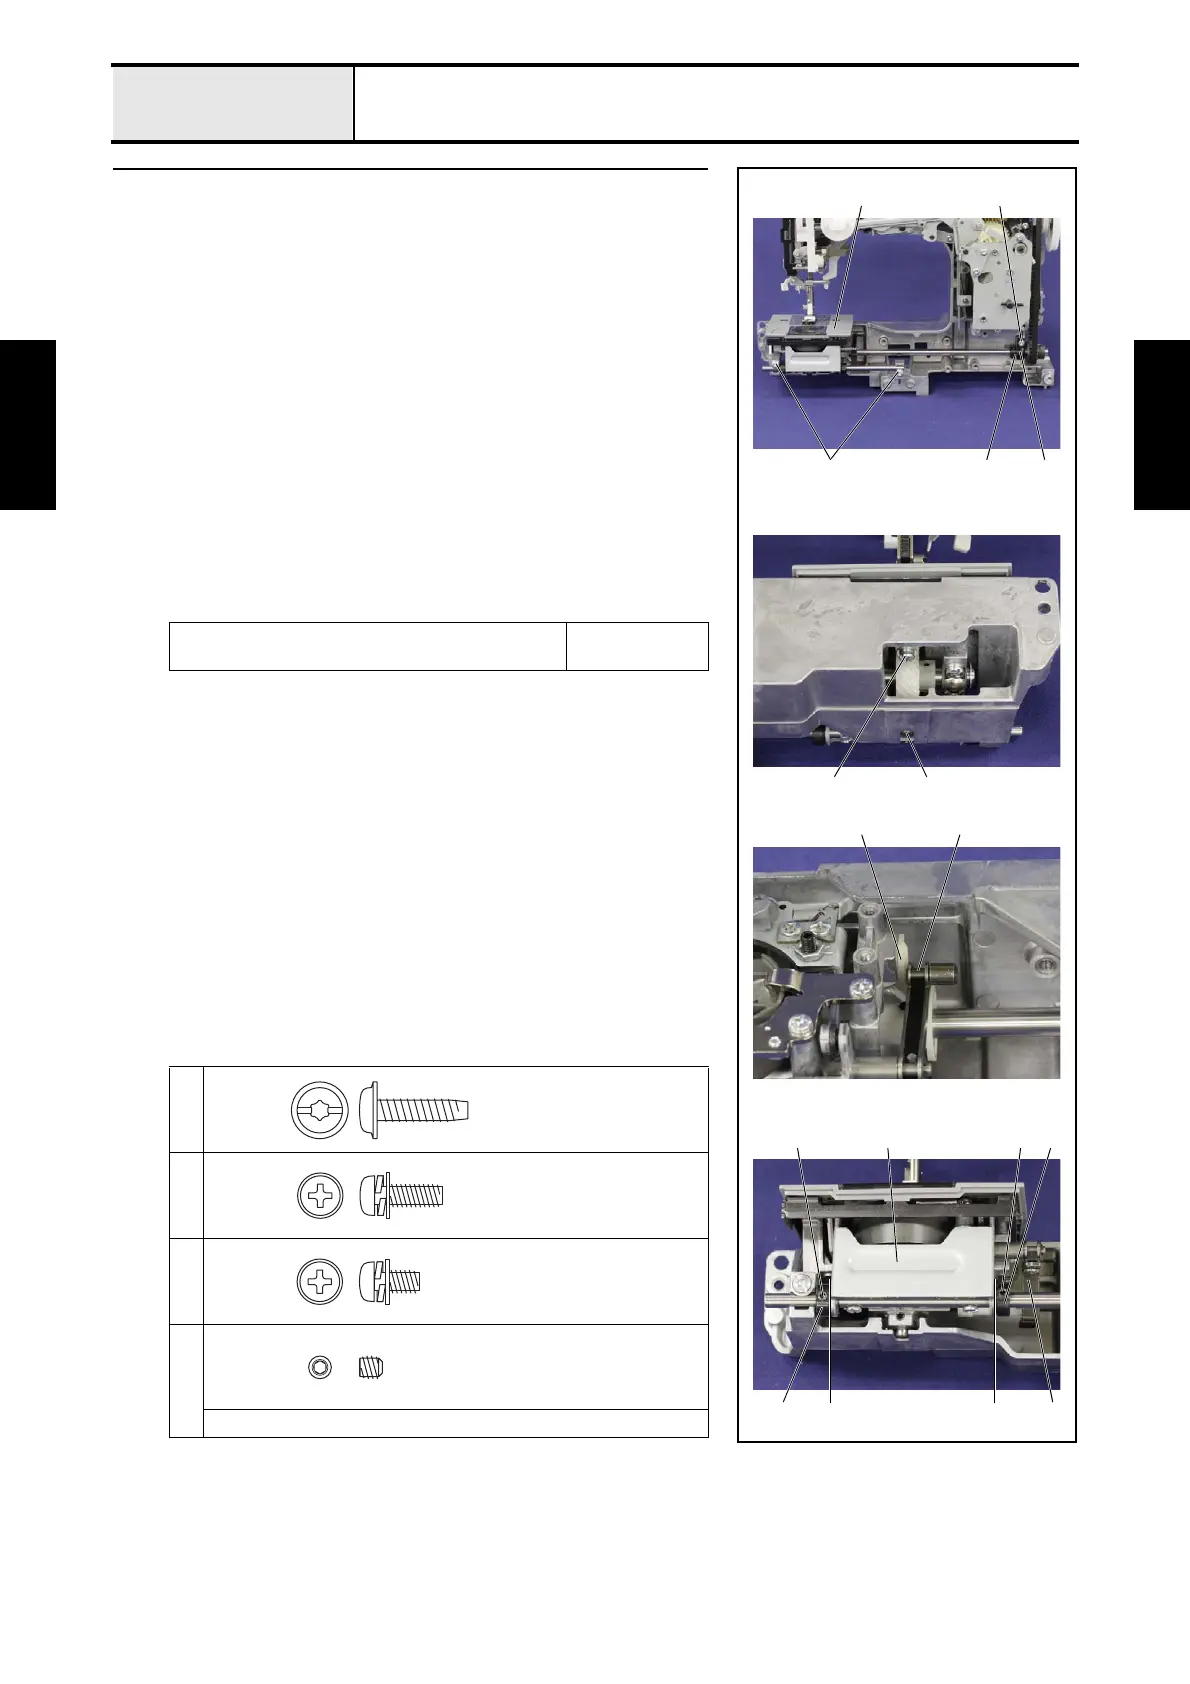
1 Attachment of Feed module
1. Set the feed module 1 to the arm bed, and then secure it with the 2 screws
1 and the screw 2.
*Key point
• Check that engage the outer rotary shaft 2 with the notch part
of the arm bed.
• Check that engage the lower shaft bushing 3 with the
positioning groove of the arm bed.
2. Set the bushing presser 4 to the arm bed, and then secure it with the screw
3.
3. Slide the feed stand assy 5 to the right side, and place the position where
the feed arm assy 6 contact the feed arm supporter 7.
*Key point
• The feed arm assy 6 is perpendicular to the lower shaft.
4. Slide the set screw collar 8 to the side of the feed stand assy 5, and then
tighten the screw 4 in the state of that the clearance is 0 mm.
5. Slide the set screw collar 9 to the side of the feed stand assy 5, and then
tighten the screw 5 in the state of that the clearance is 0.2 mm.
→Refer to 3 - 65 of the Assembly.
Apply OILER to the matching section of the lower
shaft and the lower shaft bushing 3.
1-2 drops
1
2
3
4
5
Hex wrench 2.0mm
1
1 3
4
2
3
2
4 5
6
5
8
9
0mm 0.2mm
7 6
Taptite, Cup S
M4X16
Screw, Pan (S/P washer)
M4X12DB
Screw, Pan (S/P washer)
M4X8DA
Set Screw, Socket (CP)
M4X4
 Loading...


