Inspection and
Adjustment
Inspection and
Adjustment
4 - 25
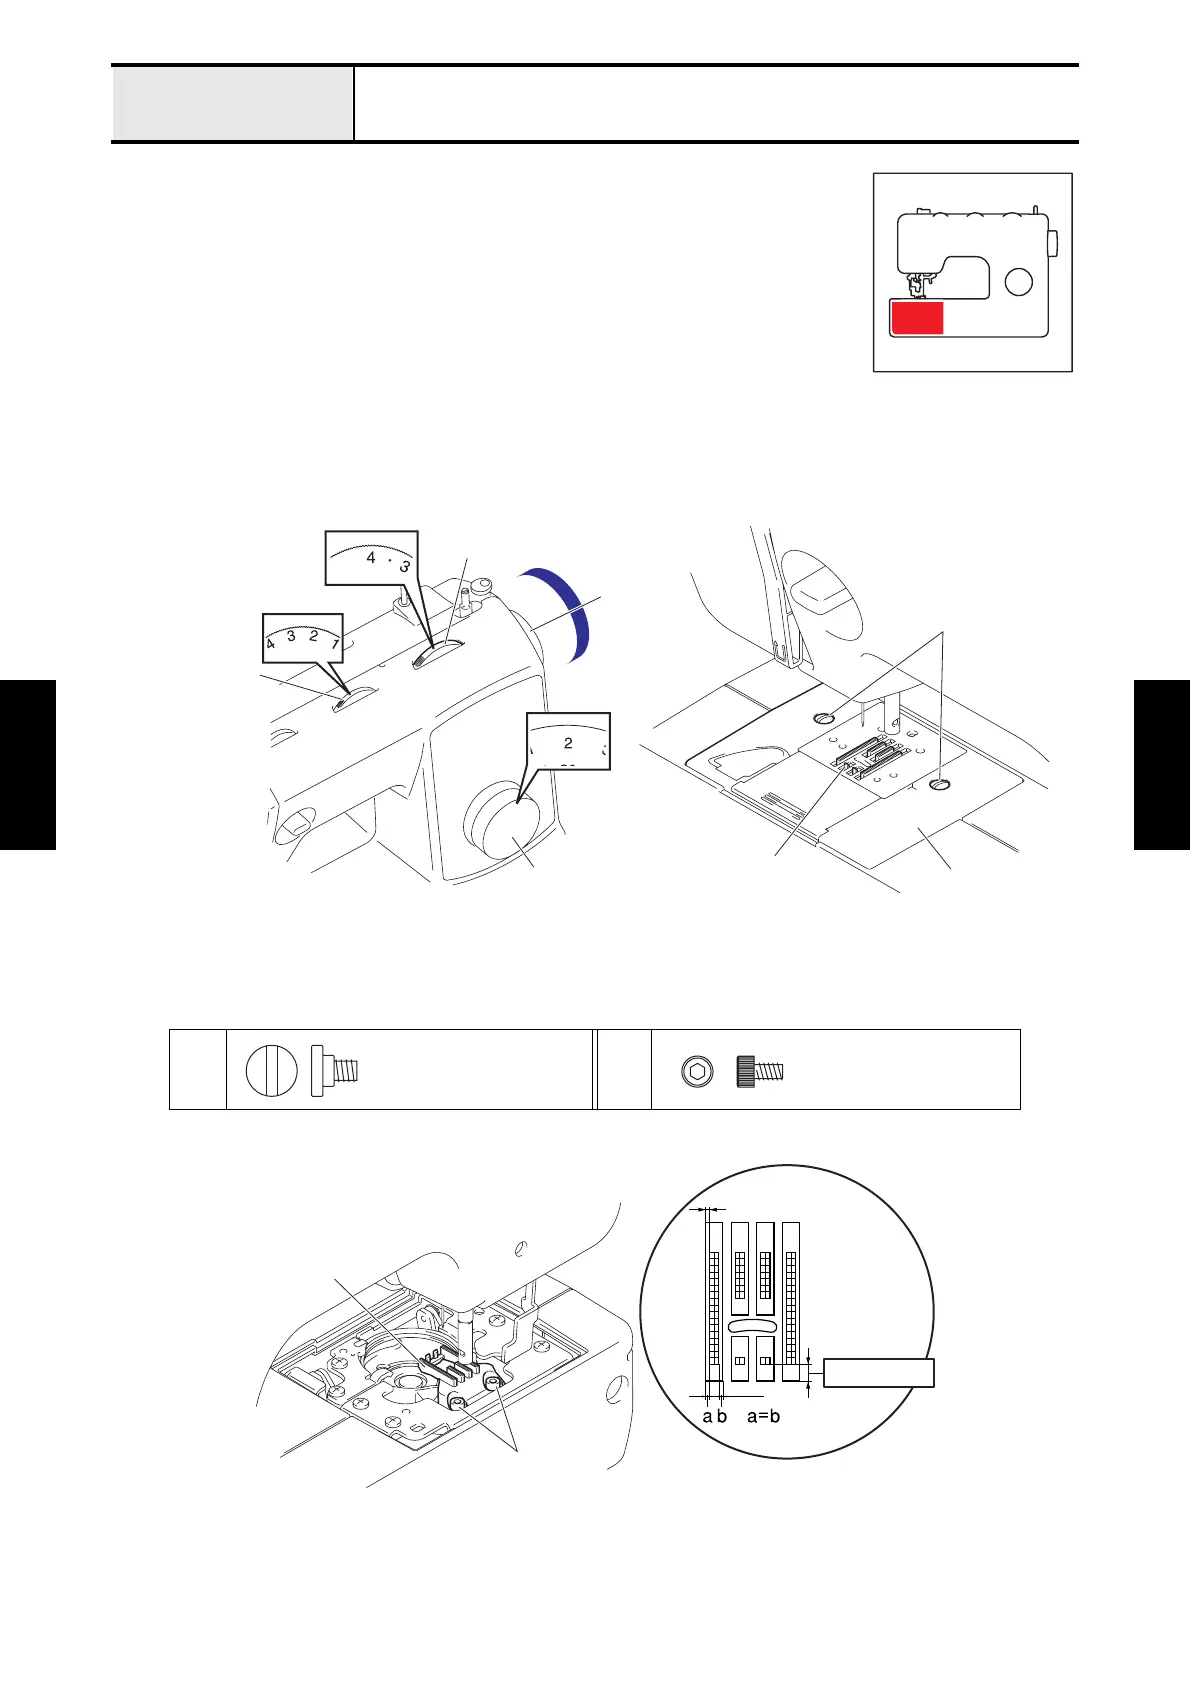
Adjustment Feed dog position (front/back and left/right)
[Standard]
1
At pattern selection dial [2] (straight stitch), stitch width dial [2.5] (center base line) and
stitch length dial [4] (feed : maximum), the minimum clearance between the front of the
feed dog and the needle plate should be 0.6 to 1.3 mm.
2
The left and right clearance between the feed dog and the needle plate should be the same.
[Adjustment]
1. Remove the presser foot.
2. Turn the pattern selection dial until the [2] is the topmost position.
3. Turn the stitch width dial until the [2.5] is the topmost position.
4. Turn the
stitch length dial
until the [4] is the topmost position.
5. Turn the pulley by hand and move the feed dog to the front position.
6. Remove the 2 screws 1 of the needle plate assy, and remove the needle plate assy.
7. Loosen the 2 screws 2 of the feed dog. Set the needle plate assy temporarily, and adjust the position of the
feed dog.
8. Tighten the 2 screws 2 of the feed dog to secure the feed dog to the feed stand assy.
9. Tighten the 2 screws 1 of the needle plate assy to secure the needle plate assy to the feed module.
12
Stitch length dial
Pattern selection dial
Stitch width dial
Pulley
Needle plate assy
Feed dog
1
Screw
needle plate
Bolt, Socket
M3X5
Feed dog
Parallel
with hex wrench 2.5 mm
0.6 - 1.3 mm
2
 Loading...


