2 - 51
Main motor unit
Basic of Assembly
Basic
Basic
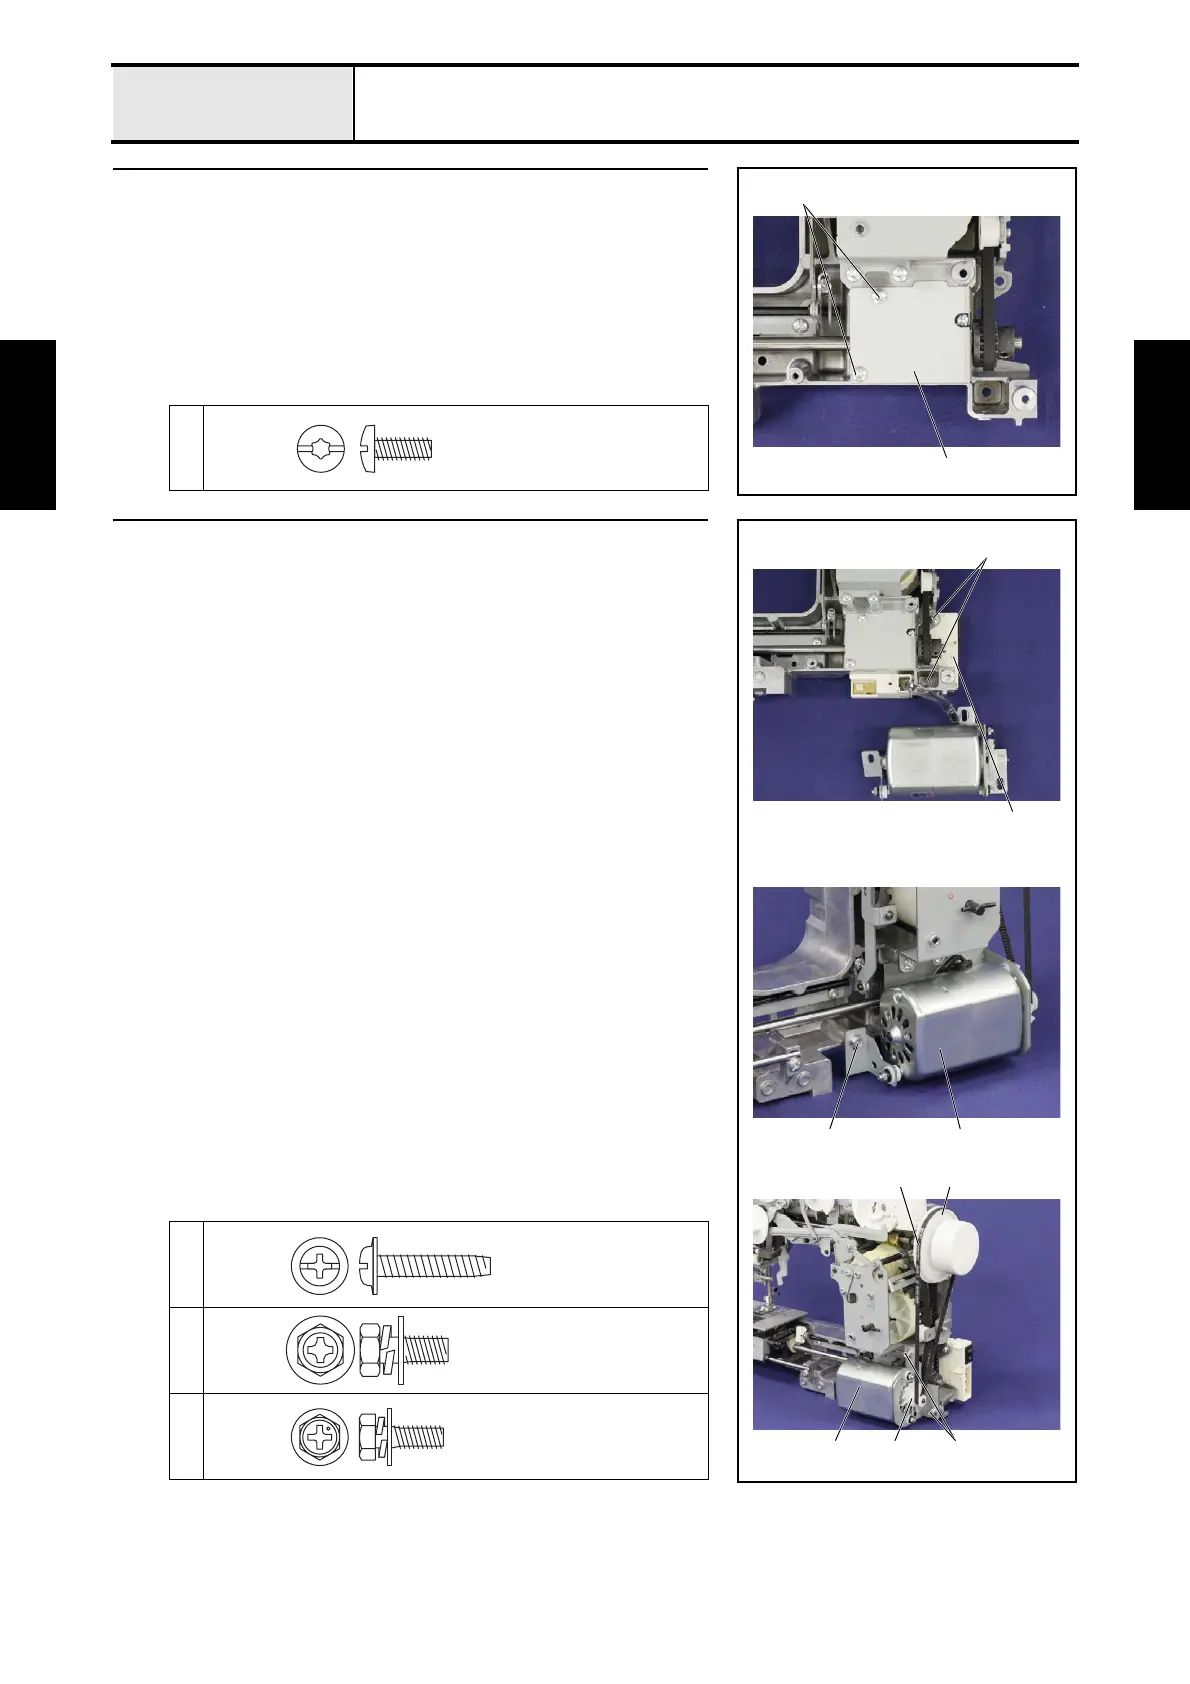
1 Attachment of Lower shaft plate
1. Set the lower shaft plate 1 to the arm bed with the 2 screws 1.
1
1
1
Taptite, Bind S
M4X10
2 Attachment of Motor 3P supply assy
120V specification
1. Set the 3P socket unit 1 of the motor 3P supply assy to the back side of the
arm bed, and then secure it with the 2 screws 1.
2. Set the motor assy 2 of the motor 3P supply assy to the front side of the
arm bed, and then tighten the 2 screws 2 and the screw 3 temporarily.
*Key point
• Fully tighten the 2 screws 2 and the screw 3 after performing
"4-6 Adjustment: Motor belt tension".
3. Hang the timing belt 3 on the motor T-pulley 4 and the T pulley 5.
<In case of 220 to 240V specification, refer to next page.>
→Refer to 3 - 77 of the Assembly.
1
2
3
1
1
23
3
2 24
5
Taptite, Cup P
M4X20
BOLT.
(S/P WASHER)
M5X12
Upset
4X12DB
 Loading...


