3 - 62
Needle threading mechanism
Application of Assembly
Application
Application
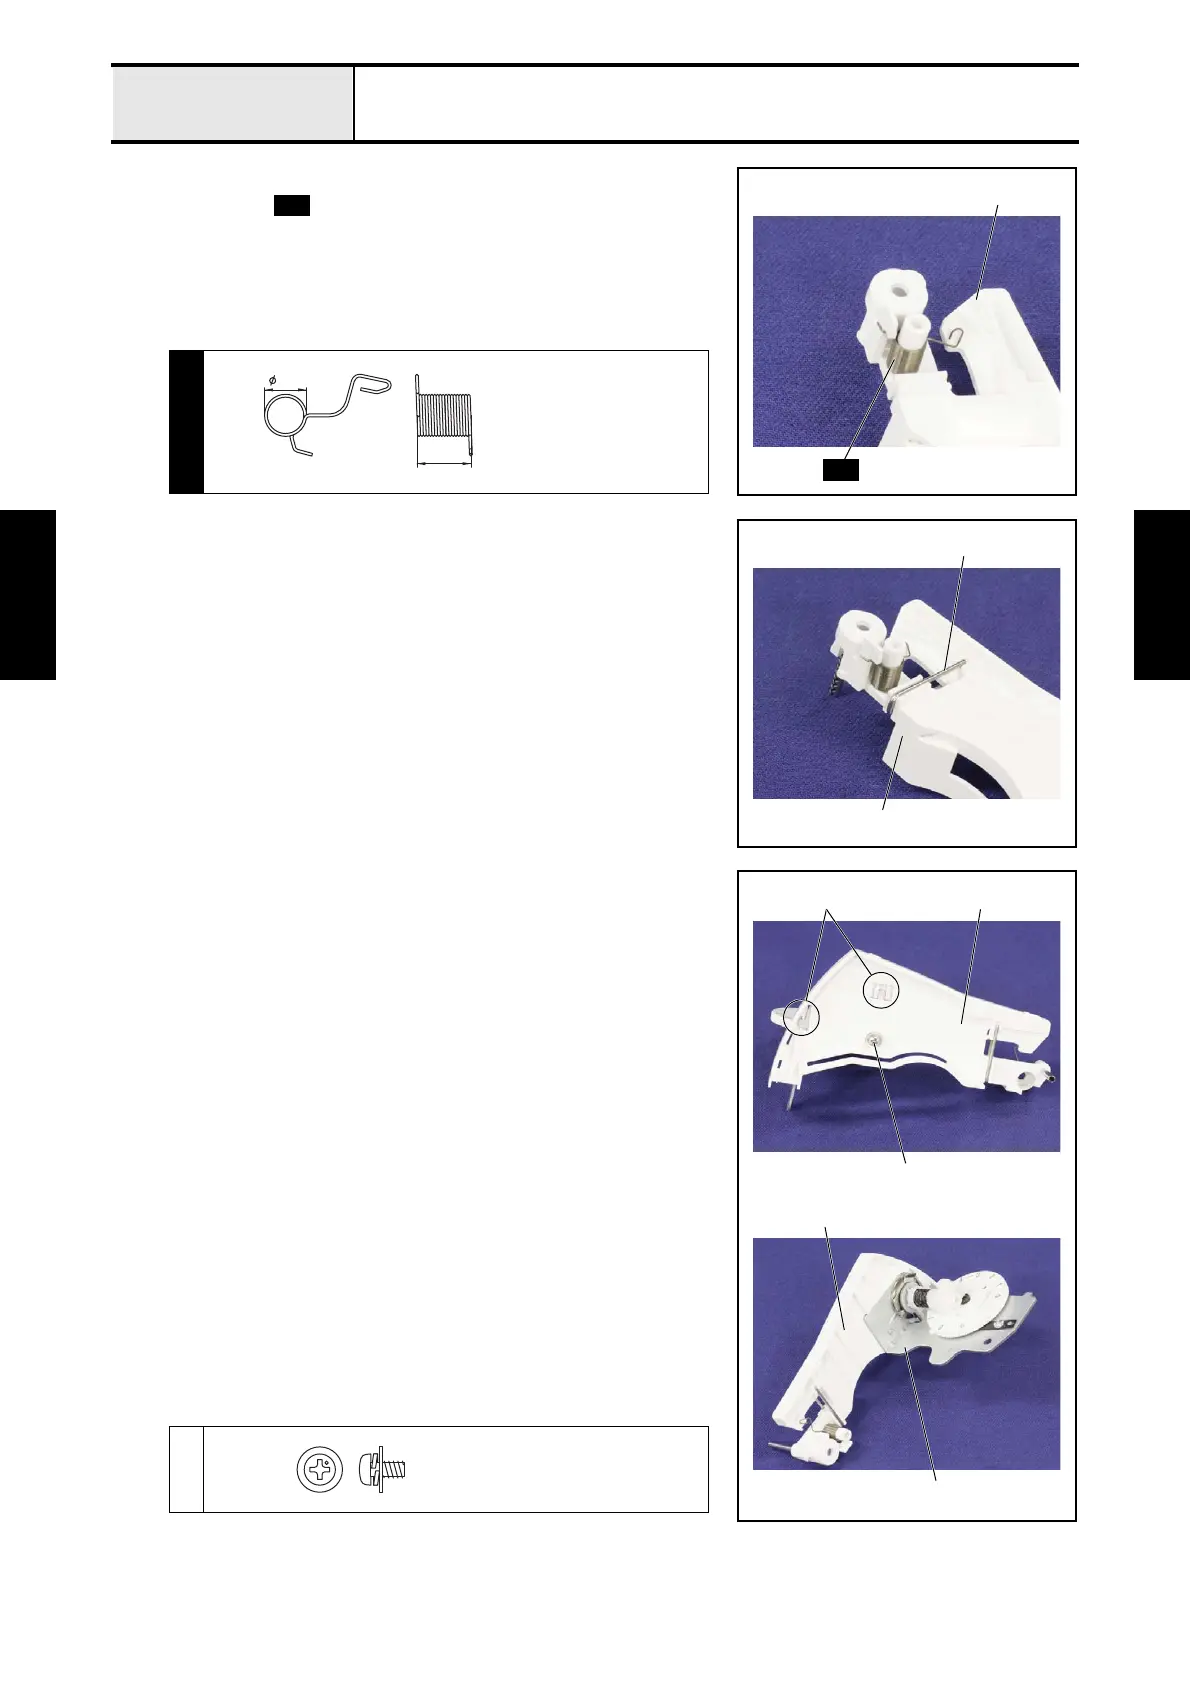
2-2 Attachment of Thread take up spring
1. Set the spring to the thread guard cover assy 1 as shown in the right
figure.
S06
1
S06
S06
9.5
7.4
THREAD TAKE UP SPRING
XE9100***
2-3 Attachment of Thread guide wire
1. Set the thread guide wire 1 to the groove of the thread guard cover assy
2.
2
1
2-4 Attachment of Thread guard cover assy
Type A
1. Set the thread guard cover assy 1 to the thread tension holder assy 2 as
shown in the right figure, and then secure it with the screw 1.
*Key point
• Check that engage the 2 protrusions 3 of the thread tension
holder assy 2 with the 2 gullets of the thread guard cover
assy 1.
<In case of Type B, refer to next page.>
1
1
13
2
1
Screw, Pan (S/P washer)
M3X6DA
 Loading...


