3 - 61
Application of Assembly
Needle threading mechanism
Application
Application
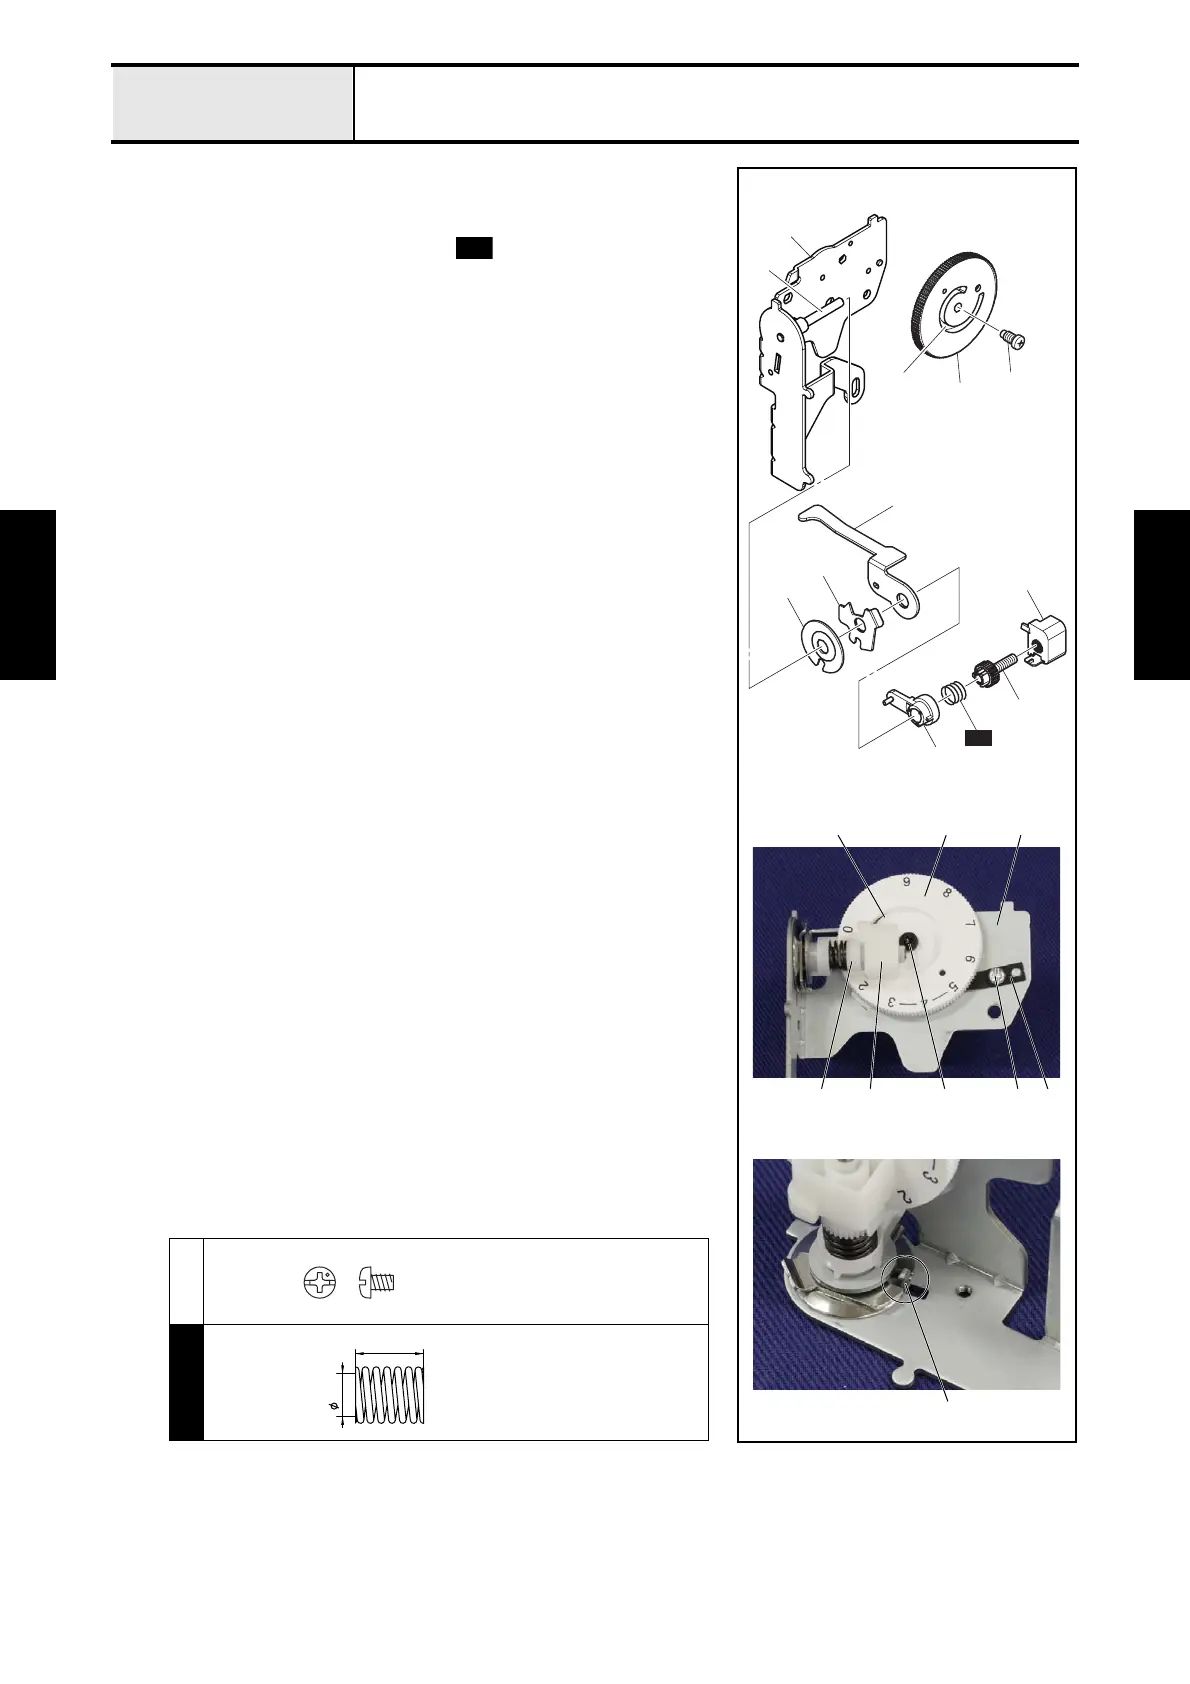
Type B
1. Set the thread tension adjusting screw 1 to the thread tension nut 2.
2. Insert the tension disc A 3, the tension plate 4, the tension release plate
5, the spring holder 6 and the spring in this order into the shaft 7
of the thread tension holder assy 8.
*Key point
• Check that align the notch part 9 of the tension disc A 3 and
the tension plate 4 with the protrusion of the thread tension
holder assy 8.
3. Engage the groove part 0 of the thread tension dial A with the protrusion
of the thread tension nut 2, and insert the thread tension adjusting screw
1 into the shaft 7 of the thread tension holder assy 8, and then set the
thread tension dial A to the thread tension holder assy 8 with the tension
dial shaft B.
*Key point
• Set the tension dial shaft B to the thread tension dial A in the
state that the (9) of the thread tension dial A is the topmost
position.
4. Set the notch spring C to the thread tension holder assy 8 with the screw
1.
*Key point
• Attach the end of the notch spring C to the lower side of the
thread tension dial A.
• Check that engage the boss part of the thread tension holder
assy 8 with the positioning hole of the notch spring C.
<In case of Type A, refer to previous page.>
1
S07
B2 C11
A 8
S07
B
A
5
8
7
0
4
6
1
2
3
9
0
S07
Screw, Pan
M3X4
7.6
12
SPRING
X55842***
 Loading...


