3 - 67
Feed unit
Application of Assembly
Application
Application
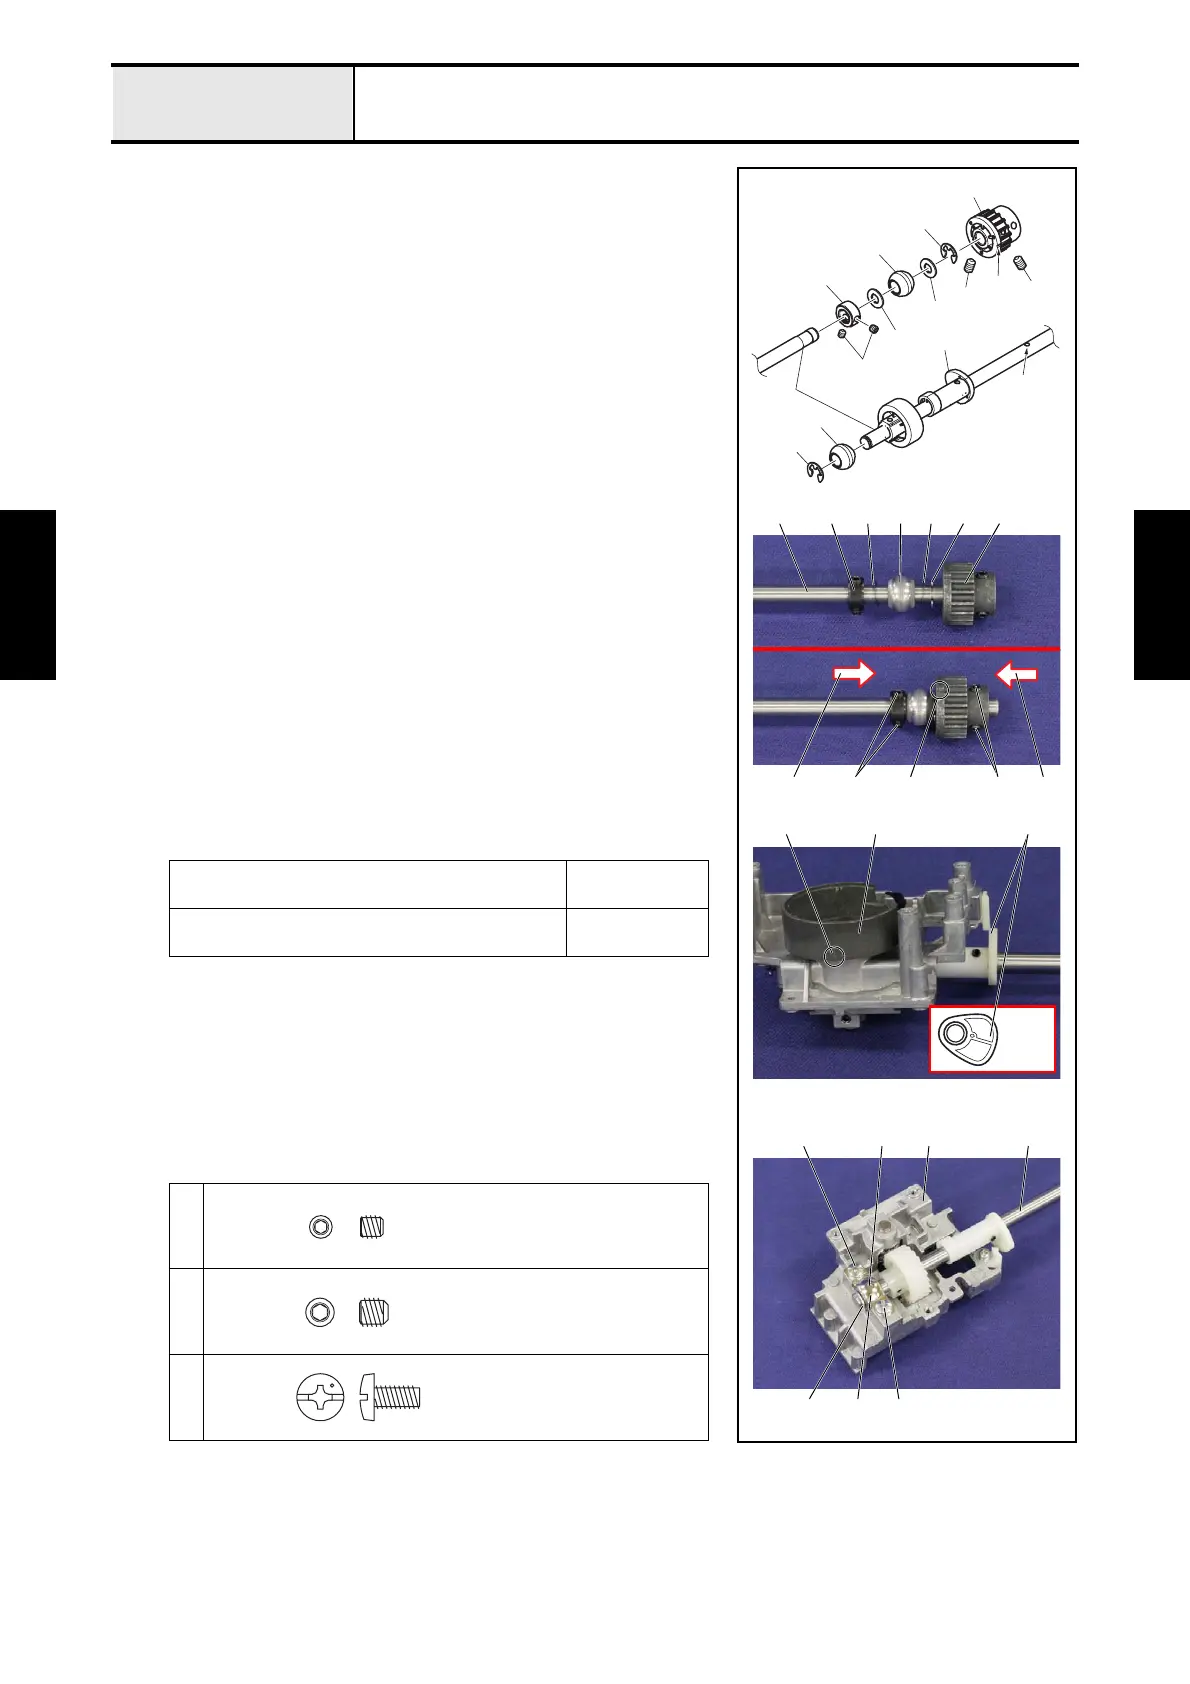
1-3 Assembly/Attachment of Lower shaft assy
1. Set the set screw collar 1, the washer thrust 2, the lower shaft bushing 3
and the washer thrust 4 to the lower shaft assy 5, and then attach the
retaining ring E6 6.
2. Tighten the 2 screws 1 while pushing the set screw collar 1 to the
direction of the arrow 7.
*Key point
• Check that it is not a wobble, and it moves smoothly.
3. Set the timing pulley D 8 to the lower shaft assy 5, and slide it to the
direction of the arrow 9, and then tighten the 2 screws 2 temporarily.
*Key point
• Set the groove 0 of the timing pulley D 8 facing frontward so
that the larger end of the feed cam A facing backward in the
state that the positioning hole B with the vertical.
• Fully tighten the 2 screws 2 after performing "4-19
Adjustment: Needle bar rising".
4. Set the lower shaft bushing C to the lower shaft assy 5, and then attach
the retaining ring E6 D.
5. Set the lower shaft assy 5 to the bottom side of the feed holder E.
*Key point
• Check that the lower shaft bushing C is set the positioning
part of the back side of the feed holder E.
• When attaching the lower shaft assy 5, set the outer rotary
hook F with the mark G facing frontward, and set the lower
shaft assy 5 so that the larger end of the feed cam A facing
backward in the state that the positioning hole B with the
vertical.
6. Set the bushing presser H to the back side of the feed holder E, and then
secure it with the 2 screws 3.
Apply FBK OIL RO 100 to the left and right end of
the lower shaft bushing 3.
2 drops
Apply FBK OIL RO 100 to the left and right end of
the lower shaft bushing C.
2 drops
1
2
3
3
3 5
HD
EC
5
C
1
2
2
6
0
8
3
1
4
2
A
B
D
1
5 1 2 3 64
7 92
8
G A
Rear
F
0
Set Screw, Socket (FT)
M4X4
Set Screw, Socket (CP)
M5X5
Screw, Bind
M4X8
 Loading...


