Inspection and
Adjustment
Inspection and
Adjustment
4 - 13
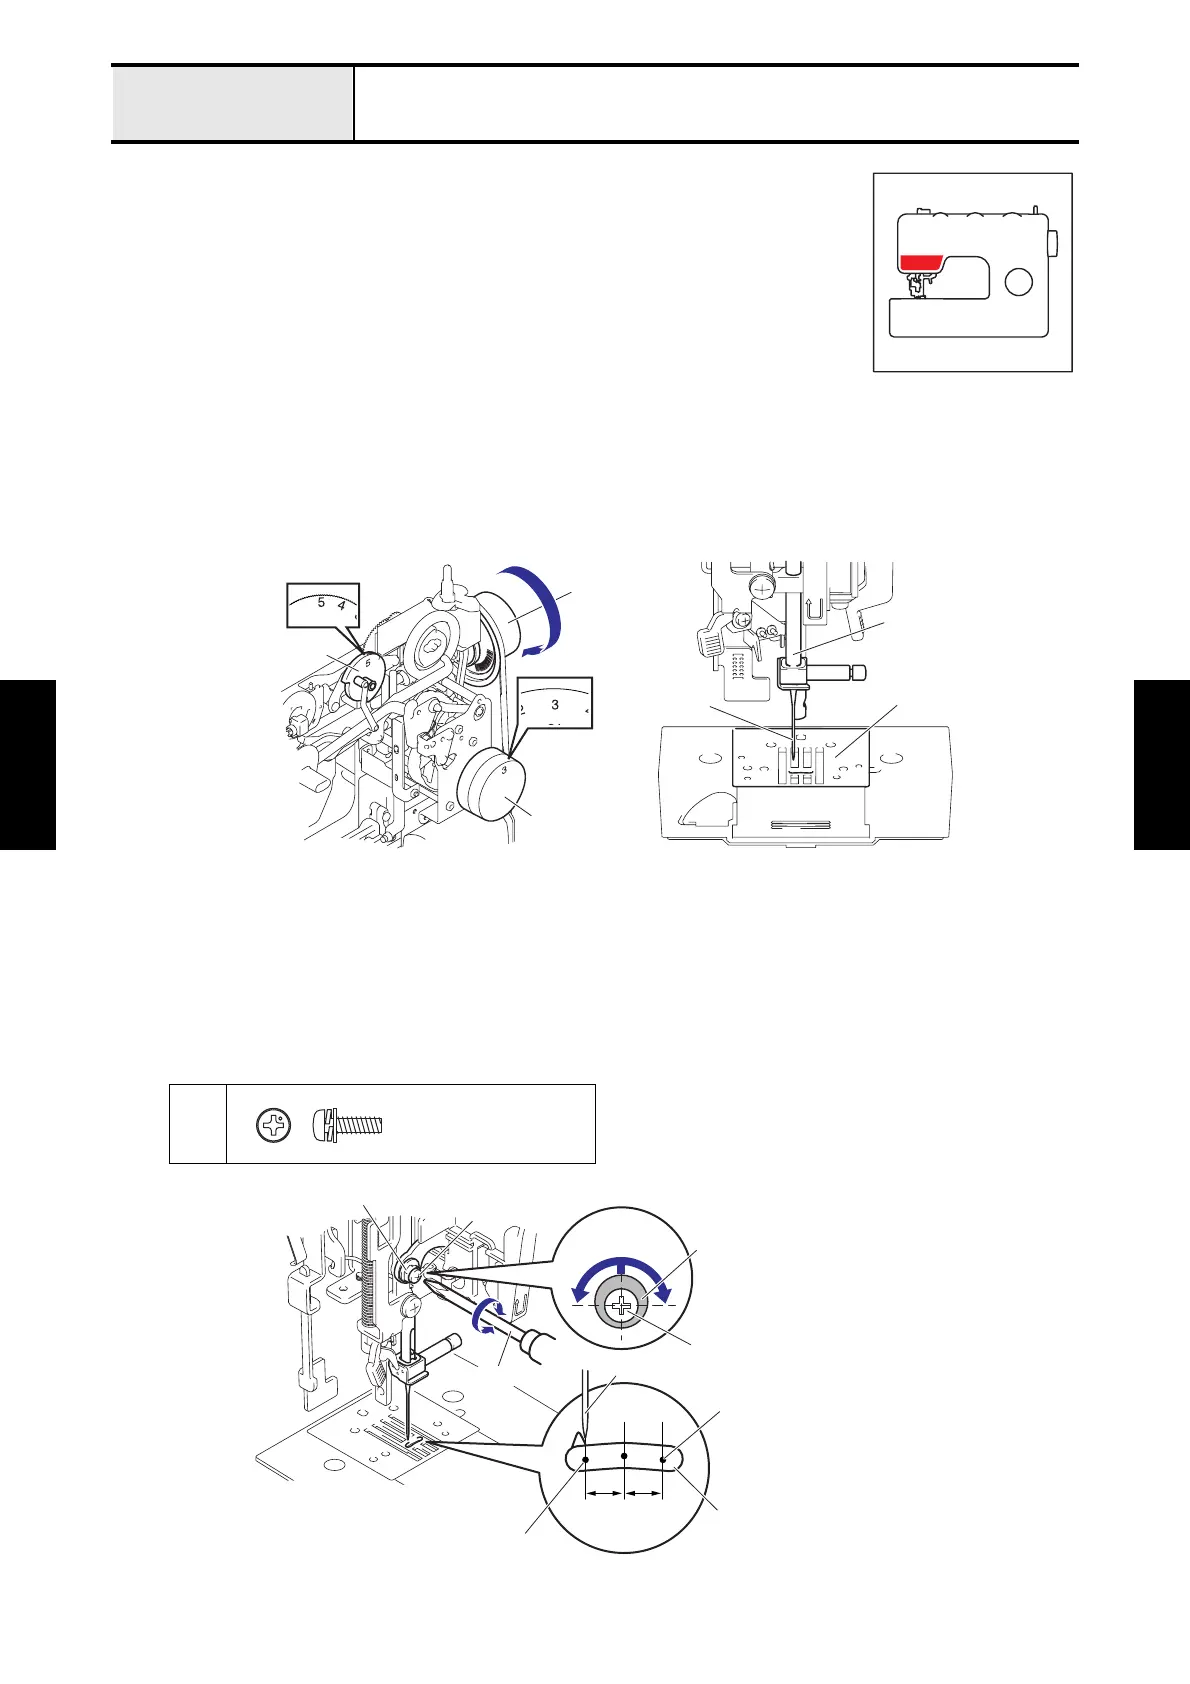
Adjustment Three point needle drop
[Standard]
At pattern selection dial [3] (zigzag stitch) and stitch width dial [5] (maximum), the left
and right needle drop position should be the same to the center of the needle hole.
[Adjustment]
1. Turn off the power, and then remove the foot controller.
2. Remove the face plate and the pattern selection dial, and remove the front cover and
the rear cover.
3. Remove the presser foot.
4. Attach the size 90/14 needle.
5. Attach the pattern selection dial.
6. Turn the pattern selection dial until the [3] is the topmost position.
7. Turn the stitch width dial until the [5] is the topmost position.
8. Turn the pulley by hand until the needle top comes to the needle plate surface. (Needle bar is left side.)
9. Loosen the screw 1 of the zigzag adjusting nut.
10. Adjust
the left/right needle drop position so that the same to the center of the needle hole by turning the
zigzag
adjusting nut
with a spanner.
*Key point
• Adjust it within the range where the large side of the eccentric amount of the zigzag adjusting nut is upper side.
11. Tighten the screw 1 of the zigzag adjusting nut to secure the zigzag adjusting nut.
*Key point
• When tightening the screw
1 of the zigzag adjusting nut, keep the zigzag adjusting nut from moving.
1
Needle
Needle plate
Needle bar
Pulley
Pattern
selection dial
Stitch width dial
Screw, Pan (S/P washer)
M3X10DA
ab
a = b
Needle hole of needle plate
Right needle drop point
Left needle drop point
Adjusting range
Screwdriver
Zigzag adjusting nut
1
1
Needle
Zigzag adjusting nut
 Loading...


