Inspection and
Adjustment
Inspection and
Adjustment
4 - 19
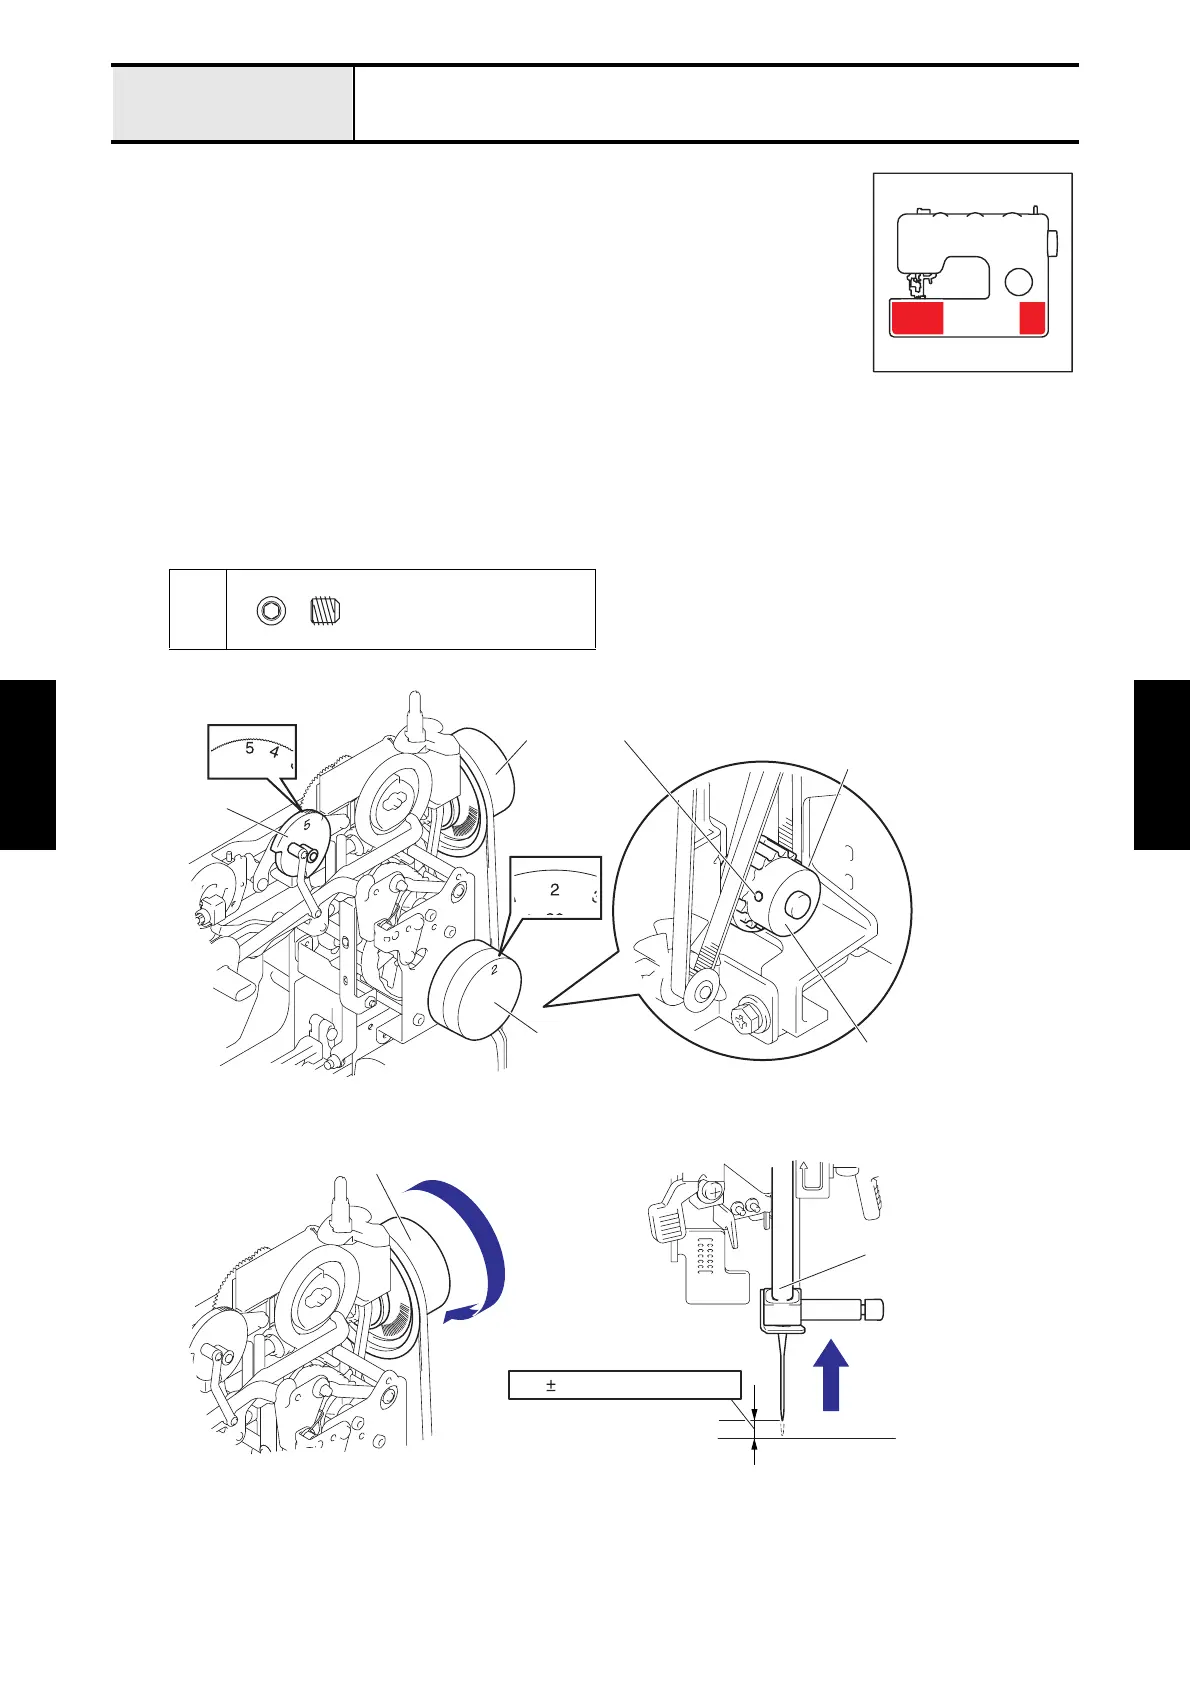
Adjustment Needle bar rising
[Standard]
At pattern selection dial [2] (straight stitch) and stitch width dial [5] (left base line), the
right edge of the needle matches up with the outer rotary hook point when the needle bar is
raised 3.1 ±0.2 mm (2.9 to 3.3 mm) from its lowest point.
[Adjustment]
1. Turn off the power, and then remove the foot controller.
2. Remove the face plate and the pattern selection dial, and remove the front cover and
the rear cover.
3. Remove the needle plate assy, the presser foot and the inner rotary hook assy.
4. Attach the size 90/14 needle.
5. Attach the pattern selection dial.
6. Turn the pattern selection dial until the [2] is the topmost position.
7. Turn the stitch width dial until the [5] is the topmost position.
8. Loosen the screws 1 and 2 of the timing pulley D.
9. R
aise the needle bar up 3.1 mm from its lowest point by turning the pulley by hand from the rear to the front.
<To next page>
1
2
Set Screw, Socket (CP)
M5X5
Pattern
selection dial
Timing pulley D
Stitch width dial
Pulley
with hex wrench 2.5 mm
with hex wrench 2.5 mm
1
2
Pulley
Needle bar
Lowest point
3.1 0.2 mm (2.9 - 3.3 mm)
 Loading...


