Failure Investigation
for Electronic Parts
Failure Investigation for Electronic Parts
Failure Investigation
for Electronic Parts
5 - 2
Sewing lamp does not light
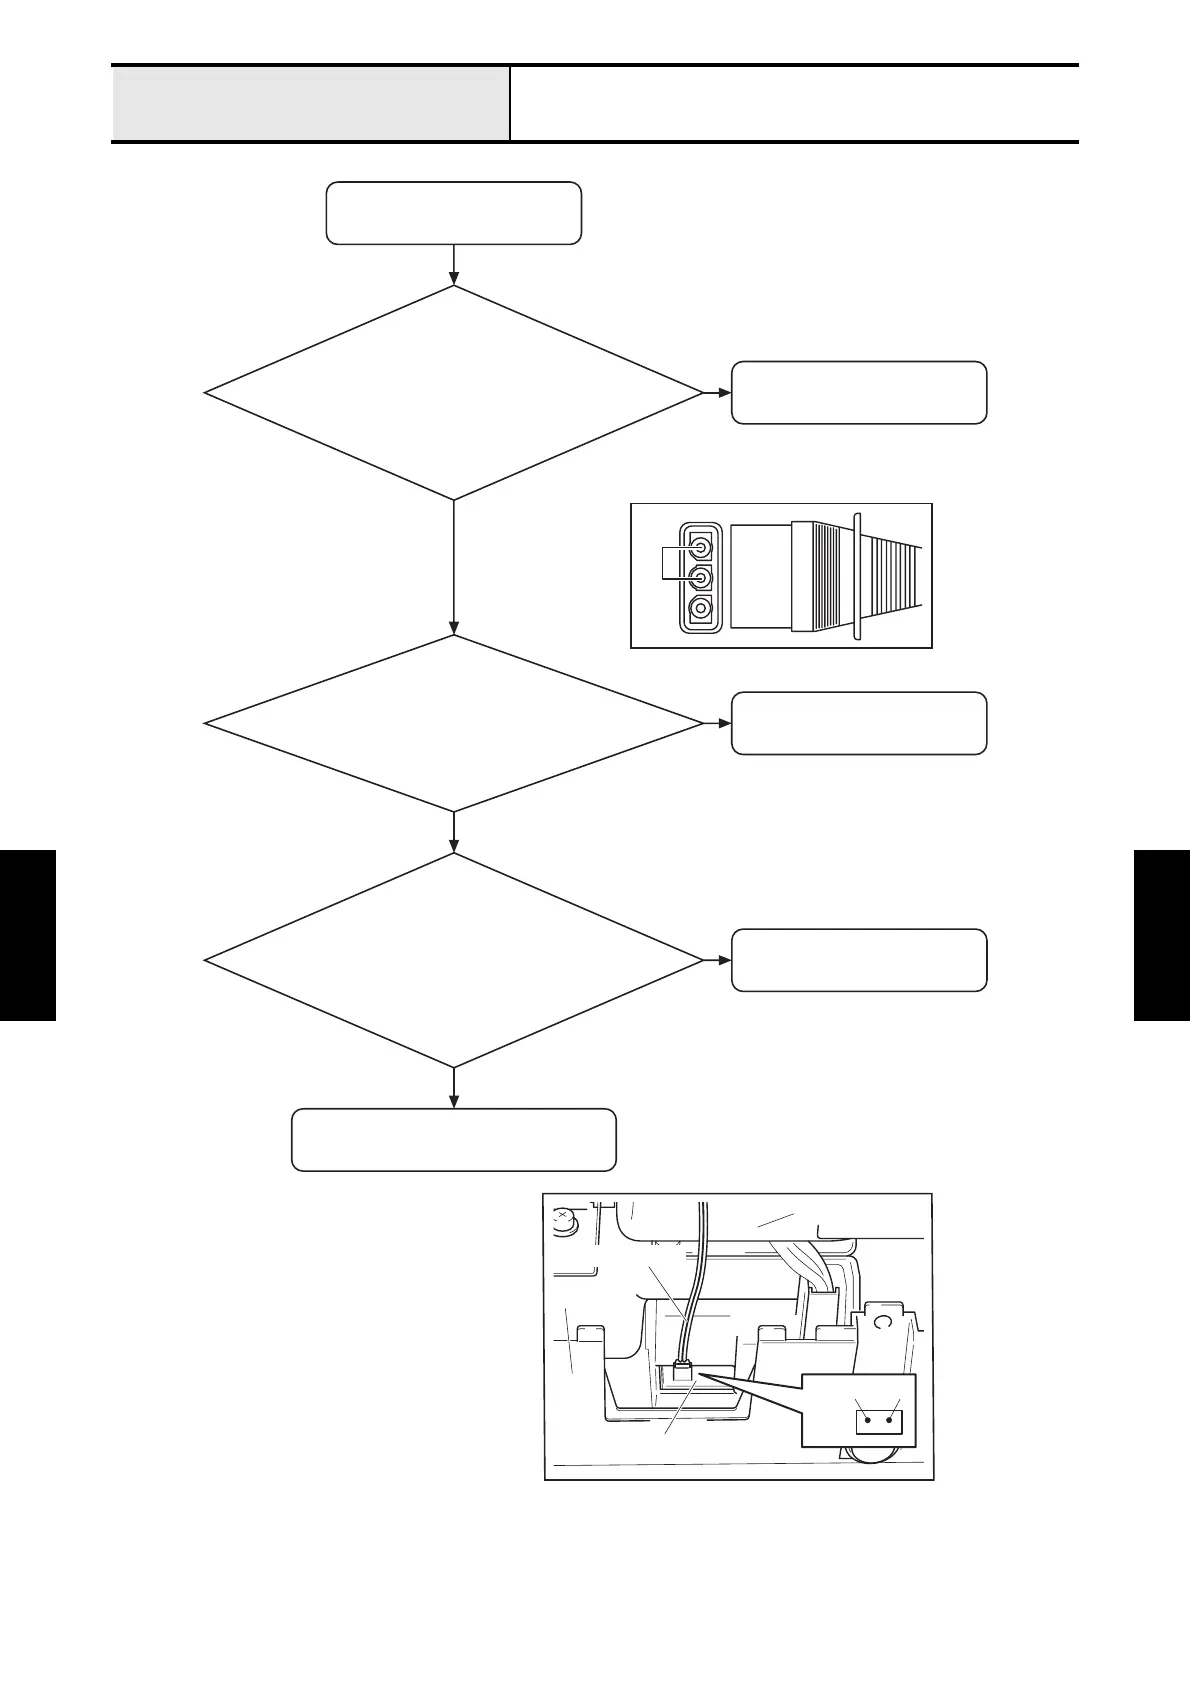
Sewing lamp does not light.
Replace the motor 3P supply assy.
N
Replace the foot controller.
Y
Replace the LED lamp assy.
When unplug the foot controller plug
from the socket of the machine, is the
voltage between pins A of the plug 108
to 132V AC? (for 120V AC countries) *
1
Y
N
N
Connect it properly.
Is the LED lamp assy connector
connected to the power supply
PCB (CN2) correctly?
Y
* Refer to Fig. 1.
* Refer to Fig. 2.
Fig. 2
When disconnect the LED lamp assy
connector from the power supply PCB
(CN2), is the voltage between pins 1
and 2 at CN2 10 to 12V DC?
* Refer to Fig. 2.
CN2
21
Power supply PCB
LED lamp lead wire
Rear cover
Front cover
*1 For 220 to 240V AC countries : 198 to 264V AC
Fig. 1
A
 Loading...


