Inspection and
Adjustment
Inspection and
Adjustment
4 - 33
Adjustment Straight forward/Straight reverse stitch length
<From previous page>
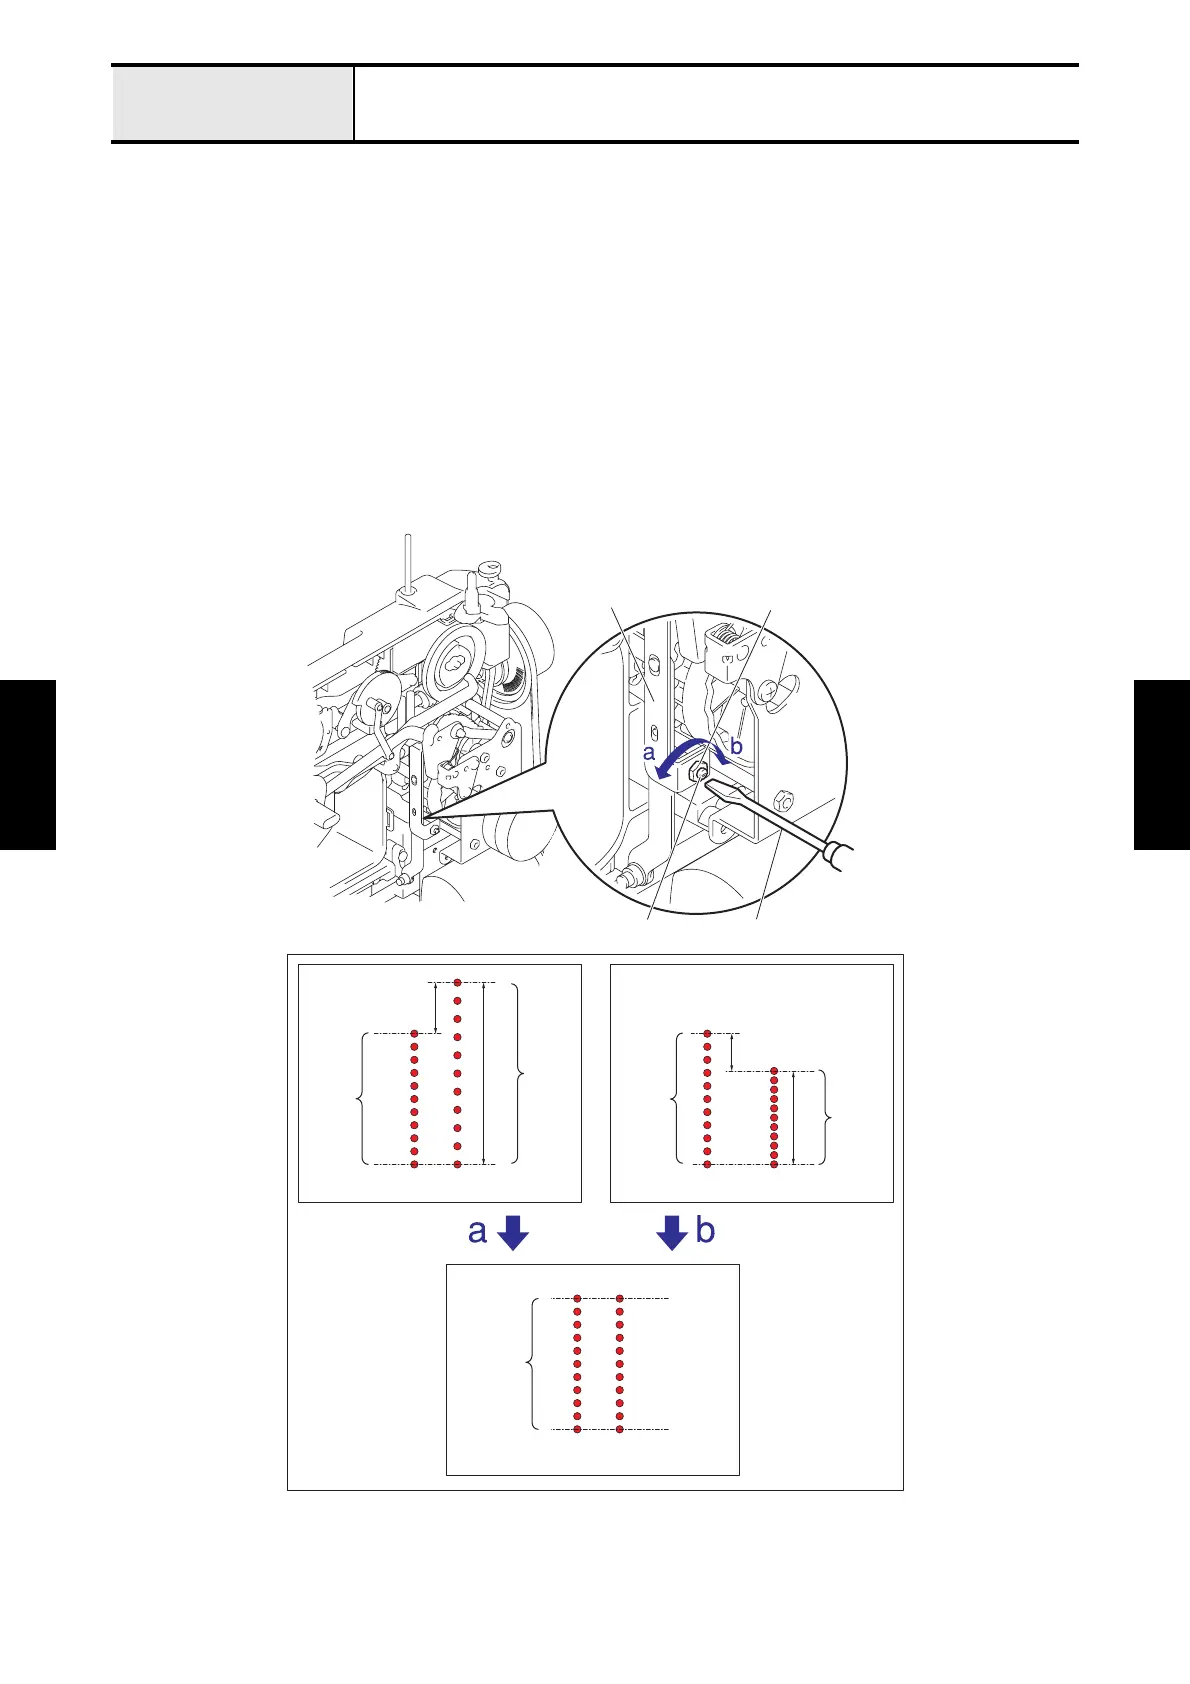
10. Loosen the nut 4 on the adjusting screw of the connecting rod assy.
*Key point
• Do not loosen the nut 4 too much. (When the nut 4 is loosened too much, the adjusting screw is removed.)
11. Adjust the stitch length so that the forward stitch length (10 pitches) and the reverse stitch length (10 pitches)
are the same by turning the adjusting screw of the connecting rod assy.
*Key point
• Turn the adjusting screw counterclockwise (Turn to the direction “a”). (Connecting rod assy is shorter.)
→ Reverse stitch length “ f ” is shorter. (Fig. 3 “a”)
• Turn the adjusting screw clockwise (Turn to the direction “b”). (Connecting rod assy is longer.)
→ Reverse stitch length “ f ” is longer. (Fig. 3 “b”)
12. Tighten the nut 4 on the adjusting screw of the connecting rod assy to secure the adjusting screw.
*Key point
• When tightening the nut 4 of the adjusting screw, keep the adjusting screw from moving.
f
more than 4 mm
f
more than 4 mm
10
pitches
10
pitches
10
pitches
10
pitches
10
pitches
NG NG
OK
Fig. 3
Forward stitch Reverse stitch Forward stitch Reverse stitch
Forward stitch Reverse stitch
Adjusting screw
Nut 4
Flat screwdriver
Connecting rod assy
 Loading...


