COPYRIGHT
©
2001 CANON INC. 2000 2000 2000 2000 CANON CLC5000 REV.0 JAN. 2001
CHAPTER 5 TROUBLESHOOTING IMAGE FAULTS/MALFUNCTIONS
5-9
2.1.3 Checking and Adjusting the Non-Image Width and Margin
Make adjustments in the following order:
• Left-right registration
• Image margin
• Image reading start position (ADJ-XY)
• Image margin (check)
a.Adjusting the Left/Right Registration
1) Make 10 copies each using all cassettes,
multifeeder, duplexing unit, and paper
deck, and check the left/right margin.
2) If the margin is not as indicated, per-
form the following:
• Standard Registration
3) Select ‘FUNC > ATTRACT’.
4) Using ‘ATT-SLCT’, select the pick-up
assembly which is outside the specifica-
tion.
5) Press ‘ATT-ON’.
(Paper will be picked up automatically
and stopped retained on the transfer
belt.)
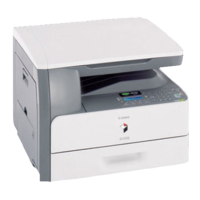
6) Make adjustments so that the distance L
between the front edge of paper [1] and
the front side plate [3] of the transfer
unit [2] is 74.7 ±0.5 mm (reference).
(In the case of LTR, 83.7 ±0.5 mm.)
F05-201-05 Standard Registration
• Using the Cassette as the source of Paper
1) Slide out the cassette from the machine.
2) Remove the cassette front cover.
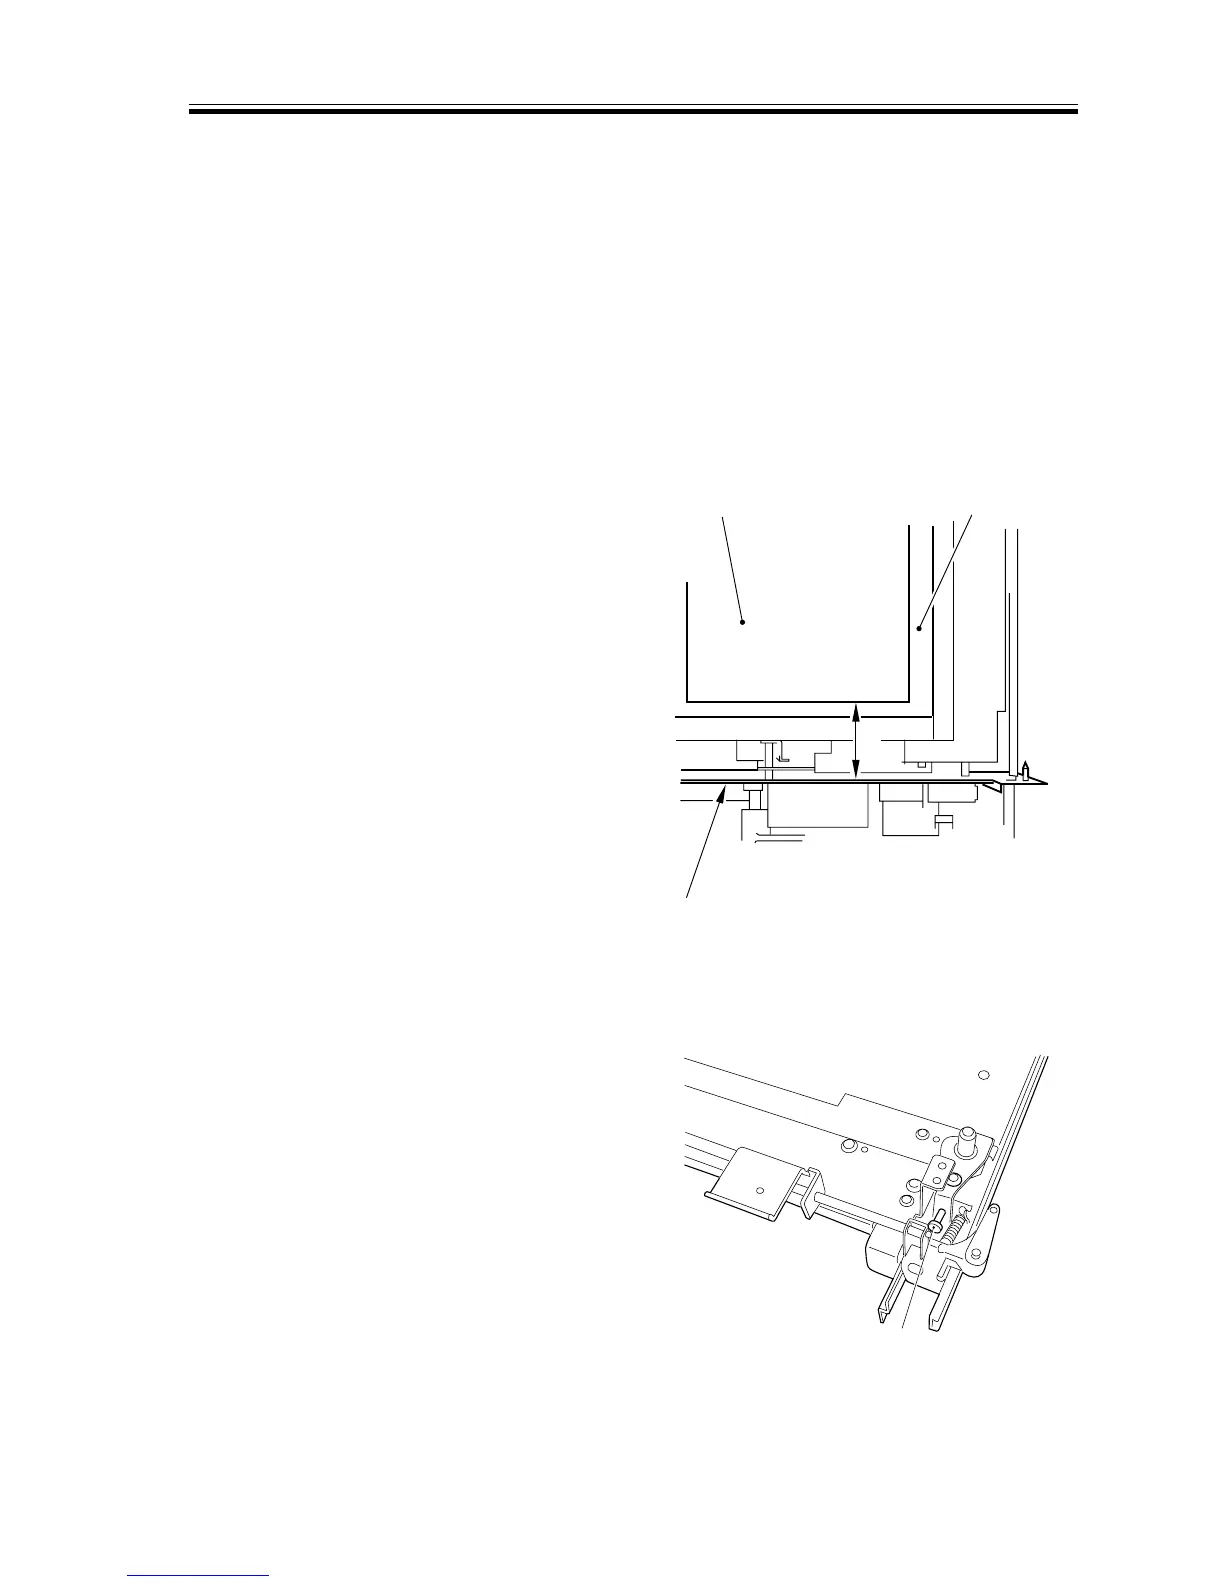
3) Turn the adjusting screw [1] to adjust
the position of the horizontal registra-
tion plate.
• To increase the registration at the
front, turn the adjusting screw to the
left.
• To increase the registration at the
rear, turn the adjusting screw to the
right.
4) After the adjustment, be sure to execute
‘paper width basic value registration’.
F05-201-06 (top view of cassette stay)
L
[1]
[2]
[3]
[1]