COPYRIGHT
©
2001 CANON INC.
2000 2000 2000 2000
CANON CLC5000 REV.0 JAN. 2001
CHAPTER 3 INSTALLATION
3-7
Scanner fixing
3.2 Removing the Fixings, Supplying Fixing Oil, and Changing
the Voltage Rating (240V North American Model)
Step Work Remarks
1 Take out the C, M, Y, and Bk starter
bottles, and shake them well. Open the
caps, peel off the seals, and keep them
in a dust-free environment.
2 Remove the strips of tape from the parts
of the machine and the protection sheet
used for the copyboard glass.
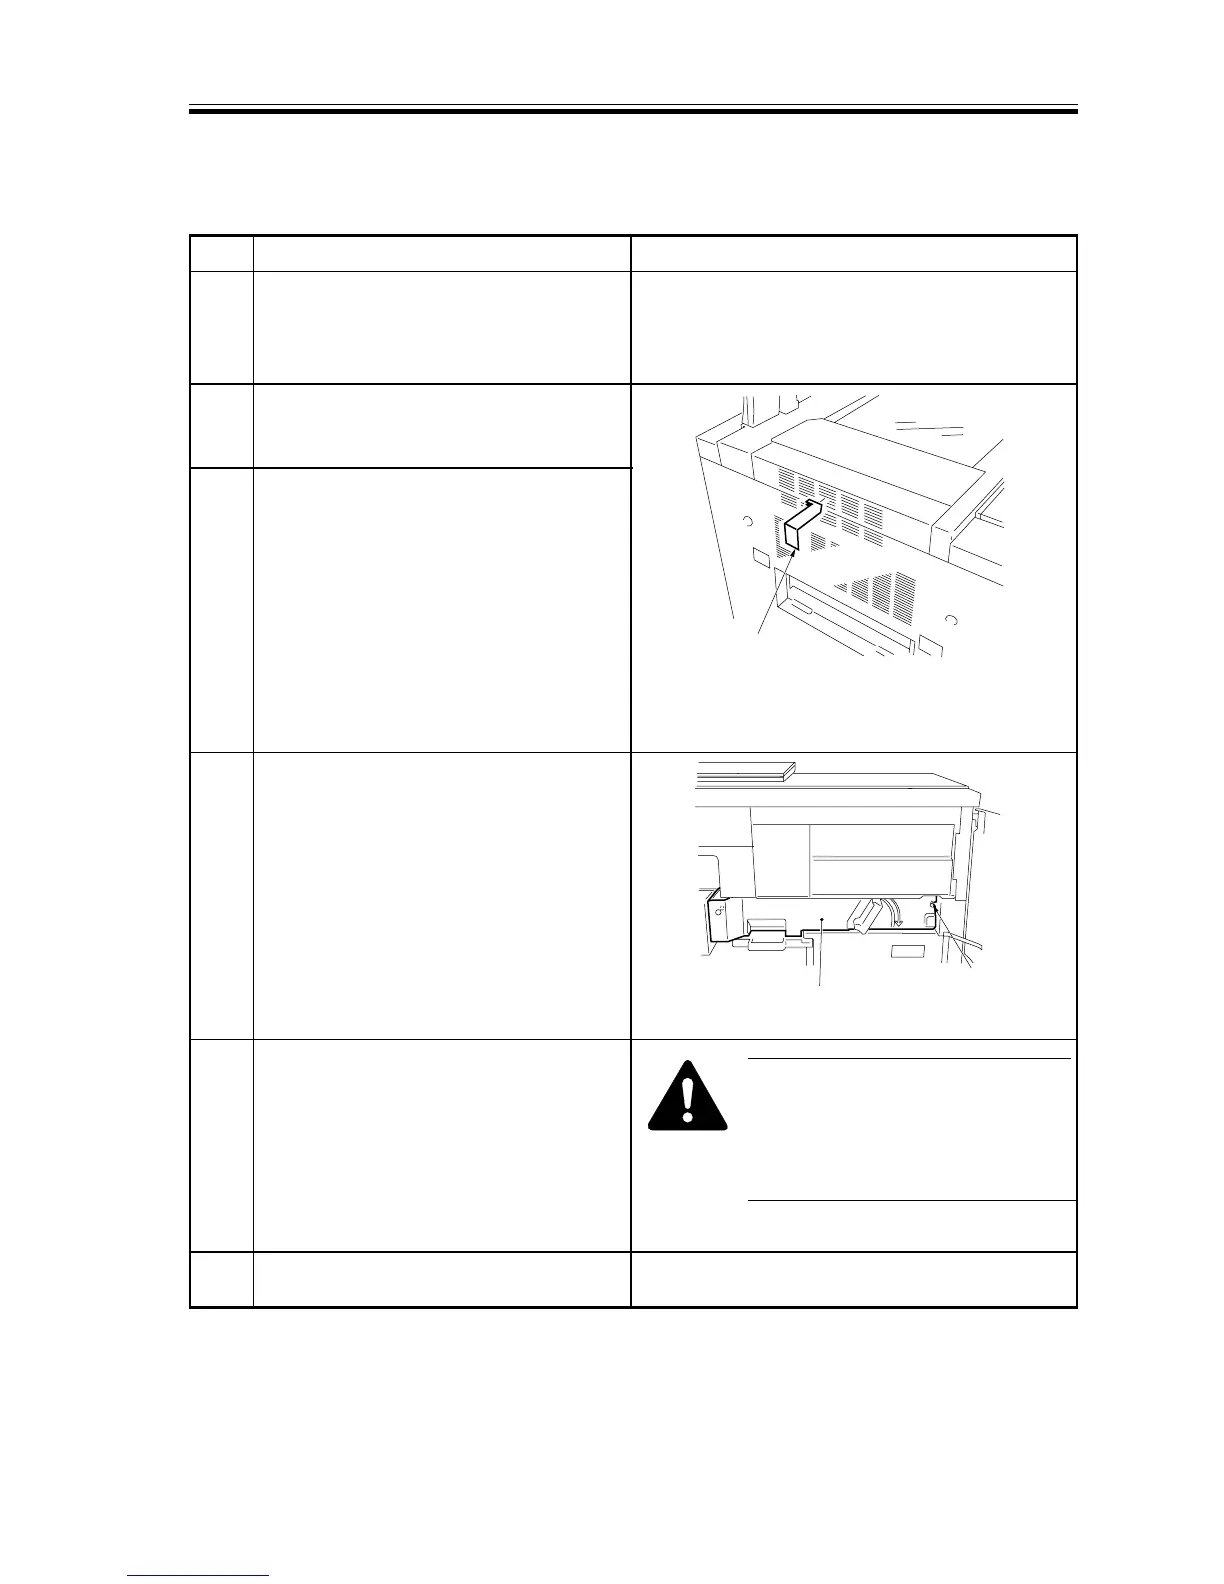
3 Removing the Scanner Fixing
Remove the tape from the scanner
retaining fixing found on the outside of
the left cover; then, slide the metal
fixing from the rear to the front, and
pull it to the left to remove.
4 Open the front covers (left, right), and
remove the fixing screw from the
transfer unit.
5 Remove the tape and materials and
sheets used to keep the lever and others
in place.
6 Remove the tape and fixing materials
from inside the cassette.
The step on the left lets the starters become
used to the environment of the site.
F03-302-01
Store away the fixing in the tool box for
possible relocation of the machine.
F03-302-02
However, do NOT remove the seal
from the toner supply mouth of the
hopper assembly. (Otherwise, toner
will be likely to leak during toner
supply operation.)
Transfer unit
Screw