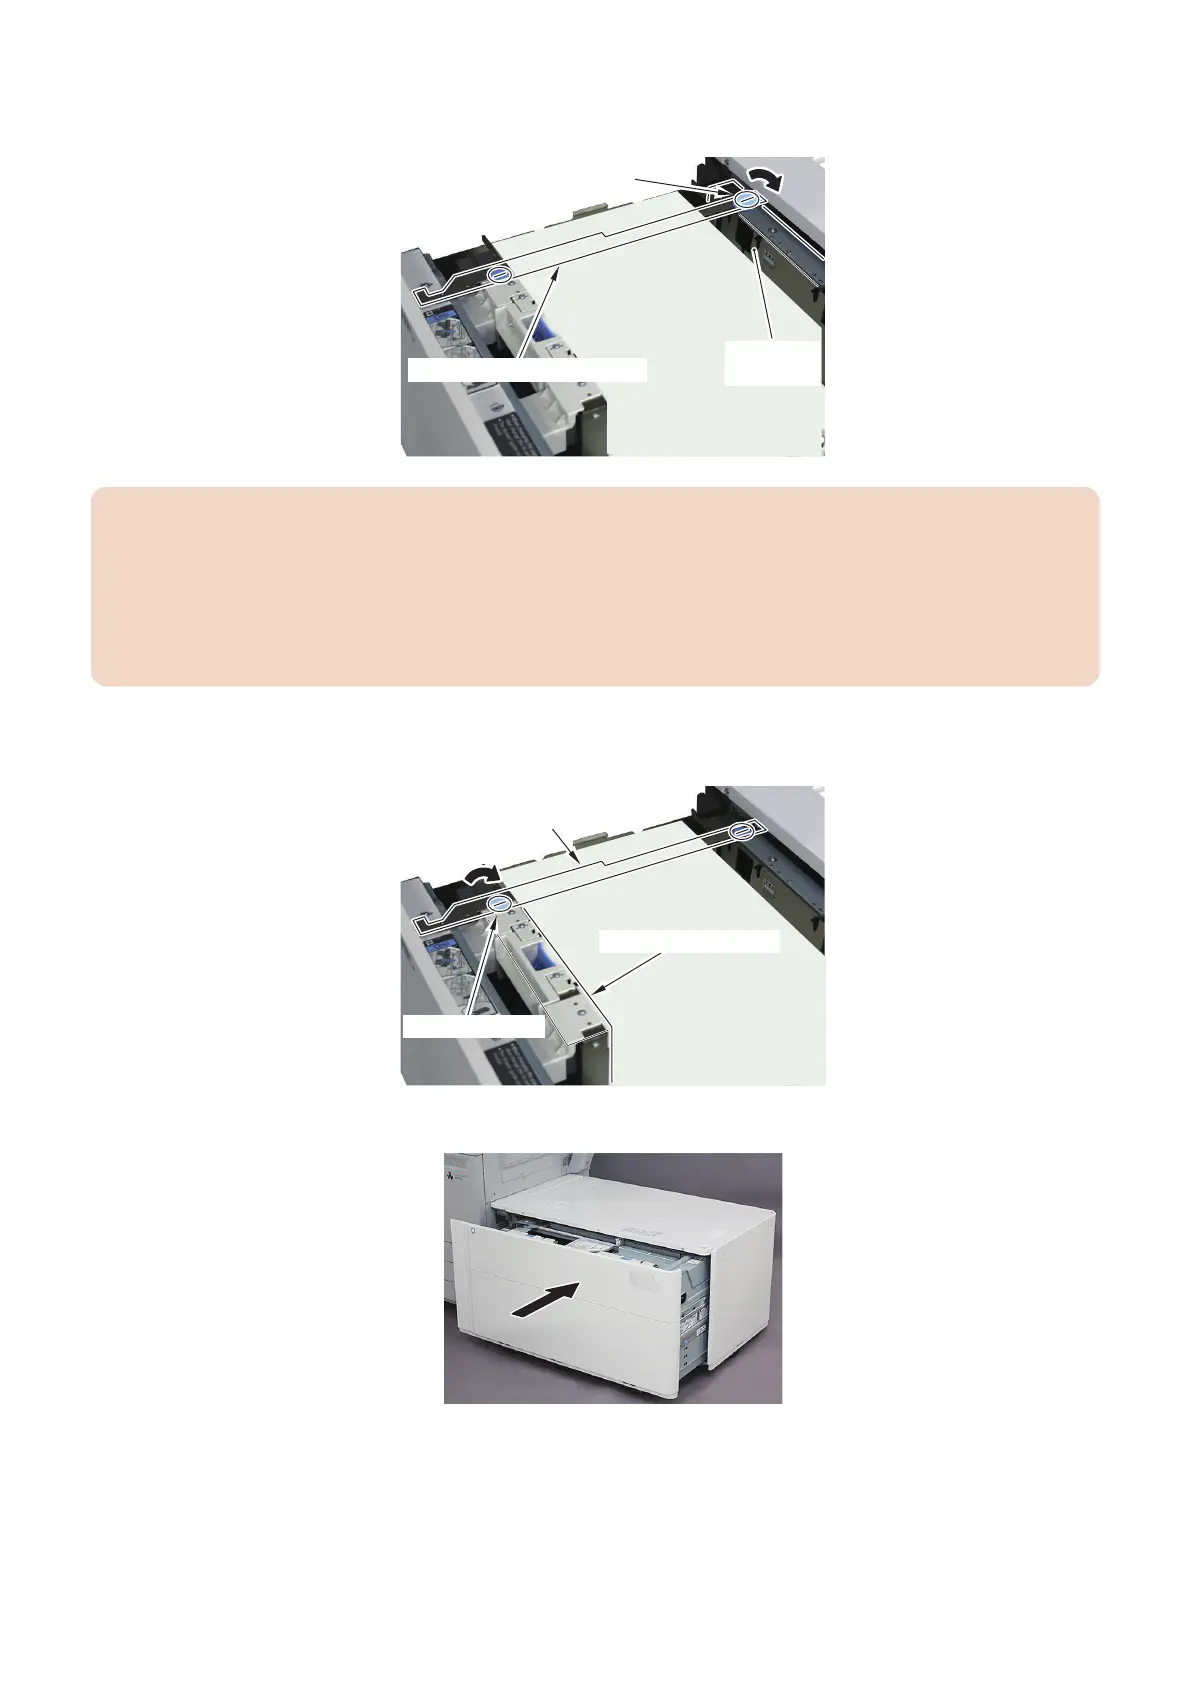
12. While holding the Side Guide Plate (Rear) to keep it from moving, fix in place the Coin Screw at the rear side of the
Side Guide Plate Fixing Bracket. (for the POD Deck Lite XL only)
Side Guide Plate Fixing Bracket
Coin Screw (Rear)
Side Guide
Plate (Rear)
CAUTION:
• Be sure to fix in place the Coin Screw at the rear side first.
If you fix in place the Coin Screw at the front side first, the Side Guide Plate will be tilted when the Coin Screw is fixed
in place, and the accuracy of the Left Edge Margin of the Image may not be attained.
• When fixing in place the Coin Screw at the rear side, work near the Side Guide Plate (Rear) to avoid applying load to
the front and back of the Side Guide Plate (Rear).
Otherwise, you may push the Side Guide Plate (Rear) and cause it to tilt.
13. While holding the Side Guide Plate (Front) to keep it from moving, fix in place the Coin Screw at the front side of
the Side Guide Plate Fixing Bracket. (for the POD Deck Lite XL only)
Coin Screw (Front)
Side Guide Plate
Fixing Bracket
Side Guide Plate (Front)
14. Close the Compartment.
6. Troubleshooting
205