2.
CHECK EVAP CANISTER CONTROL VALVE ACTION
• Start the engine and warm it up to the normal operating temperature then select view DTC.
• Touch the EVAP canister valve body, raise engine speed up to 2,000 RPM.
• With the X-431 scan tool, use the 9ACTIVE TEST9 function of the EVAP canister valve, touch the EVAP canis-
ter valve body, perform the action test.
• The EVAP canister valve should have a slight vibration.
Is the check result normal?
Yes
>> Go to step 8.
No
>> Go to the next step.
3.
CHECK EVAP CANISTER CONTROL VALVE ELECTRICAL CONNECTOR
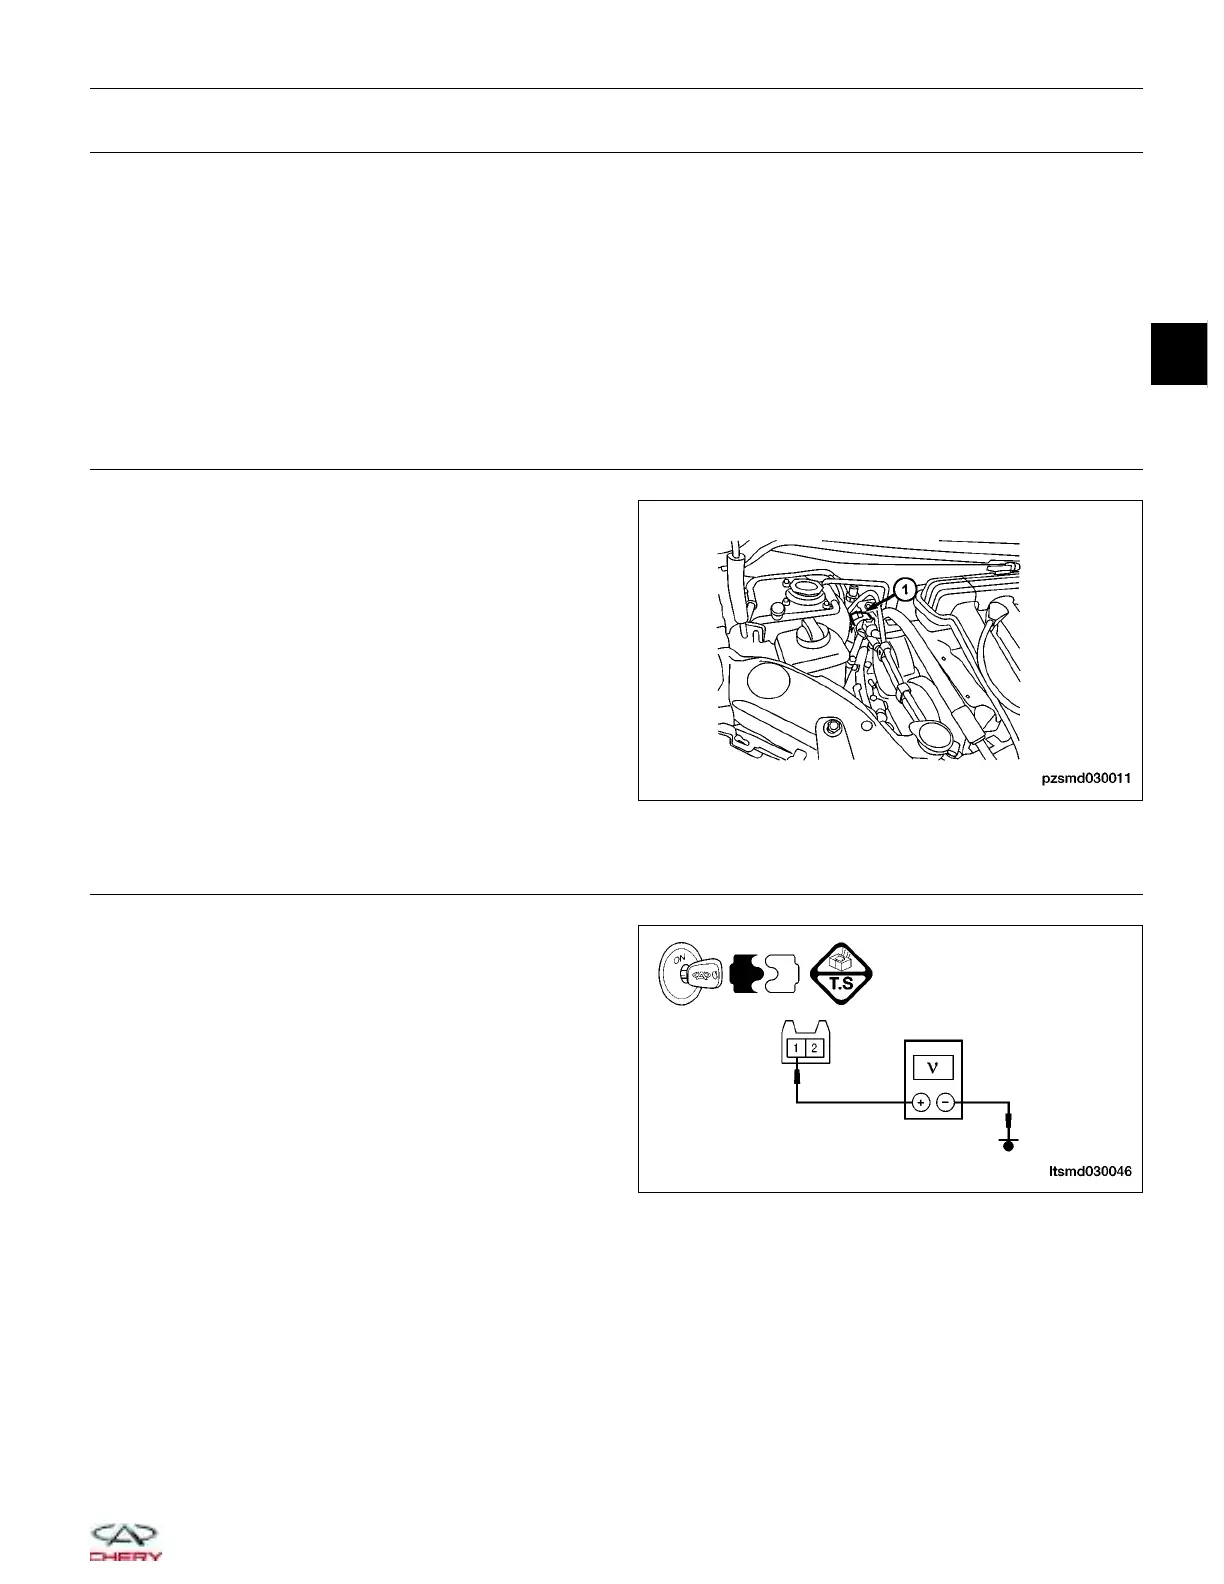
• Disconnect the EVAP canister control valve (1)
electrical connector.
• Inspect the electrical connector for damage.
Is the electrical connector OK?
Yes
>> Go to the next step.
No
>> Repair or replace the electrical connector
as necessary.
4.
CHECK EVAP CANISTER CONTROL VALVE POWER SUPPLY CIRCUIT
• Turn ignition switch on.
• Check the supply voltage between EVAP canister
control valve terminal 1 and ground, terminal side.
• 12 V should exist.
Is the check result normal?
Yes
>> Go to step 6.
No
>> Go to the next step.
DIAGNOSIS & TESTING
PZSMD030011
LTSMD030046
03
03–137
Chery Automobile Co., Ltd.