EasyManuals Logo

Chery A1 2009 User Manual

Chery A1 2009
1080 pages
To Next Page IconTo Next Page
To Previous Page IconTo Previous Page
Page #503 background imageLoading...
Page #503 background image
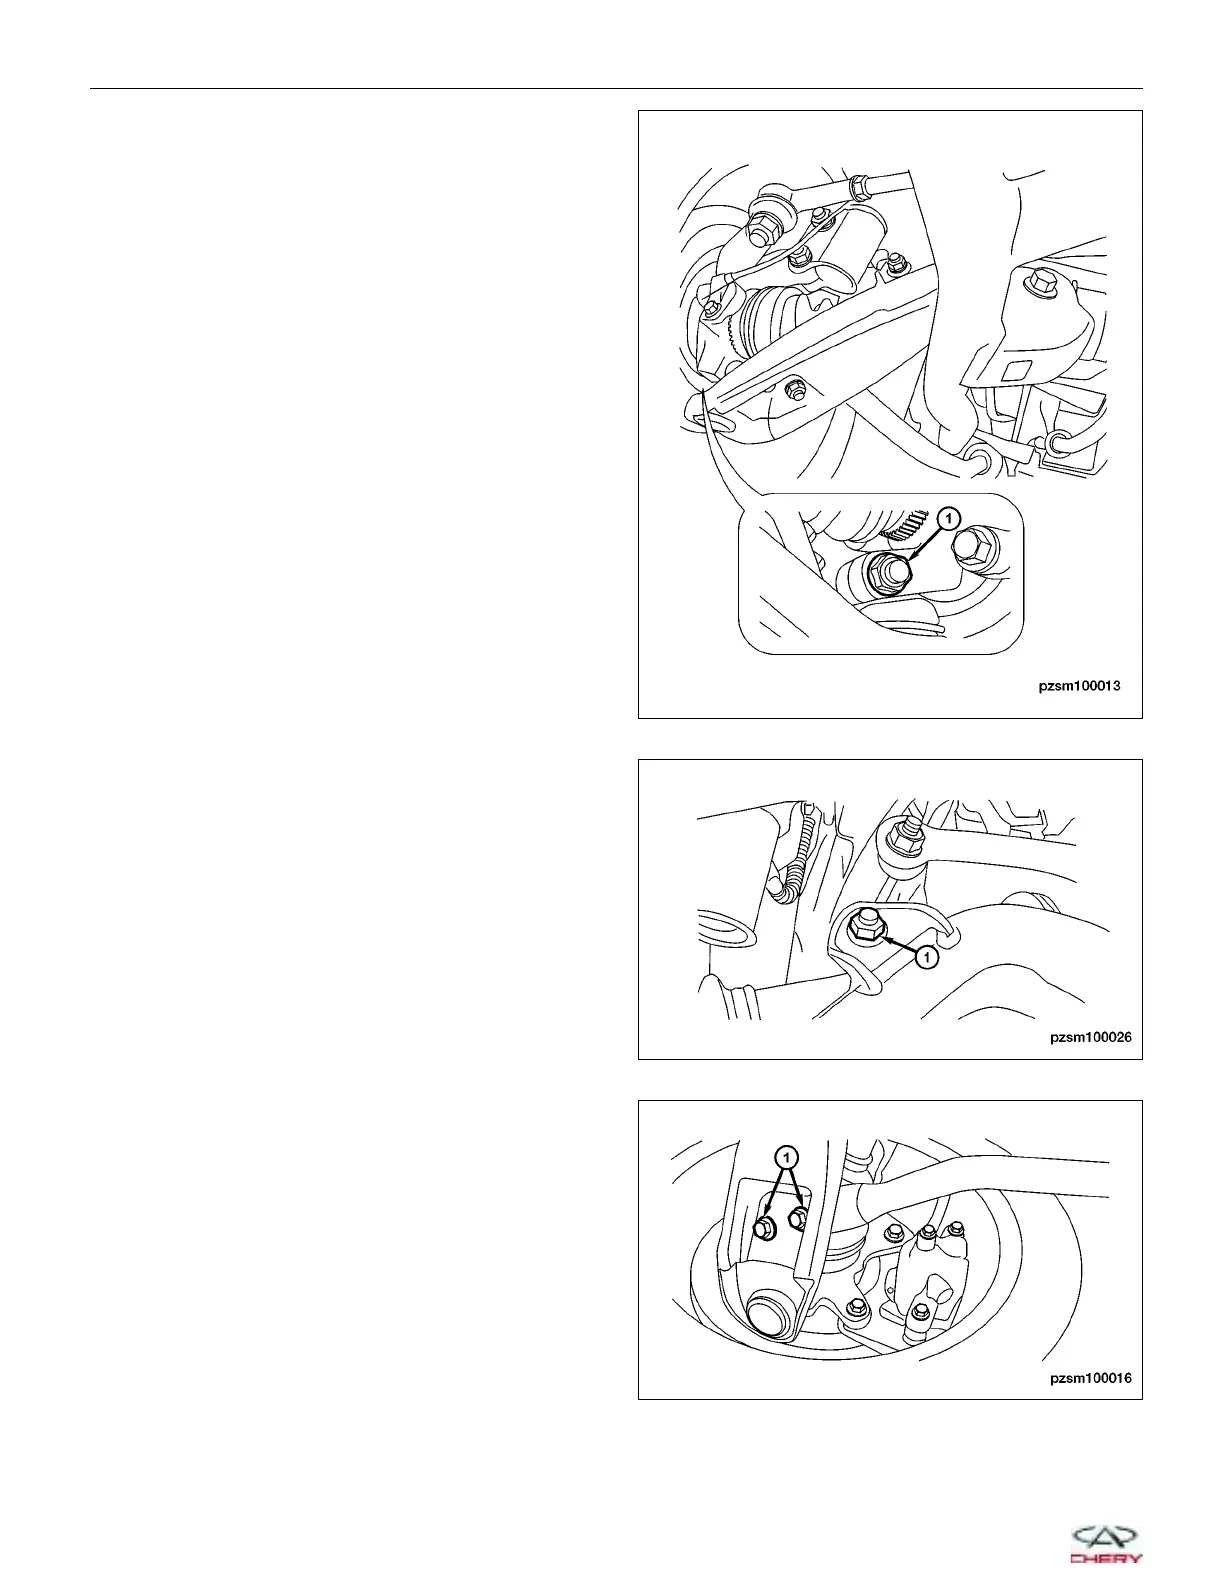
3. Remove the lower ball joint nut (1) from the steer-
ing knuckle, then separate the lower control arm
ball joint from the steering knuckle.
(Tighten: Steering knuckle pinch bolt to 110 ± 10
N·m)
4. Remove the lower control arm to the stabilizer bar
link nut (1).
(Tighten: Lower control arm to the stabilizer bar link
nut to 110 ± 10 N·m)
5. Remove the two lower control arm to the strut rod
bolts (1).
(Tighten: Lower control arm to the strut rod bolt to
75 ± 5 N·m)
ON-VEHICLE SERVICE
PZSM100013
PZSM100026
PZSM100016
10–10
Chery Automobile Co., Ltd.

Table of Contents

Questions and Answers:

Question and Answer IconNeed help?

Do you have a question about the Chery A1 2009 and is the answer not in the manual?

Chery A1 2009 Specifications

General IconGeneral
BrandChery
ModelA1 2009
CategoryAutomobile
LanguageEnglish

Related product manuals