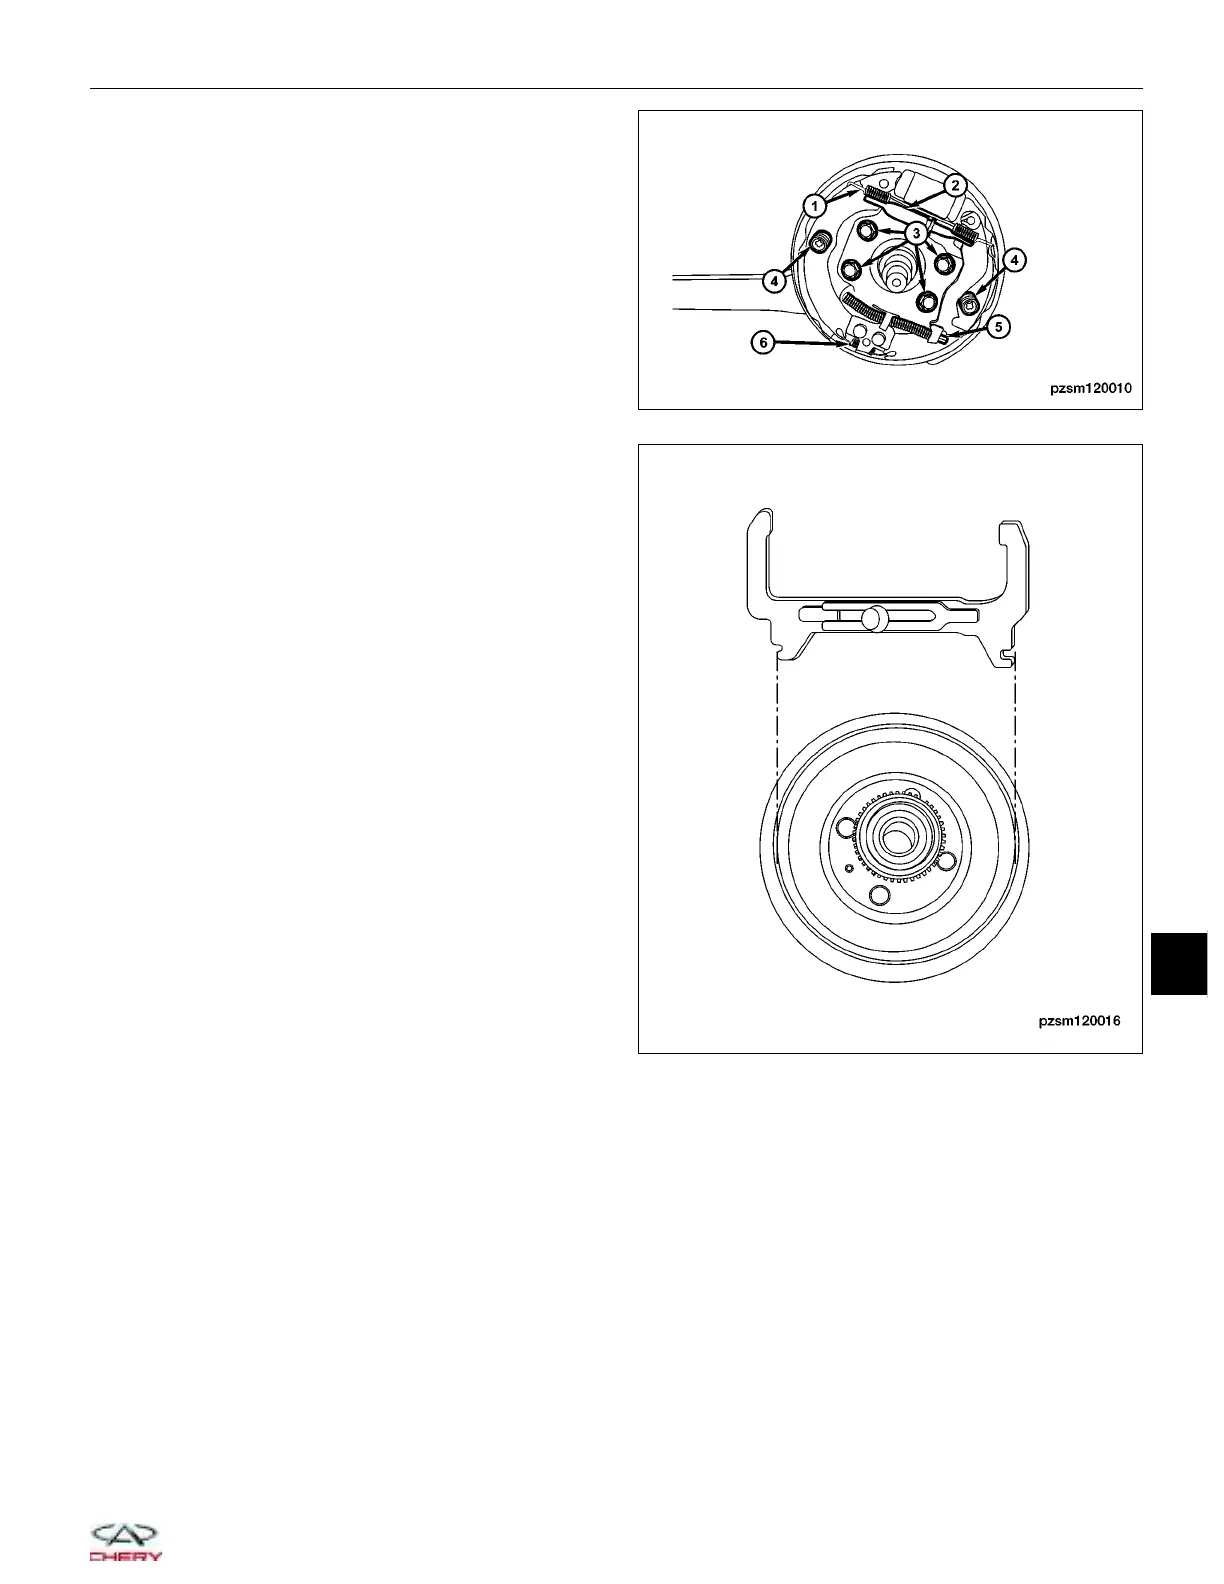
7. Remove the parking brake cable (5).
8. Remove the upper return spring (1).
9. Remove the lower return spring (6).
10. Remove the brake shoe hold-down springs (4) and
pins. Rotate the pins 90° to disengage.
11. Remove the two brake shoes.
12. Remove the spring (2) and separate the brake
shoes.
13. Installation is in the reverse order of removal.
Installation Notes:
• Using a brake measuring gauge or equivalent,
measure the inside diameter of the brake drum.
• Place the brake measuring gauge over the brake shoes at their widest point.
• Using the adjuster wheel, adjust the brake shoes until the linings on both brake shoes just touch the jaws on
the brake measuring gauge.
Inspection
• Brake Shoes
− Inspect the rear brake shoes linings for proper alignment.
− Inspect the rear brake shoe linings for proper contact across the entire width of the lining.
− Inspect the rear brake shoe linings for proper contact from the heel to the toe of the lining.
− Brake shoes with lack of contact at the toe or heel of the brake shoe lining may be improperly ground.
• Brake Hardware
− Clean and inspect the brake support plate.
− Clean and inspect the brake shoe self-adjustment screw.
− Apply a thin coat of lubricant or equivalent to the threads of the self-adjuster.
− Replace the adjuster screw if it is corroded.
− Inspect the return springs and hold-down spring clips for overheating or damage (Overheating indications
are paint discoloration or distorted end coils). Replace the brake hardware if needed.
ON-VEHICLE SERVICE
PZSM120010
PZSM120016
12
12–19
Chery Automobile Co., Ltd.
 Loading...


