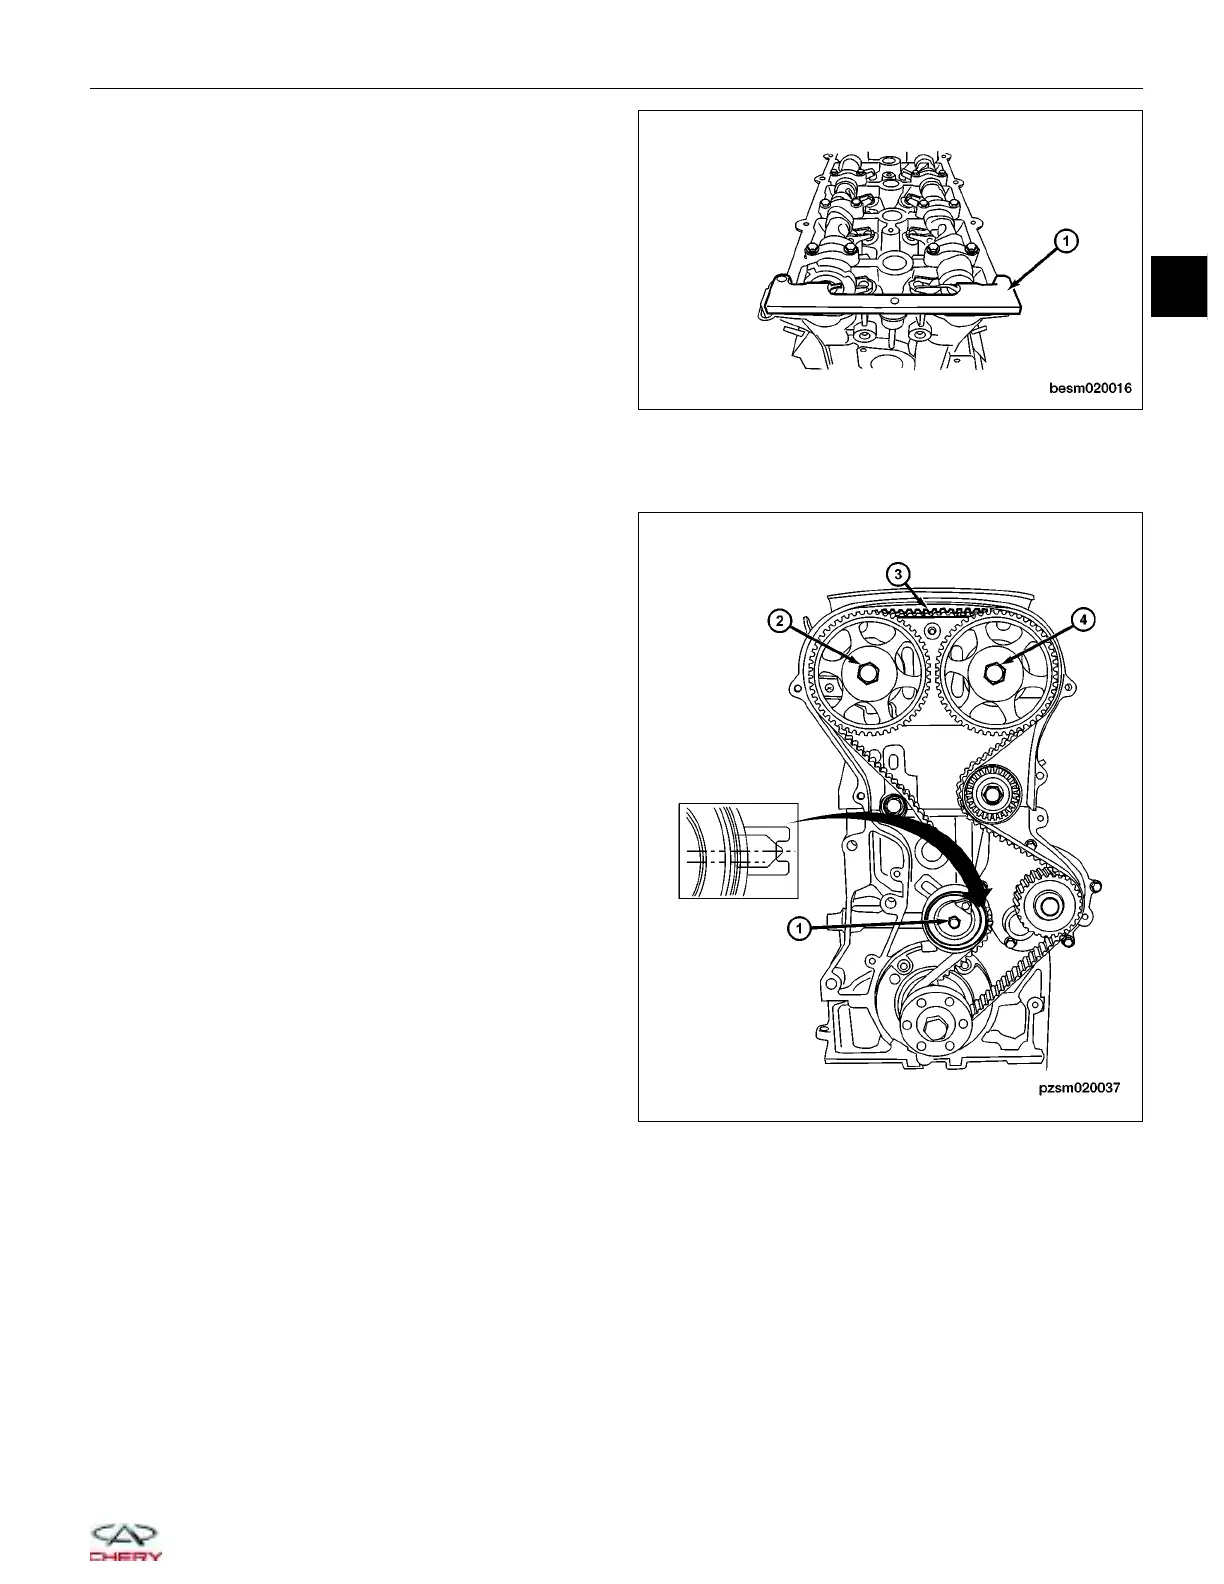
14. Using special tool CH-20010 (1), install the cam-
shaft holder to hold the camshafts in place.
NOTE: The camshaft holder will prevent the cam-
shafts from rotating in either direction.
CAUTION: Rotating the camshafts or crankshaft with timing components loosened or removed can cause
serious damage to the valves or pistons.
15. Loosen the bolt of the timing belt tensioner pulley
(1) and remove the pulley.
(Tighten: Timing belt tensioner pulley bolt to
27 ± 3 N·m)
16. Remove the timing belt (3).
NOTE :
When removing the timing belt, pay attention to the
operating direction of the timing belt. Refer to the oper-
ating direction of the engine crankshaft and the arrow
head direction on the timing belt.
17. Installation is in the reverse order of removal.
Installation Notes:
• Install the timing belt and rotate the tensioner pul-
ley with an Allen wrench in order to apply tension
to the belt and align the finger pointer of the ten-
sioner to the middle of the U-slot opening.
• Tighten the tensioner pulley bolt (1) to 27 ± 3 N·m.
• Tighten the intake and exhaust camshaft pulley
bolts (2 ) & (4) to 120 ± 5 N·m.
ON-VEHICLE SERVICE
BESM020016
PZSM020037
02
02–43
Chery Automobile Co., Ltd.