To use the Cleverscope carry out these steps:
Connect the Cleverscope to the network and turn it on. Make sure the Connected LED comes on.
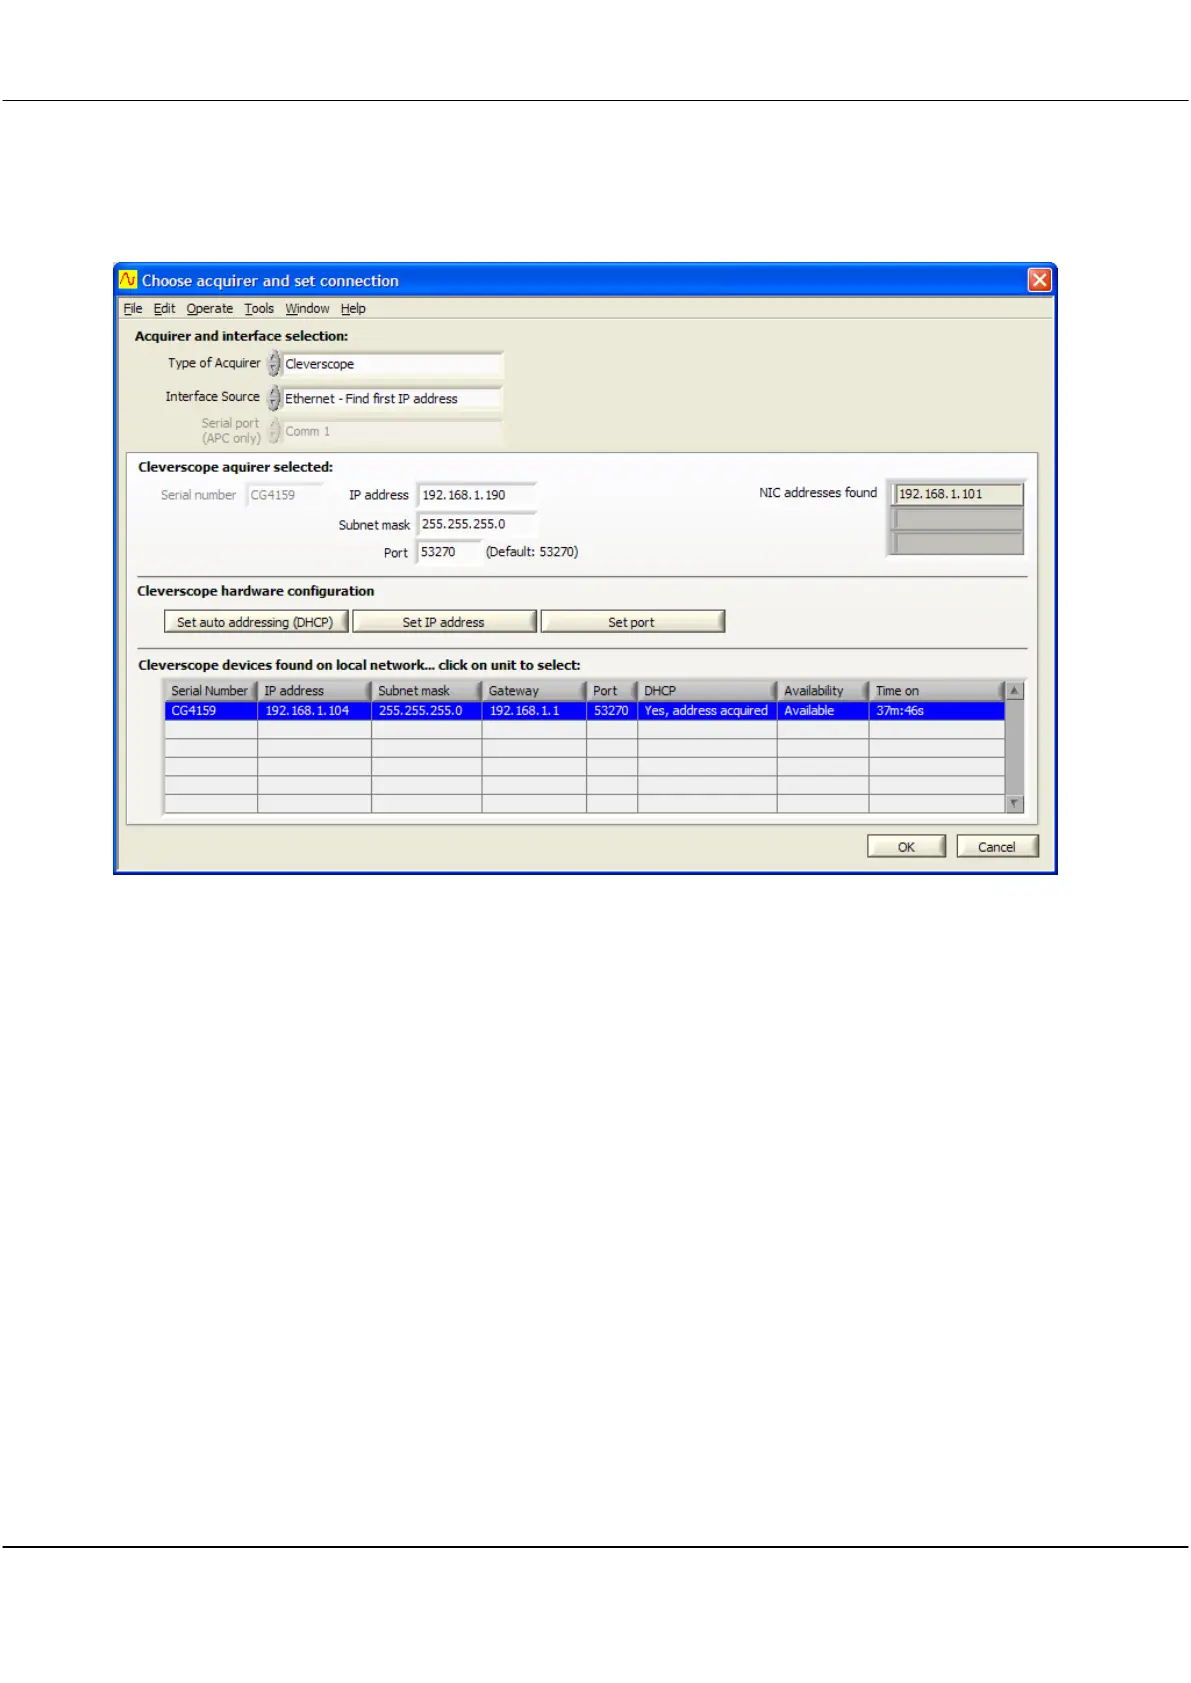
On the Settings menu click Choose Acquirer and set connection to display the following dialog:
Make sure the Type of Acquirer is
Cleverscope
. Set Interface Source to
Ethernet – Find first IP address
. This
option will find the first free Cleverscope available on the network.
You should see the Cleverscope listed under Cleverscope devices found. If the entry under DHCP is not
Yes,
address acquired
, select the line which corresponds to the Cleverscope you want to use, and then click Set auto
addressing (DHCP). This will cause that Cleverscope to use the DHCP method of addressing. The DHCP column
should change to
Yes, address acquired
, after you have clicked the button.
Click OK. The Cleverscope should be ready for use – click Auto on the Cleverscope Control Panel to acquire a
signal.
The next time you start up the Cleverscope, and run the Cleverscope application, you do not need to do setup –
the Cleverscope will automatically connect.