ComNav Commander P2 & P2VS Installation & Operation Basic Operations
Document PN 29010074 V4.1 - 115 -
Power On
The first step in using your P2 system is to
turn it on
…
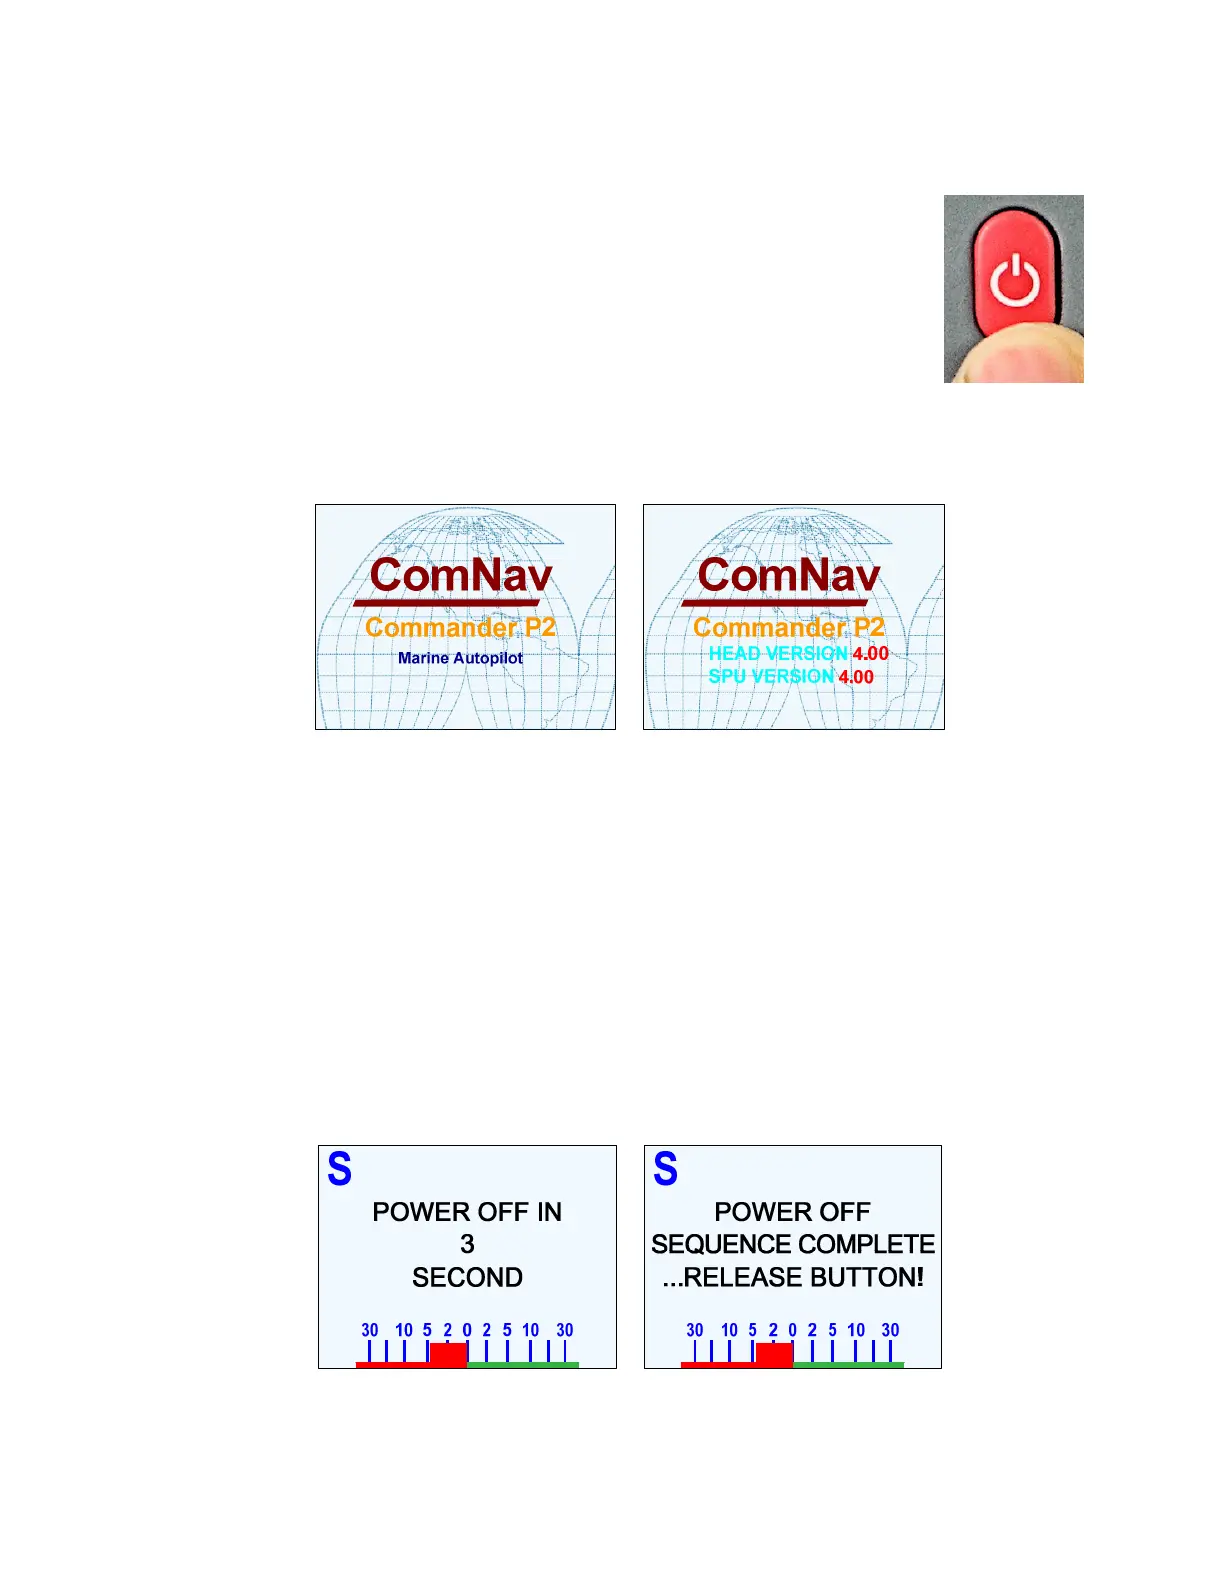
•
Press the Control Head’s
RED
button (referred to as the
S
S
T
T
A
A
N
N
D
D
B
B
Y
Y
button).
⇒
Press & hold until the introductory display (see below)
appears on the LCD screen, then release the button.
•
On the SPU, the BATT PWR, DRV PWR & VCC diagnostic
LEDS should all light up.
After a few seconds, the firmware versions of both the Control Head and the SPU are listed
on the display. You should record those version numbers in the
Notes
section at the back of
the manual, to refer to should your autopilot ever require servicing.
Figure 70 – Power On Sequence
The autopilot then goes into STANDBY mode.
Power Off
You can turn off the autopilot, at any time:
•
Press and hold the
S
S
T
T
A
A
N
N
D
D
B
B
Y
Y
button.
The autopilot will switch first to
STANDBY
mode, if it was not already there.
Then, if you keep pressing the button, the autopilot will start a 3 second power-down
sequence.
Once the countdown has expired, the display will prompt you to release the
S
S
T
T
A
A
N
N
D
D
B
B
Y
Y
button … and once you do, the whole autopilot system will immediately shut off.
Figure 71 – Power Off Sequence
•
If you release the
S
S
T
T
A
A
N
N
D
D
B
B
Y
Y
button before the 3-second countdown has completed,
the autopilot will abort the countdown, and remain in
STANDBY
mode.