ComNav Commander P2 & P2VS Installation & Operation Appendices
Document PN 29010074 V4.1 - 199 -
Appendix 4
Auxiliary Head / Remote Power On
The P Series SPU is shipped from the factory configured so that power can only be turned on
or off from the main Control Head. The main Control Head is designated as that which is
plugged into the SPU receptacle labelled "
J11 - CONTROL HEAD
”. However, the SPU can also
be configured so that it can be turned on or off by a Control Head plugged into the
receptacles
J12 – AUX 1
or
J13 – AUX 2
.
The following instructions detail how this is accomplished.
1) Remove the wiring cover from the SPU and unplug all wiring connectors.
2) Remove ten sheet metal screws around the edges of the SPU. These screws secure the
top portion of the SPU enclosure.
3) Lift the top portion of the SPU enclosure off and set it aside. The top of the printed circuit
assembly will be visible.
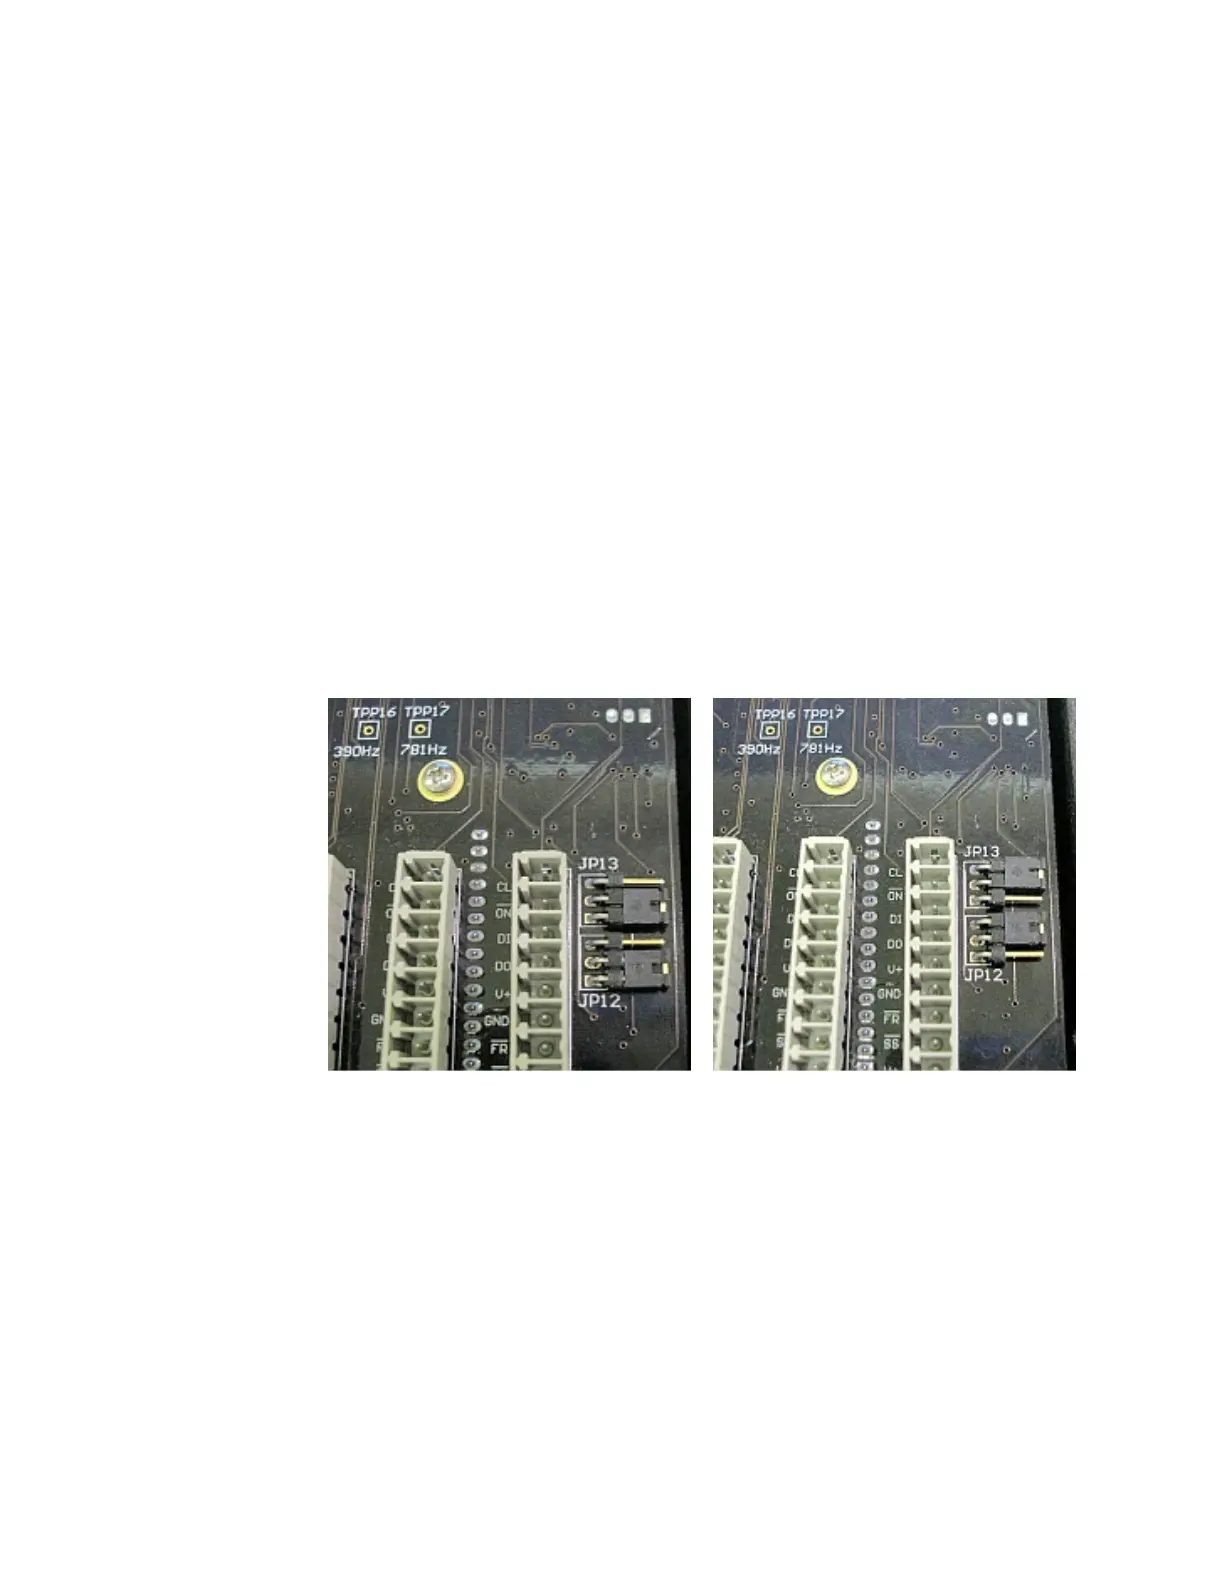
4) On the lower right side of the printed circuit assembly are two right-angle pin headers.
They are labelled JP1 and JP2. On each header is a shorting shunt.
5) Change the position of the shunts as shown in the pictures below. JP1 determines
whether power can be turned on from the Controller attached to
J13 – Aux 2
, while JP2
determines whether power can be turned on from the Controller attached to
J12 – Aux 1
.
Figure 127 – JP12 & JP13 in Factory Default Position (left) and After Moving Shunts (right)
6) Replace the SPU enclosure top and secure it with ten sheet metal screws.
7) Replace all wiring plugs and the wiring cover.
You will now be able to turn on power from the auxiliary heads simply by pressing the
S
S
T
T
A
A
N
N
D
D
B
B
Y
Y
button. Note that the SPU always powers on in
STANDBY
mode, with the main
Control Head in command, regardless of which station was used to turn the power on. If
power was turned on from one of the auxiliary stations, then in order to use that station, you
must first take command by pressing the
P
P
O
O
R
R
T
T
and
S
S
T
T
A
A
R
R
B
B
O
O
A
A
R
R
D
D
buttons.
Note: Power cannot be turned on from a CR-203 or TS-203 Remote.