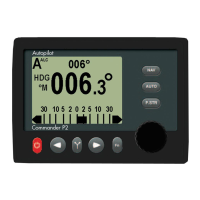
ComNav Commander P2 & P2VS Installation & Operation Basic Operations
Document PN 29010074 V4.1 - 118 -
Compass Cal (Compass Calibration)
This line allows you to synchronize the Heading source the autopilot is currently using with an
external reference – for example, some type of high-accuracy compass, or a navigation
range which the boat is currently on, etc.
Simply turn the
C
C
O
O
U
U
R
R
S
S
E
E
C
C
H
H
A
A
N
N
G
G
E
E
knob until the Compass Cal value reads the same as your
reference.
Note: for safety reasons, the Compass Source & the Compass Cal values may not
be adjusted in AUTO or NAV modes, so neither menu line appears if the
Standby menu is entered when operating in one of those modes.
NMEA Hdg Type (NMEA Heading Type)
Note: this menu line only appears if the Compass Source parameter is set to NAV1
or NAV2.
This line allows you to choose which type of value – Degrees Magnetic or True – from an
NMEA source will be used by the autopilot for its Heading:
•
“Auto”: the autopilot will automatically select whether to use Magnetic or True,
depending on which NMEA sentences are received (assuming all sentences have
valid data):
–
If the HDG sentence is being received (no matter whether HDM &/or HDT are
also being received), then the autopilot will use Magnetic Heading (indicated on
the display by an ‘M’ beside the boat’s actual Heading value on the screen), and
it will be the value in the HDG sentence.
–
If only HDM & HDT are being received, or just HDT, then the autopilot will use
True Heading (indicated by a ‘T’), from the HDT sentence.
–
If only HDM is being received, then the autopilot will use Magnetic Heading
(indicated by an ‘M’), from that sentence.
•
“True”: the autopilot will use True Heading from the HDT sentence. If HDT is not
being received, a Heading Error alarm will occur.
•
“Mag”: the autopilot will use Magnetic Heading from the HDG sentence, if that is
being received, or from HDM if only that is being received. If neither HDG nor HDM
are being received, a Heading Error alarm will occur.
Backlight Level
There are 9 levels of backlighting available, numbered 0 through 8.
Level 8 offers the brightest possible backlight. Each level below 8 offers a correspondingly
lower level of backlight.
Level 0 is completely off (no backlighting). To change from Level 0 to any other level,
double-press the
S
S
T
T
A
A
N
N
D
D
B
B
Y
Y
button to bring up the Standby menu. The screen will temporarily
light up with level “3” brightness, so that you can see the menu.
For colour Control Heads, the screen automatically changes to a “night” colour scheme (see
scheme “C” below), whenever the backlight level is set to “1”, “2”, or “3”.
Contrast (monochrome Head only)
There are 8 levels of contrast available. Level 5 is usually the optimum value.
Contrast of the LCD is affected primarily by temperature. The Control Head is internally
compensated for fluctuations over a wide temperature range – but manual adjustments can
be made to the contrast by changing this parameter, if necessary.