D-Link DWC-1000 User Manual 172
Section 5 - Advanced Network Conguration
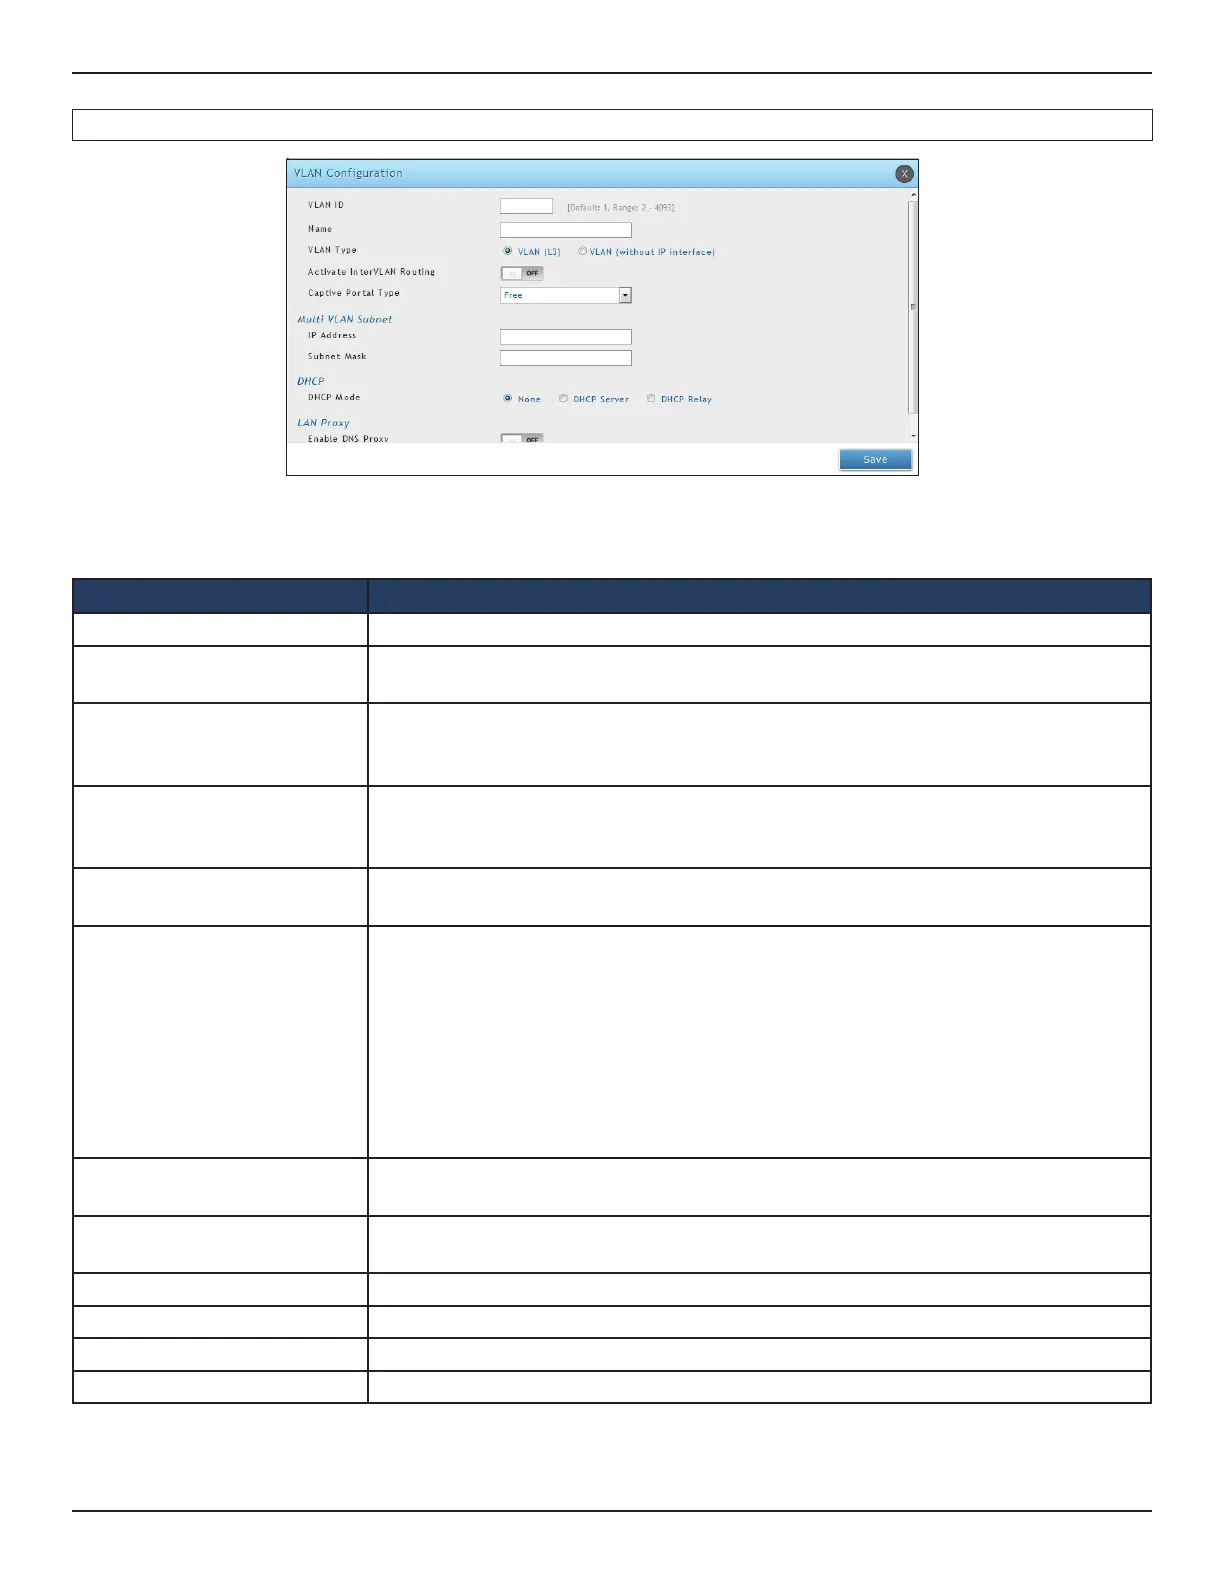
3. Complete the elds in the table below, and click Save. The elds vary with the type of the captive
portal.
Field Description
VLAN ID Enter a unique ID to this VLAN (2 - 4093).
Name
Enter a unique name for this VLAN. The name should allow you to easily identify this
VLAN from others you may add.
VLAN Type
Allows you to select the type of VLAN that you would like to create. If VLAN (L3) is
selected, VLAN will be associated with the L3 network. If VLAN (without IP interface)
is selected, a VLAN is created in switch but none of the L3 network associated with it.
Activate InterVLAN Routing
Allows or denies communication between VLAN networks. Choices are:
• Enable = allows communications between dierent VLANs.
• Disable= denies communications between dierent VLANs.
Captive Portal Type
Select the type of captive portal from free, SLA, Permanent User, Temporary User, or
Billing User.
Authentication Server
Select the type of authentication server to authenticate captive portal for permanent,
temporary, or billing users. It shows the available authentication servers among which
one can be selected for this VLAN. All users login into the captive portal for this VLAN
, are authenticated through the selected server. This option appears only if Captive
Portal Type is selected as Permanent user. List of available authentication servers are:
1. Local User Database
2. Radius Server
3. LDAP Server
4. POP3
Authentication Type
This eld is available only if Radius Server is selected as an Authentication Server.
Available authentication types are PAP/CHAP/MSCHAP/MSCHAPV2.
Login Prole Name
Select a captive portal from the drop-down menu. Click Create a Prole to create a
new prole.
IP Address Enter an IP address for the Multi-VLAN subnet.
Subnet Mask Enter the subnet mask for the Multi-VLAN subnet.
DHCP Mode Select whether to enable DHCP Server or DHCP Relay.
LAN Proxy Click to enable DNS proxy.
2. Click Add New VLAN. The following page will appear.
 Loading...