User's Manual
94
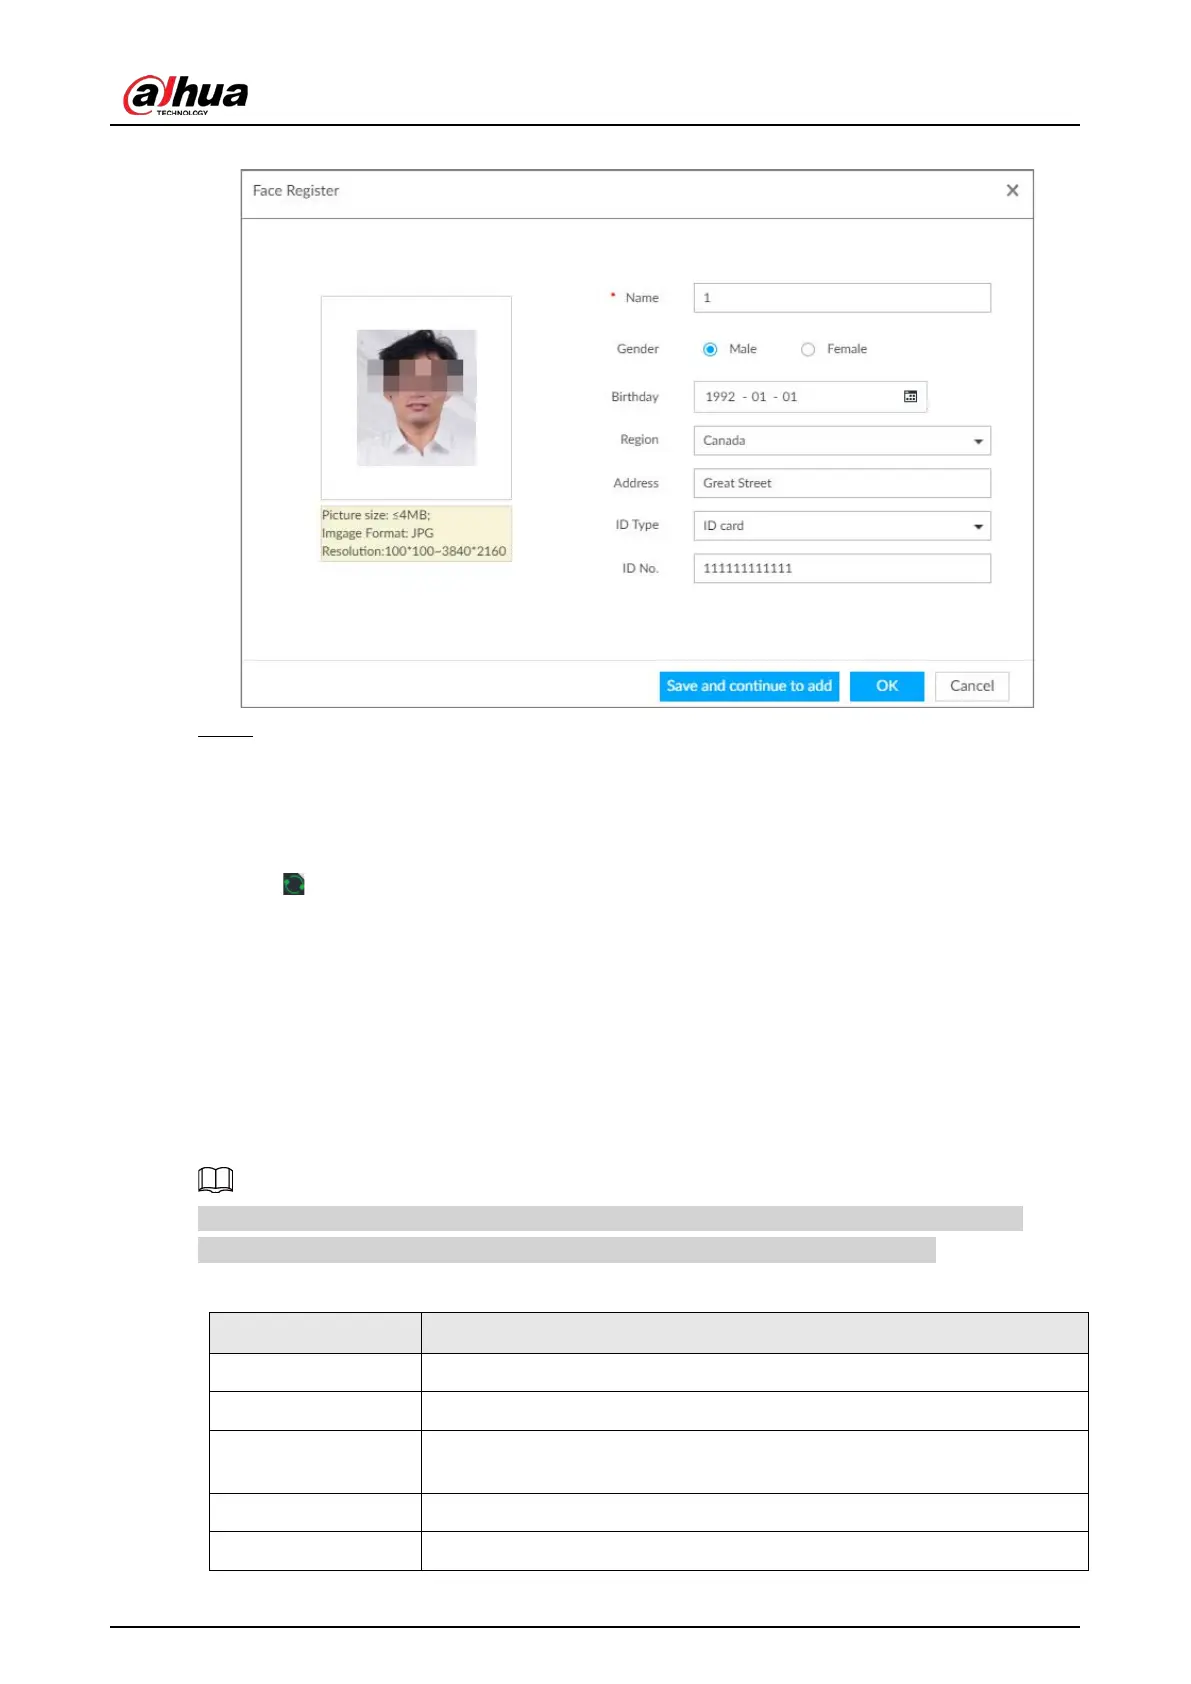
Figure 6-44 Face information
Step 7 Click Save and continue to add or OK.
●
Click
Save and Continue to add to save current face image information and add
another human face image.
●
Click
OK to save current face image information and complete registration.
After adding the image, at the lower-left corner of the human face image, there is an icon
. It means device that face abstracting in process. See "6.3.3.4.6 Managing Face Pictures"
for detailed information.
Batch Import
Before the batch import, name the face image according to the following rule:
"Name#SGender#BBirthday#NNation#PProvince#TIDtype#MIDnumber#AAddress.jpg" (for example,
"Tim#S1#B20000101#NCN#PZheJiang#T1#M0000#AAddress").
Name the face image according to the rule. After successful import, the system will identify the face
image automatically. For details about naming rule.
Name is required and the rest are optional. For example, if you want to enter the name and ID
number only, the naming can be Tim#S#B#N#P#T#M0000#A.jpg or Time#M0000.jpg.
Table 6-8 Naming rules for batch import
Name Enter the corresponding name.
Gender Enter number. 1: Male; 2: Female.
Birthday
Enter number in the format of yyyymmdd or yyyy-mm-dd. For example,
20181123.
Region Enter the corresponding abbreviation of the region.
Province Enter the corresponding spelling or English name of the province.
 Loading...