User's Manual
95
ID type Enter the corresponding number. 1. ID card, 2. Passport, 3. Others.
ID number Fill in the corresponding ID number.
Address Enter the detailed address.
Procedure
Step 1 On LIVE page, click , and then select FILE > Face Management > Face Database >
Local.
Step 2 Double-click a face database.
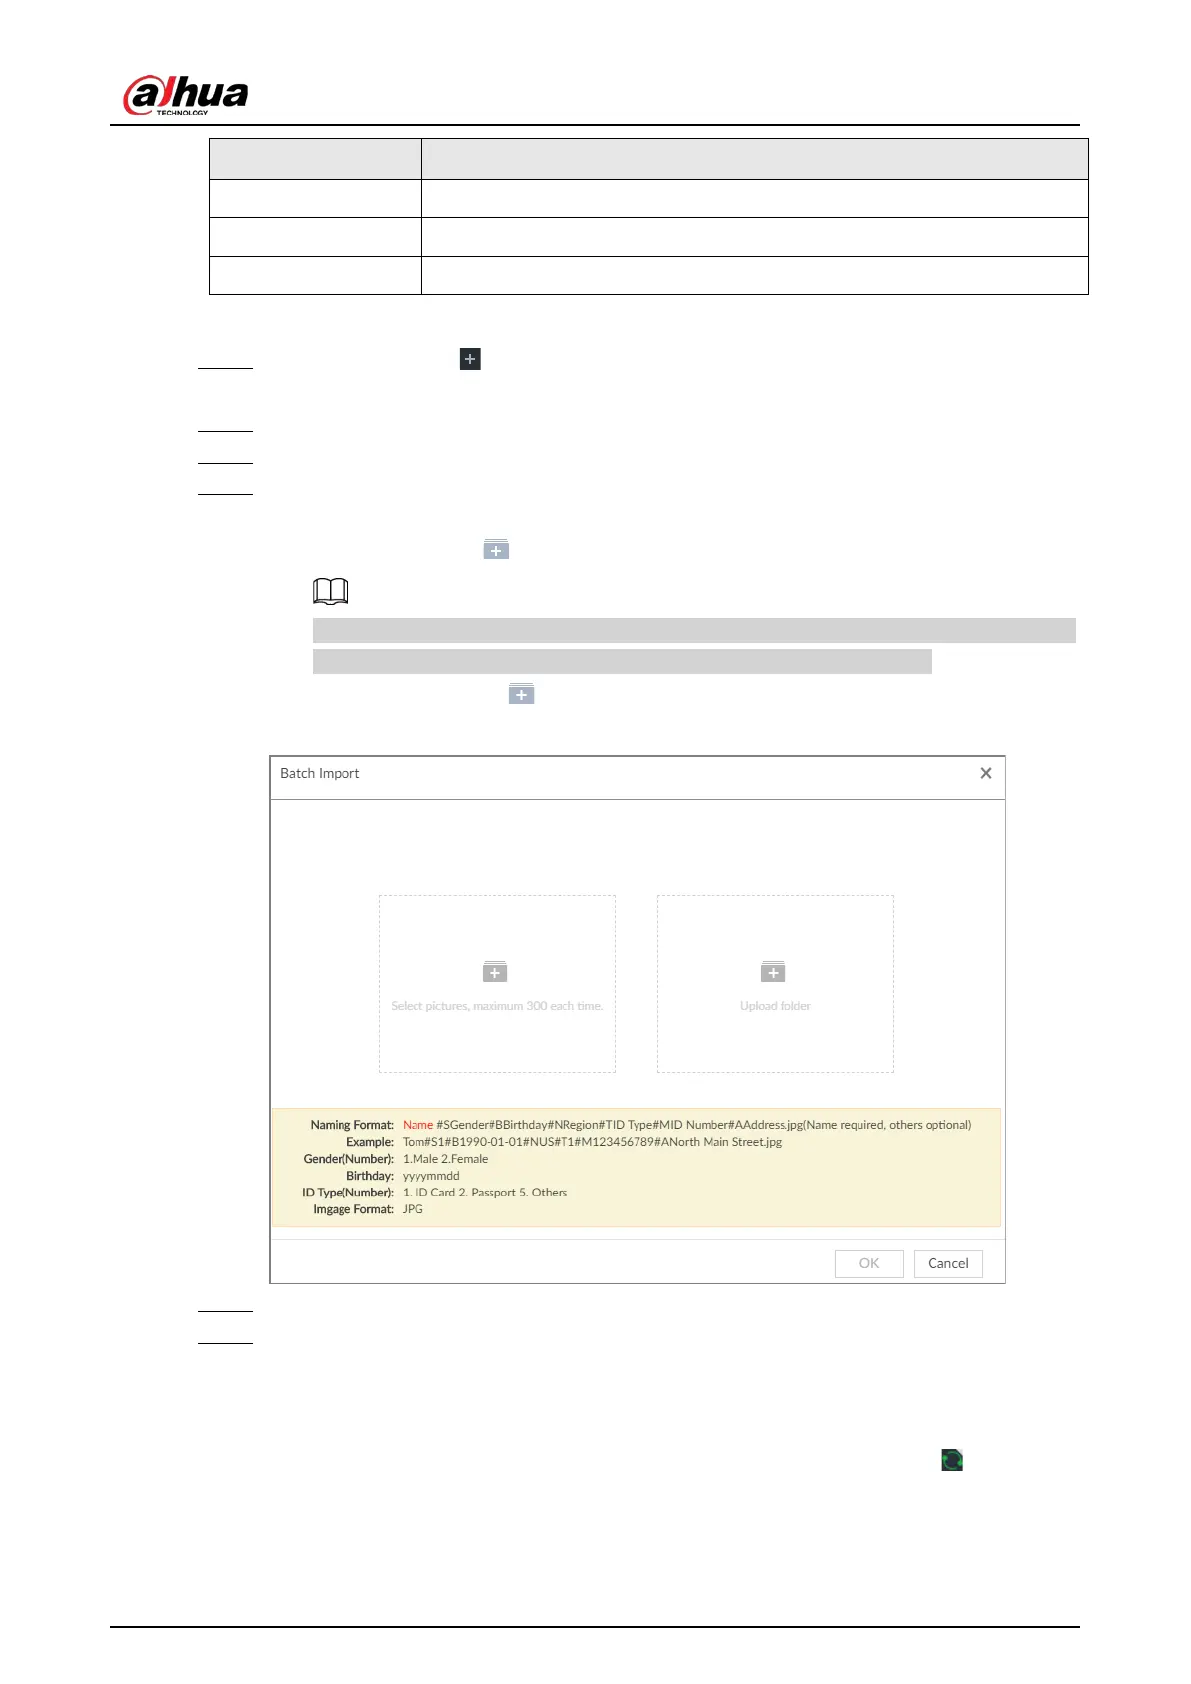
Step 3 Click Batch Import.
Step 4 Import face image.
The system supports uploading file or folder. Select according to your actual need.
●
Upload a file: Click , select multiple face images, and then click
Open.
You can select multiple face images by holding Shift and then clicking the first and the
last face images, or holding Ctrl and then click the images one by one.
●
Upload a folder: Click , select the folder with face images, and then click
Upload.
Figure 6-45 Batch import
Step 5 Click OK.
Step 6 Click Continue to add or OK.
●
Click
Continue to add to add more images.
●
Click
OK to complete adding images. Face database interface is displayed, and you can
see the added images.
After adding the image, at the lower-left corner of the face image, the icon appears,
which indicates that face information is being processed.
 Loading...