User's Manual
79
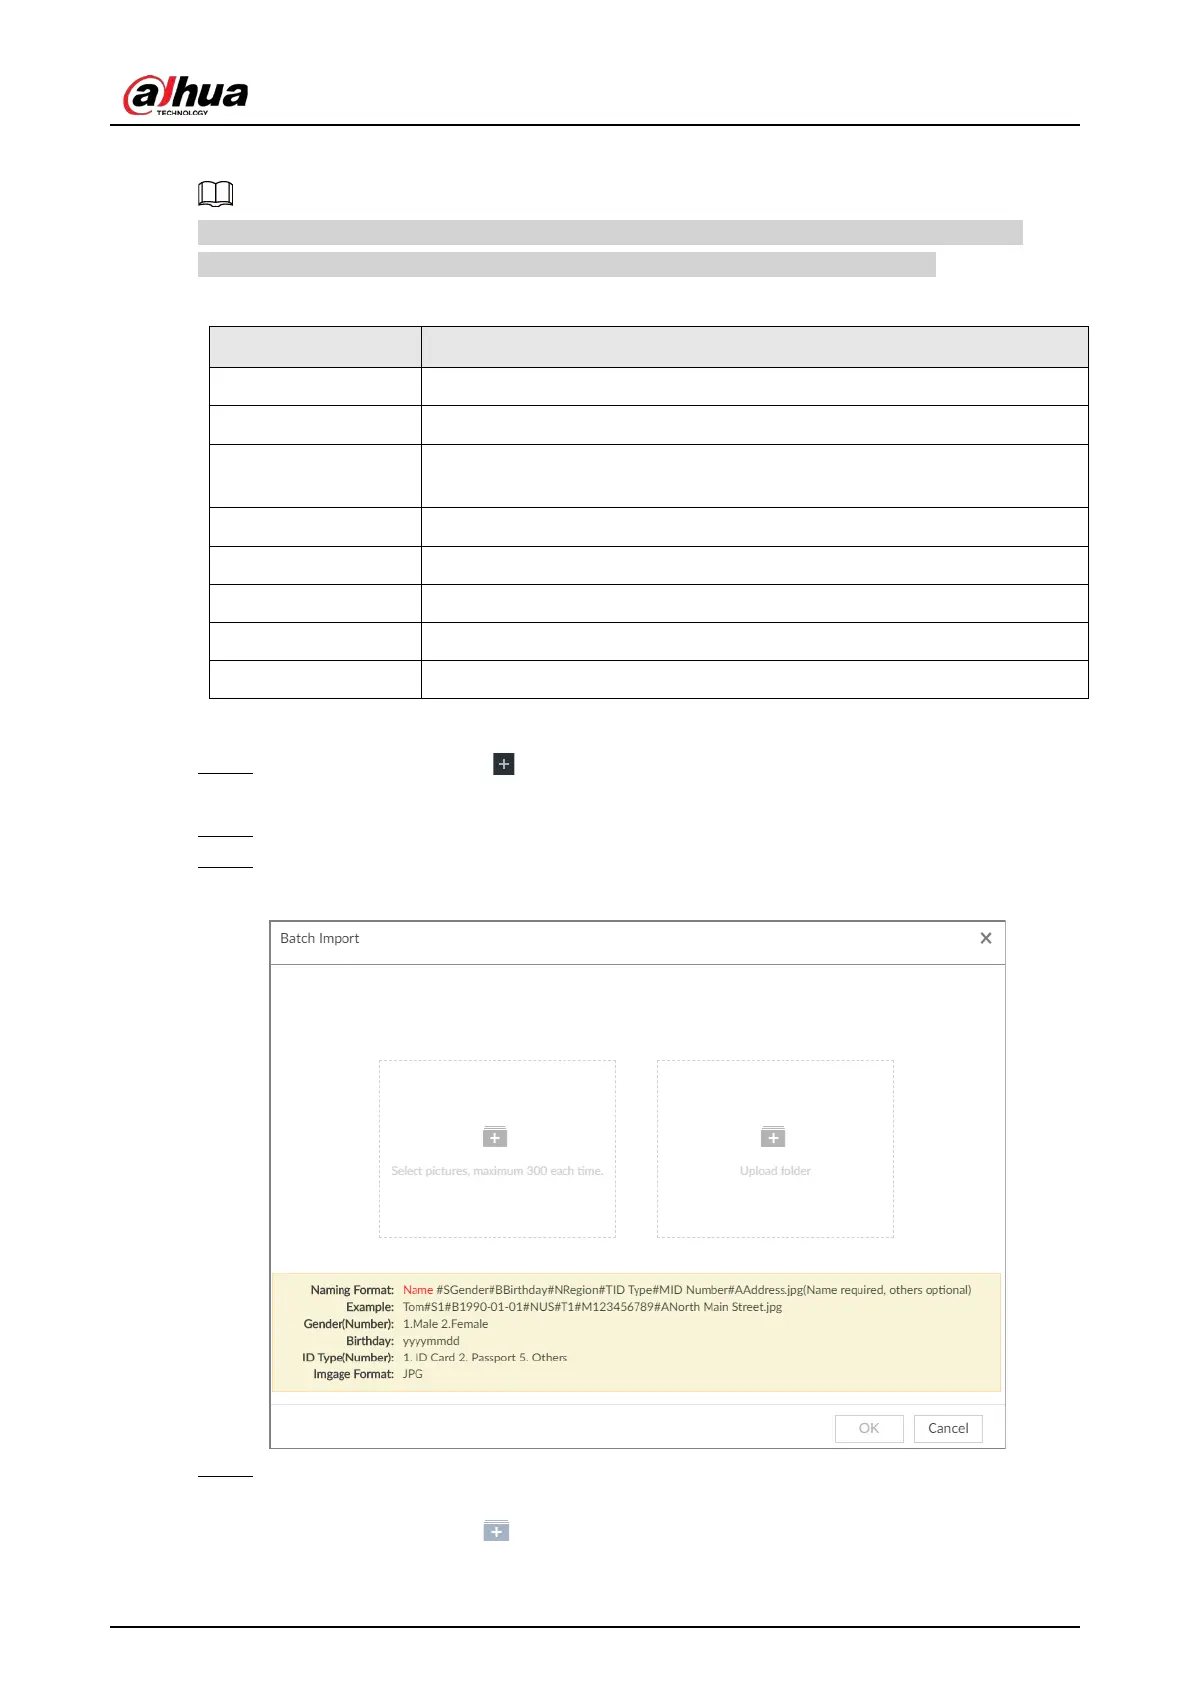
image automatically. For details about naming rule.
Name is required and the rest are optional. For example, if you want to enter the name and ID
number only, the naming can be Tim#S#B#N#P#T#M0000#A.jpg or Time#M0000.jpg.
Table 6-6 Naming rules for batch import
Name Enter the corresponding name.
Gender Enter number. 1: Male; 2: Female.
Birthday
Enter number in the format of yyyymmdd or yyyy-mm-dd. For example,
20181123.
Region Enter the corresponding abbreviation of the region.
Province Enter the corresponding spelling or English name of the province.
ID type Enter the corresponding number. 1. ID card, 2. Passport, 3. Others.
ID number Fill in the corresponding ID number.
Address Enter the detailed address.
Procedure
Step 1 On the LIVE page, click , and then select FILE > Face Management > Face Database >
Remote.
Step 2 Double-click face database.
Step 3 Click Batch Import.
Figure 6-26 Batch import
Step 4 Import face image.
The system supports uploading file or folder. Select according to your actual need.
●
Upload a file: Click , select multiple face images, and then click
Open.
 Loading...