112 of 282 M-SV-001-EN Rev. G
Table 4-25 Soft Start Fuse Details
Fuse Amperage Resistance (Ω) Circuit Class Comments
F1 2A Less than 1Ω HV DC to DC Fast Acting
F2 0.25A Less than 1Ω
Transformer Secondary -
15V AC to DC-DC
Fast Acting, Nano
F3 1A Less than 1Ω
Transformer Secondary -
Soft Start Board
Fast Acting, Nano
F4 0.25A 30-38Ω HV AC to Transformer Class CC Slow Blow
F5 0.25A 30-38Ω HV AC to Transformer Class CC Slow Blow
F6 1A Less than 1Ω
Transformer Secondary -
Soft Start Board
Fast Acting, Nano
9. Troubleshoot to determine the cause of the blown fuse, if necessary replace any fuse that is
found to be defective. Some of the fuses may require the use of needle-nose pliers or forceps
to replace them.
10. Install the Soft Start. Refer to "4.15.6 Soft Start Installation (Closed-Top)" on page 116.
11. Install the top covers. Refer to "4.2 Compressor Covers" on page 56.
12. Return the compressor back to normal operation.
4.15.3 Soft Start Removal and Installation
This section covers the direct replacement of a Soft Start (i.e., Open-Top Soft Start to Open-Top Soft
Start or Closed-Top Soft Start to Closed Top Soft Start). If you are upgrading to an Open-Top Soft Start
from a Closed-Top Soft Start, be sure to review the spare part instructions that are included in the
upgrade kit.
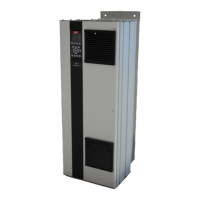
4.15.4 Soft Start Removal (Closed-Top)
1. Isolate the compressor power as described in Section "1.8 Electrical Isolation" on page 19.
2. Remove the Soft Start Temperature Harness. Refer to "Figure 4-102 Closed-Top Soft Start J9
Connector".
Figure 4-102 Closed-Top Soft Start J9 Connector
J9 Connector
 Loading...